

Once you have set up your pattern in QuiltInk, you can choose the privacy level for your pattern. Here are the different privacy levels available:
It’s important to note that you can change the privacy level of your pattern over time. For example, you can start with a pattern only accessible to a community and later decide to make it public. This flexibility allows you to adapt the privacy settings according to your needs and the stage of your pattern’s development.
Each pattern differs in terms of privacy settings and access methods, while thy have other common features:
Patter main page:
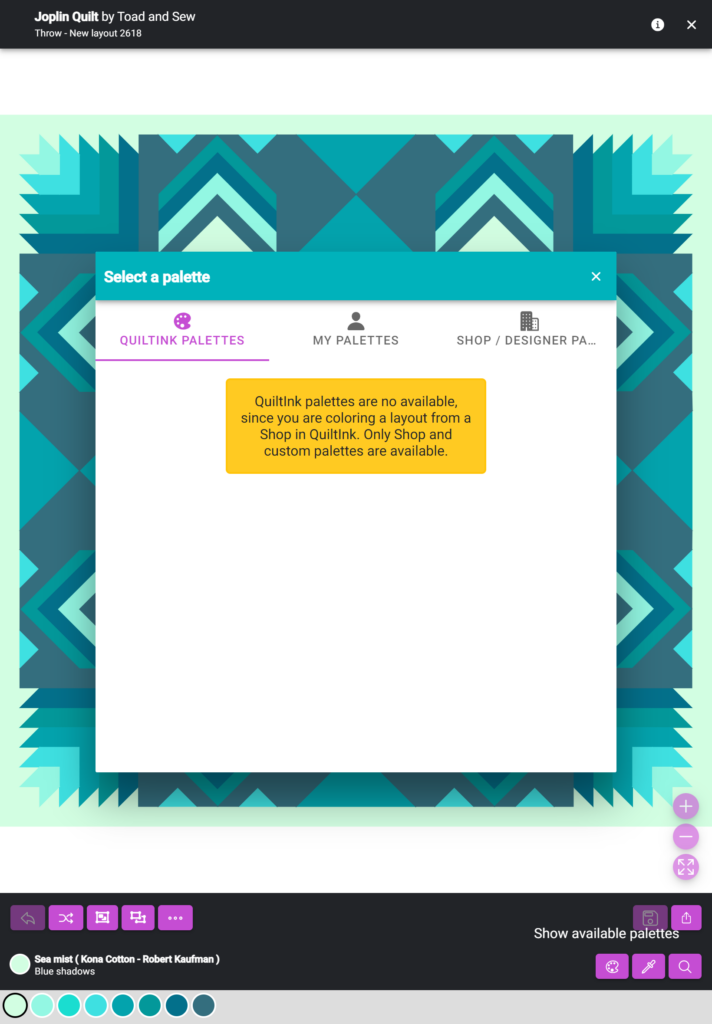
Coloring pages are the same in all the patterns except for the palettes available for coloring at the Kit Patterns which are restricted to fabric shop fabrics and private custom palettes. For a comprehensive understanding of the coloring features in the coloring pages, you can refer to the “Color a pattern” Tutorial.
KITS
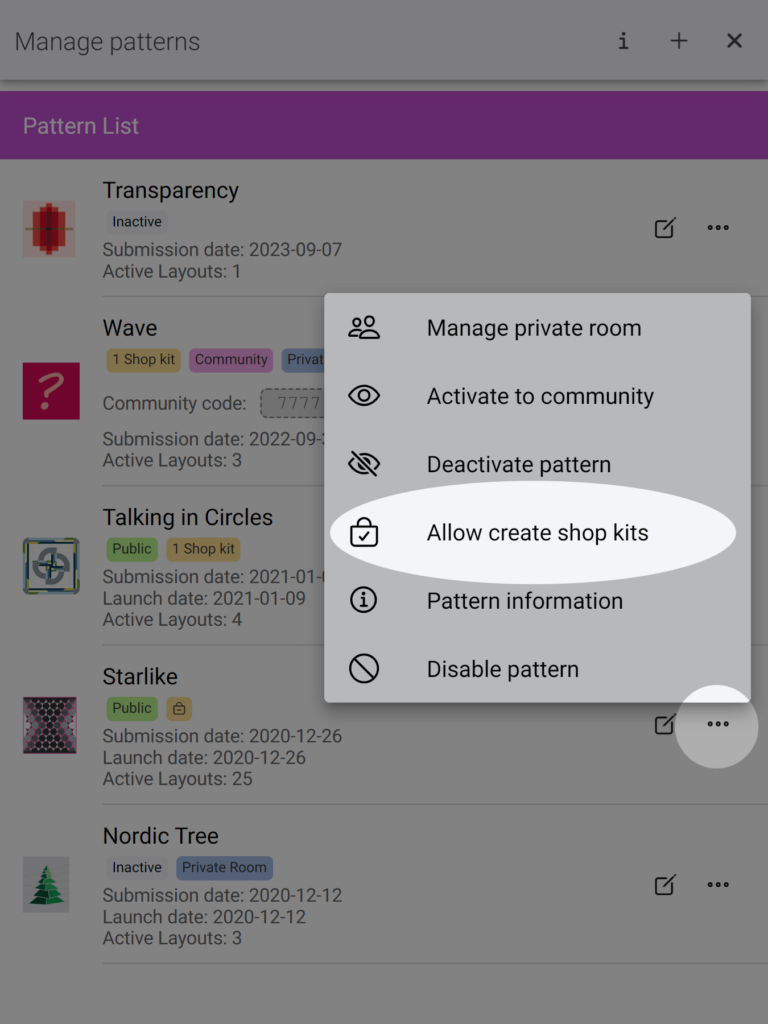
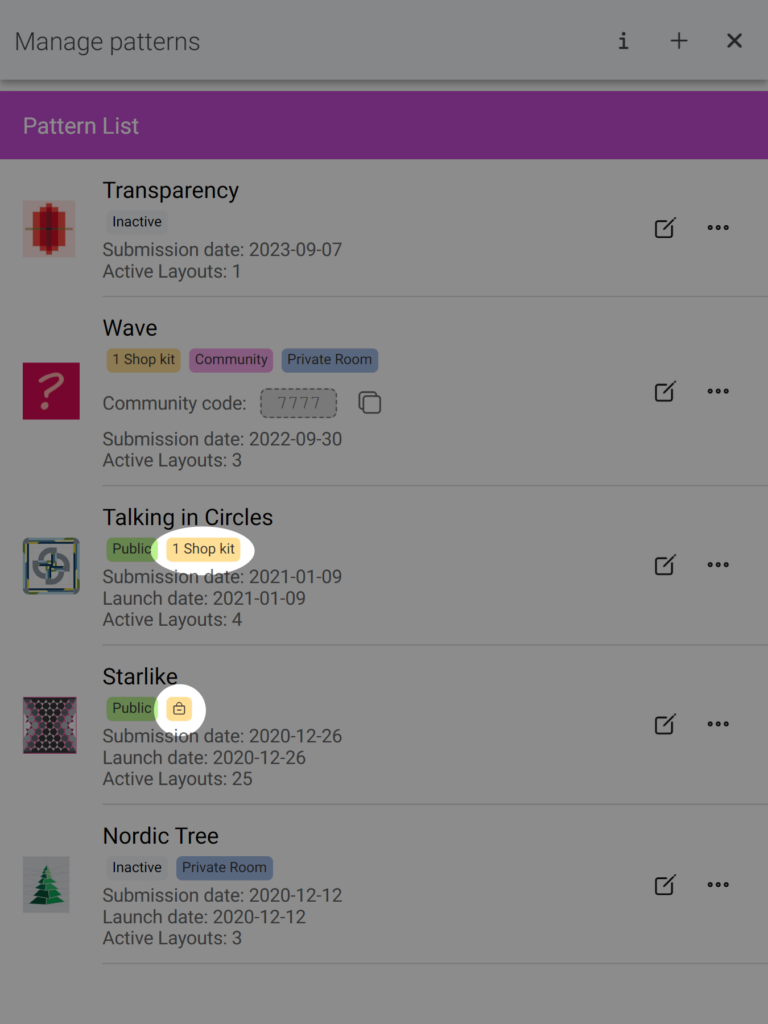
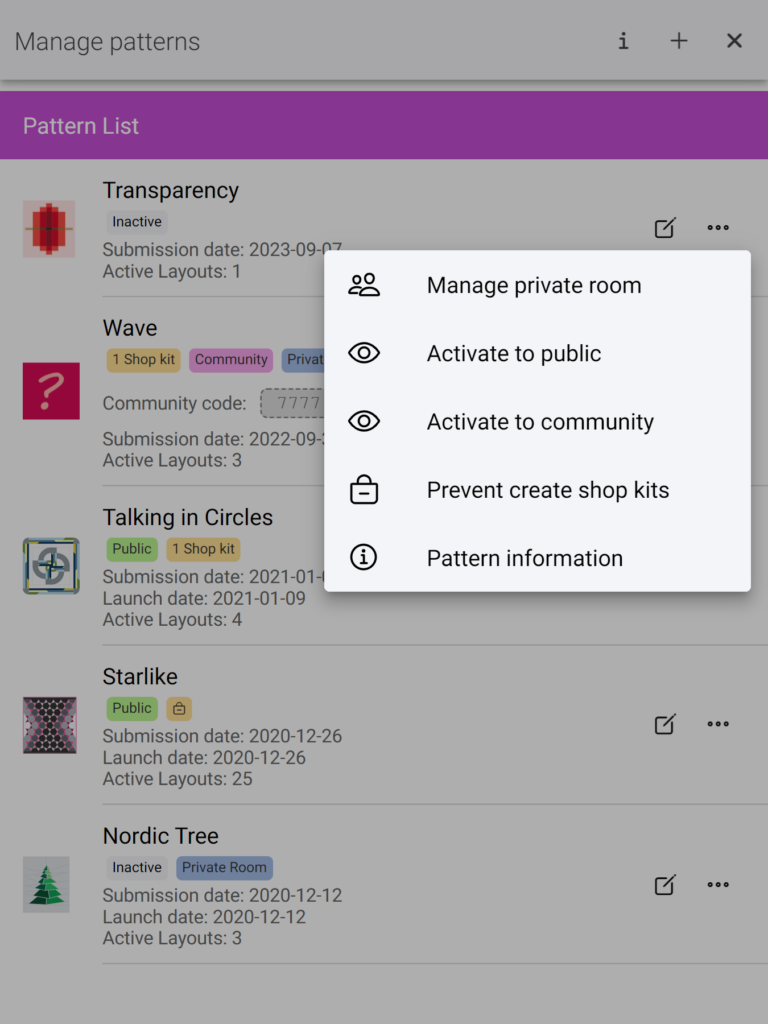
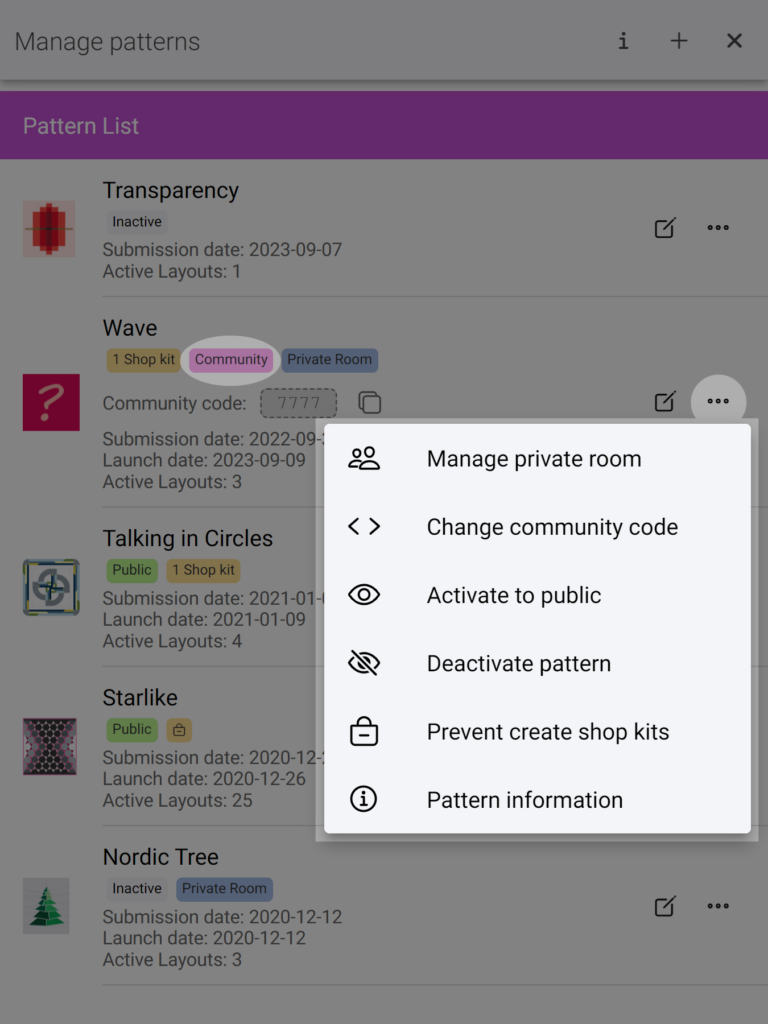
Before activating the patterns (to public or community) you have to decide if you want your pattern to be used by Fabric shops in QuitlInk to create Kits or not. By default, all patterns are available for creating kits. However, if you don’t want your pattern to be used for creating kits, you can click on the option “Prevent creating shop kits”. You will find this option by clicking on the “…” icon related to the pattern on the manage patterns page. When this option is restricted, a yellow icon with a bag with a bar on it will appear below the pattern name in the manage patterns page.
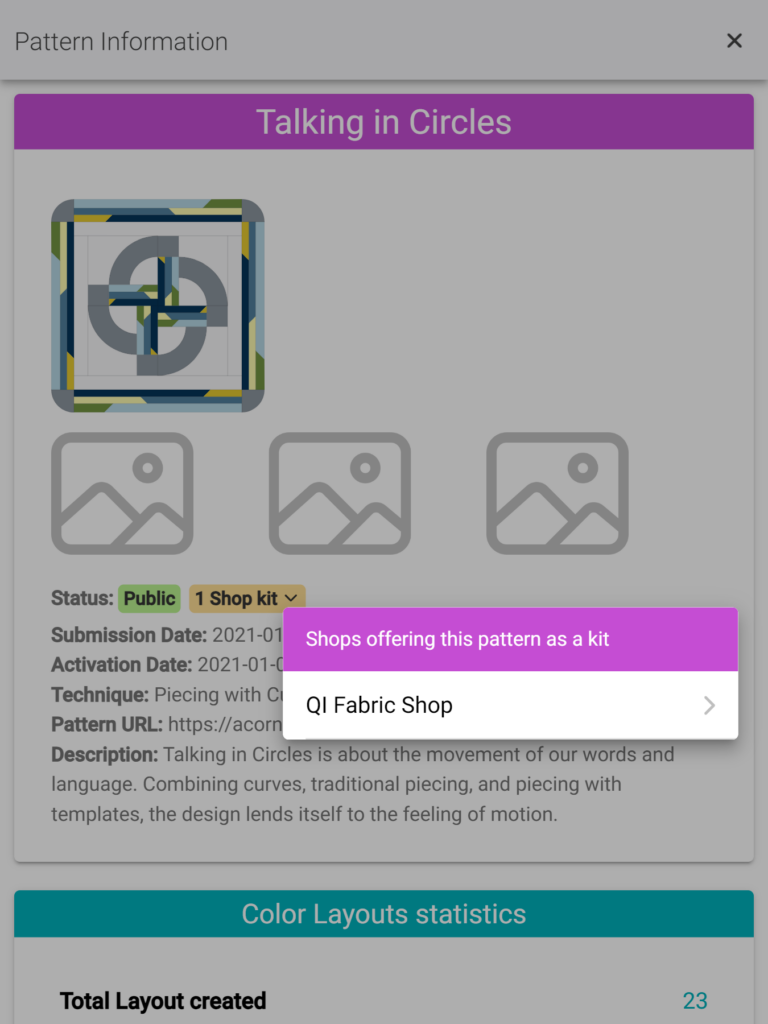
Here are the main features of kits created by Fabric Shops:
Inactive is the stage for a pattern when it’s just submitted to QuiltInk while you are working on the color layouts and setting it up.
An inactive pattern is not visible to any user in QuiltInk, unless it has a private room.
Once a pattern has been activated, it can be returned to the inactive stage. This can be useful for seasonal patterns, such as a Christmas pattern, or when you no longer offer a particular pattern to your customers.
Inactive patterns are included in the total number of patterns you can have in QuiltInk, based on the subscription plan you chose as a designer.
HOW TO INACTIVATE A PATTERN
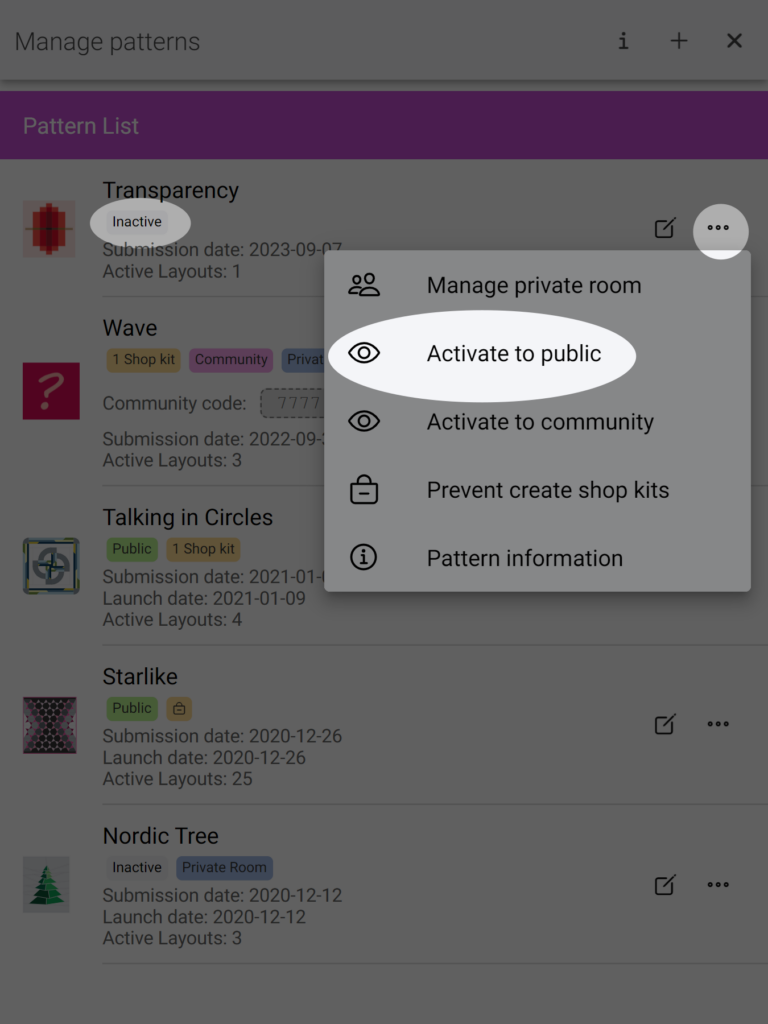
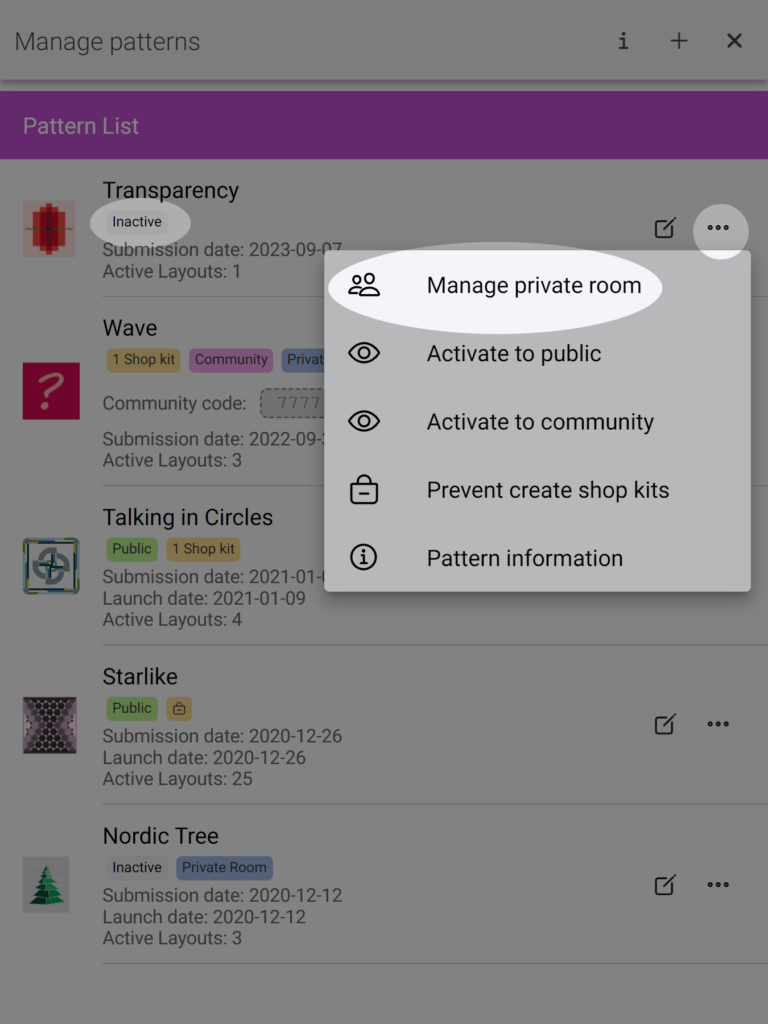
You can manage the activation/deactivation of your patterns by clicking on the ‘…’ icon near the pattern name on the manage pattern page, by clicking to “Deactivate pattern”.
When a pattern is not active, a grey badge will be shown below the pattern name, indicating “Inactive” and letting you know that this pattern is not public.
The inactive stage of a pattern can be changed to the following stages using the “…” icon near the pattern name:
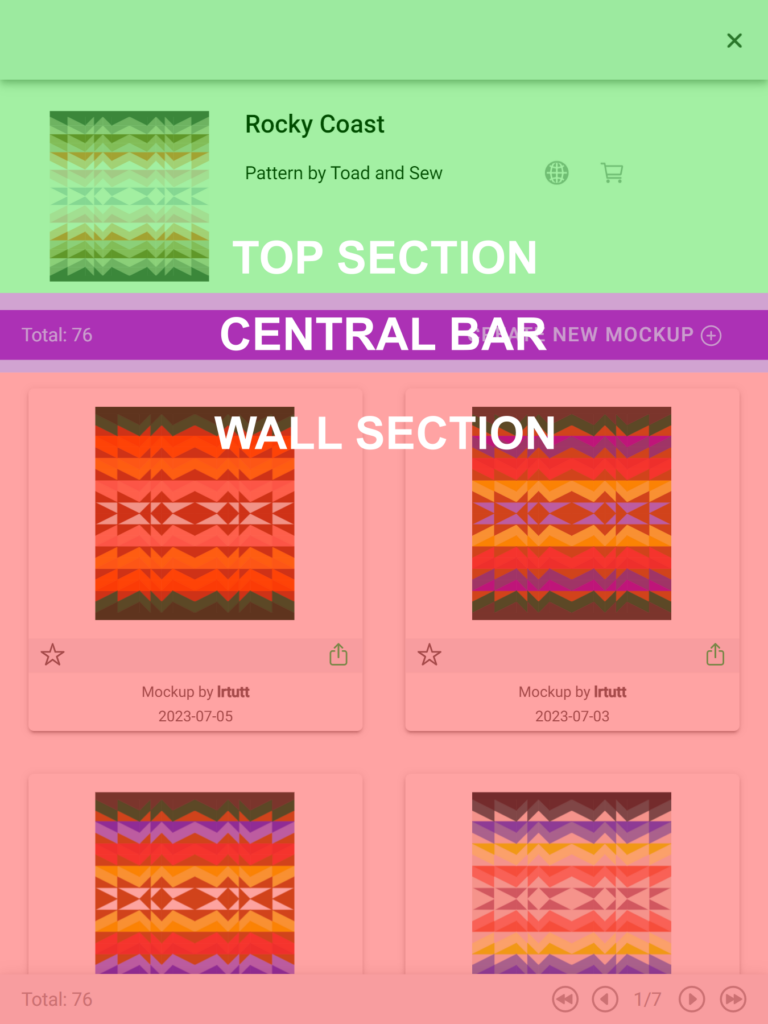
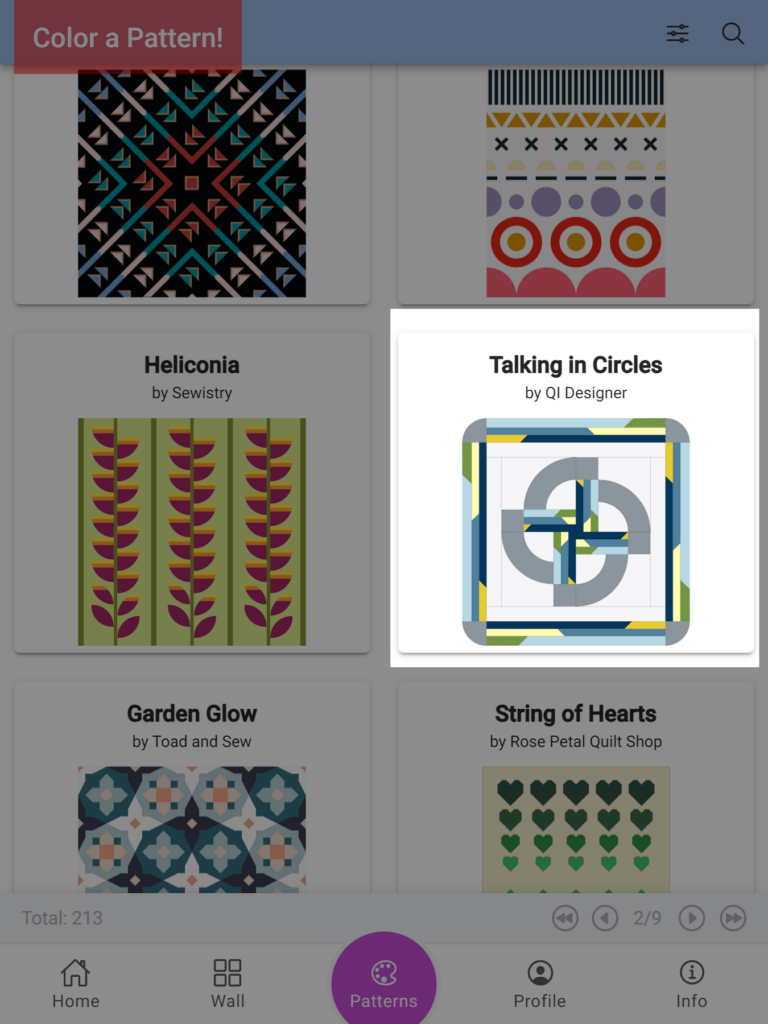
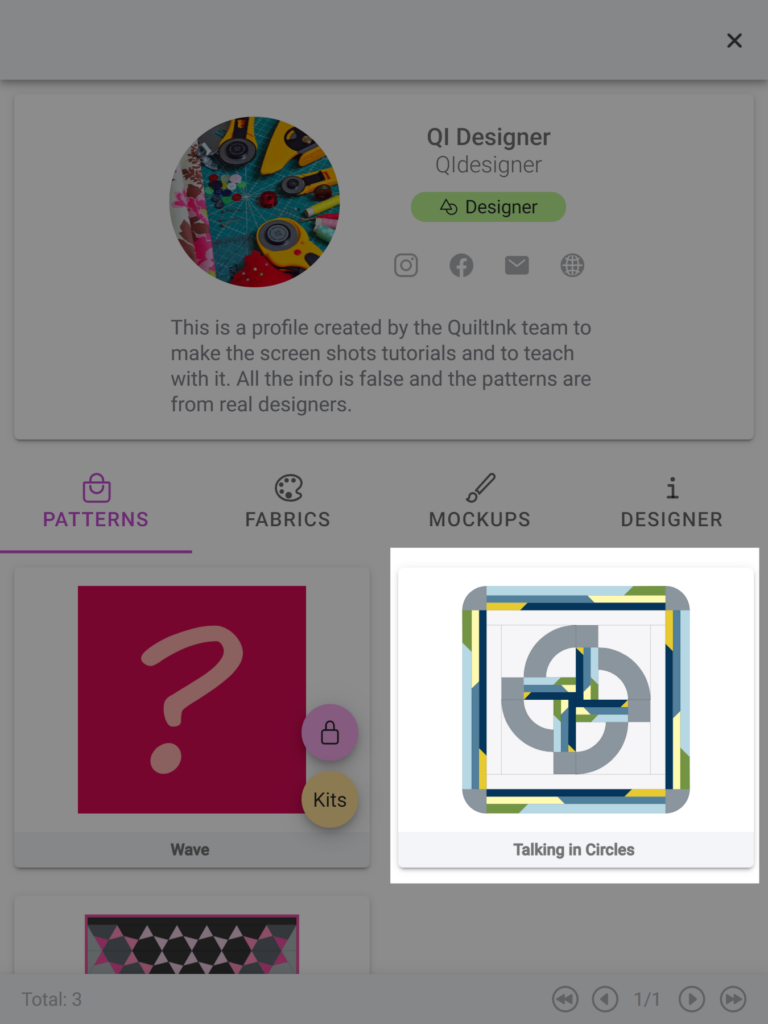
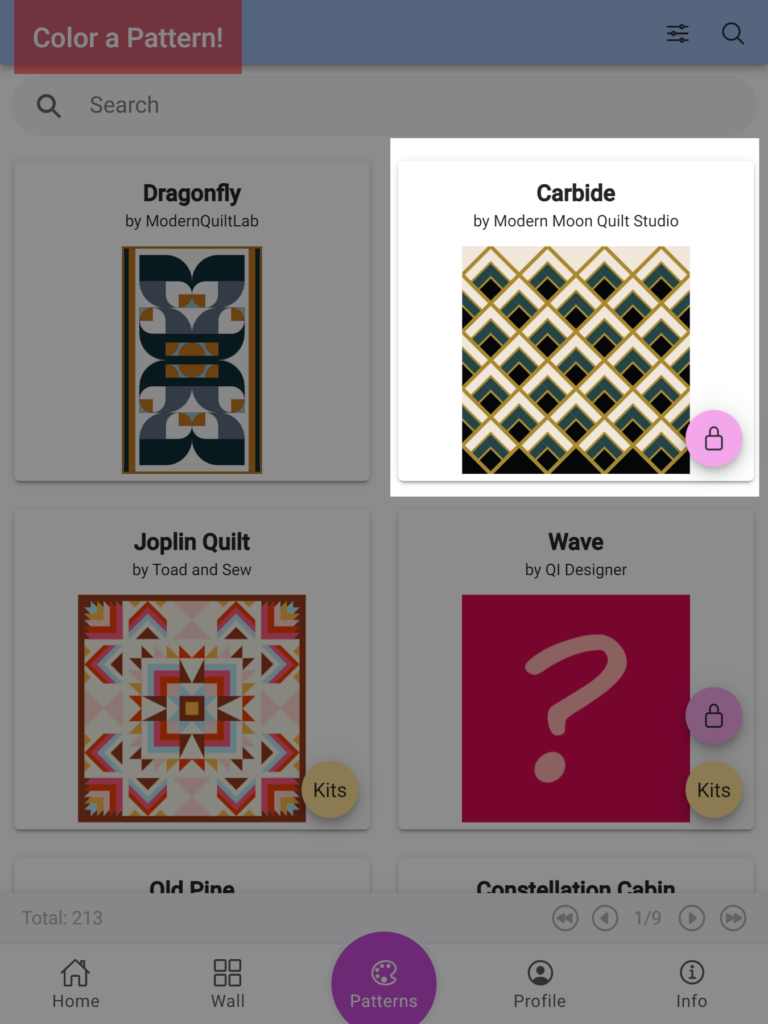
Public Patterns in QuiltInk are patterns that are listed on the “Patterns” main page (central tab at the bottom bar in the platform) and your profile page under the “Patterns” tab.
Any user, with or without an account, can see and access these patterns to color them, create mock-ups, save their progress, publish them on the public Wall, and export them. Refer to the “Explore patterns variety” tutorial to know more about it.
Mock-ups made from public patterns can be published by the users in the public Wall, and they will also appear at the profile page of the users.
Remember, public patterns can be used by Fabric Shops in QuiltInk to offer kits for these patterns, unless you restrict it.
HOW TO MAKE A PATTERN PUBLIC
You can manage the activation/deactivation of the public stage for your patterns by following these steps:
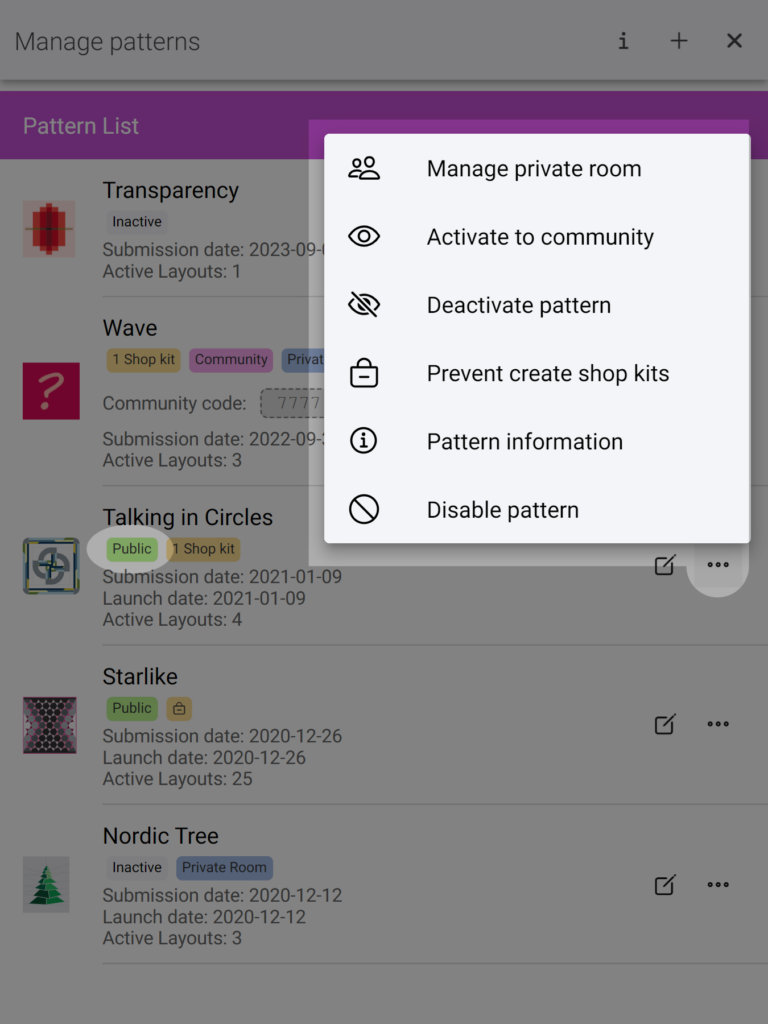
When a pattern is public, a green badge will be displayed below the pattern name, indicating “Public” and letting you know that this pattern is currently public.
The public stage of a pattern can be changed to the following stages using the ‘…’ icon near the pattern name:
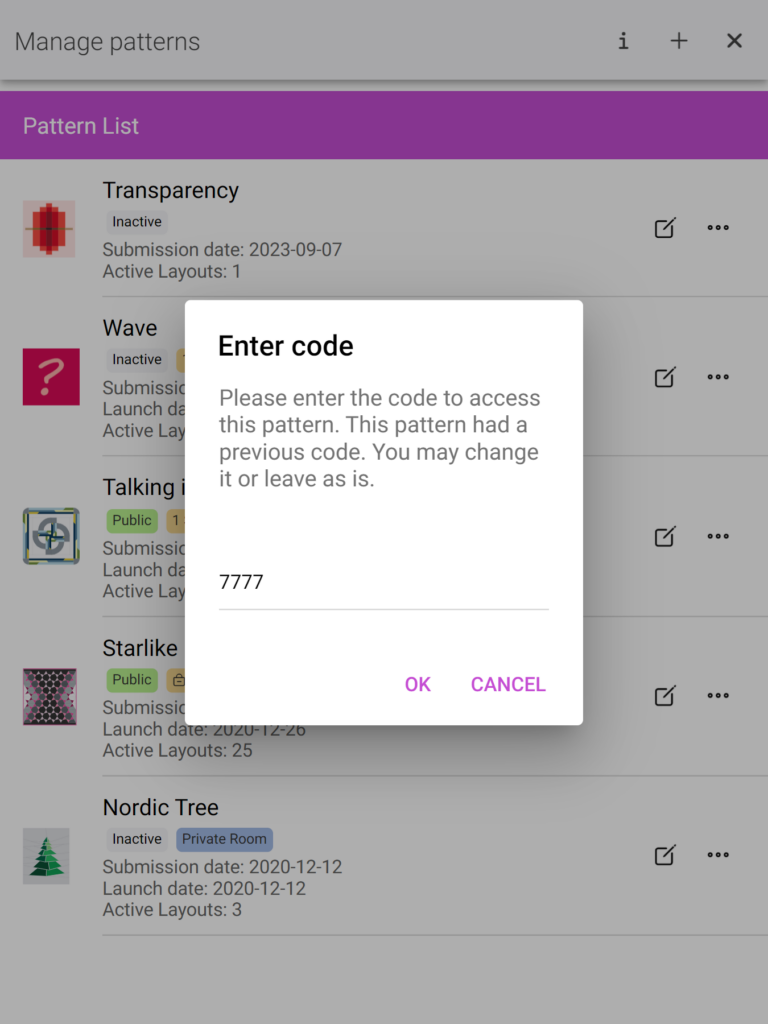
Community Patterns in QuiltInk are patterns that are only accessible to users who have been provided with a code by the designer. These patterns can be accessed without the need for an account, but the provided code is required to access the coloring pages of these patterns.
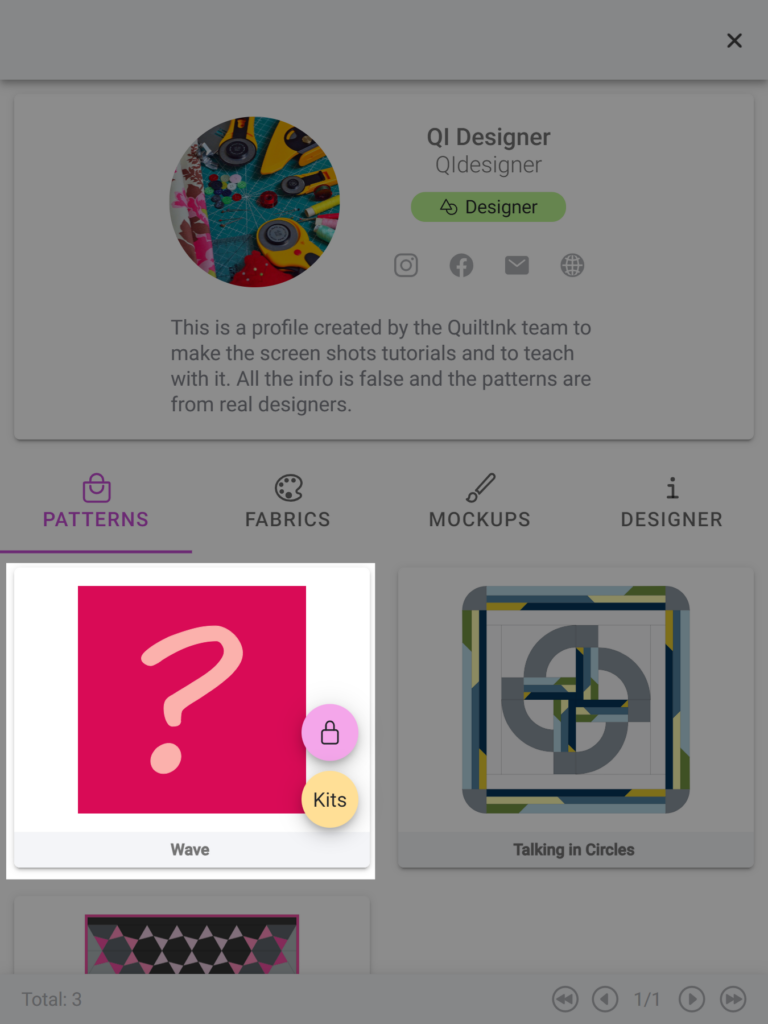
Community patterns can be accessed from the main QuitlInk Patterns page and the designer’s profile page, specifically under the “Patterns” tab. They are distinguishable from other patterns by the presence of a lock in a circle, and when users click over it the code will be required to access.
Mock-ups created in a Community pattern can be saved and published exclusively on the dedicated Wall for that pattern in its pattern page. They cannot be shared on the public Wall of QuiltInk. Refer to the “Explore patterns variety” tutorial to know more about it. Users will also have access to these mockups at their profile page.
Fabric Shops in QuiltInk can also use Community patterns to offer kits. The main features of these patterns are the same as those for public patterns with kits. However, users will need to provide the same access code on the Fabric Shop’s profile page to color these patterns.
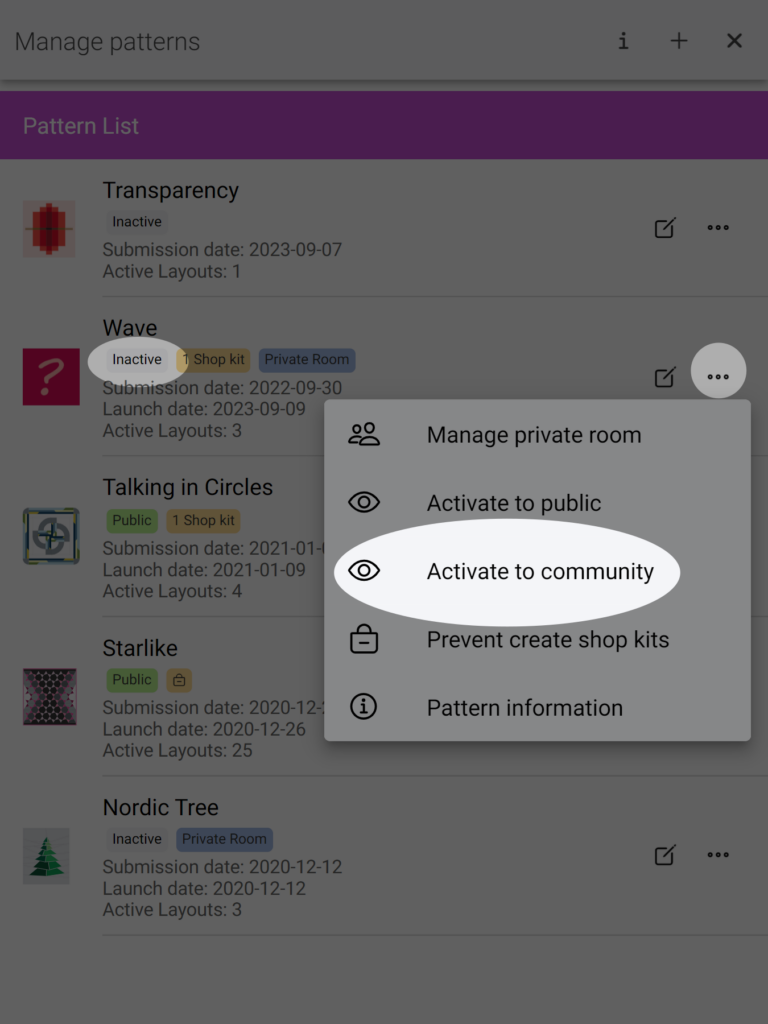
HOW TO MAKE A PATTERN COMMUNITY
You can manage the activation/deactivation of the community stage for your patterns by following these steps:
When a pattern is set as a Community pattern, a pink badge will be displayed below the pattern name, indicating “Community” and letting you know that the pattern is currently in the Community stage.
From the Community stage, the pattern can be changed to the following stages using the ‘…’ icon near the pattern name:
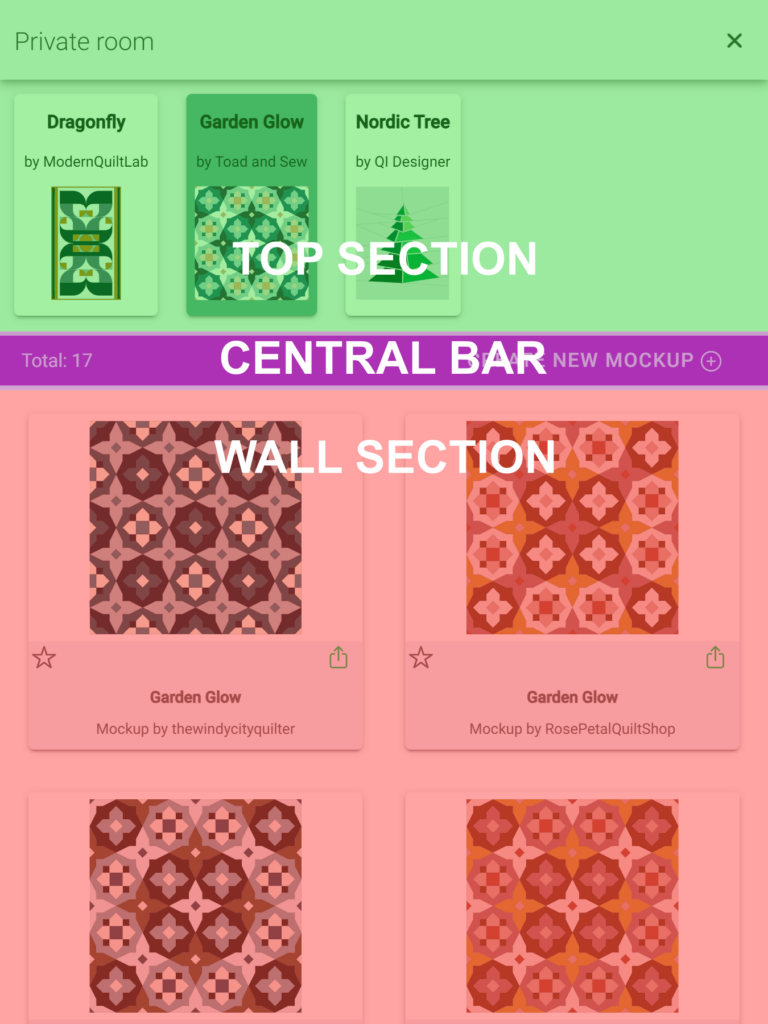
Private Rooms allow you to offer the possibility of coloring a pattern to a selected group of QuiltInk users. This option is intended to be used by designers in various scenarios:
Designers manually select the users who will have access to a private room, and those users must have a QuiltInk account to be included.
Private Rooms in QuiltInk offer flexibility when it comes to activating and sharing your patterns. If you have initially set up a private room for a pattern when it was inactive, you can still choose to make it public or activate it for your community without closing the private room.
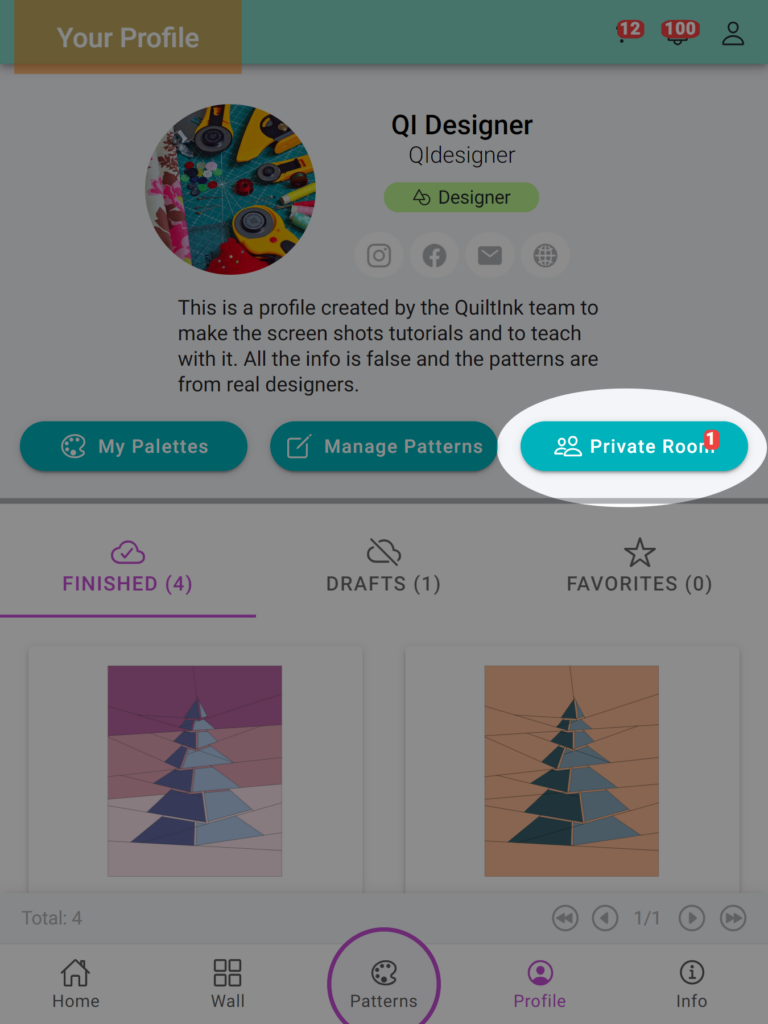
All the users included in any private room will see a “PRIVATE ROOMS” button near their profile information on their profile page. Clicking this button allows them to access all the private rooms they are included in.
All the users included in any private room will see a “PRIVATE ROOMS” button near their profile information on their profile page. Clicking this button allows them to access all the private rooms they are included in.
HOW TO OPEN A PRIVATE ROOM
To open a private room, follow these steps:
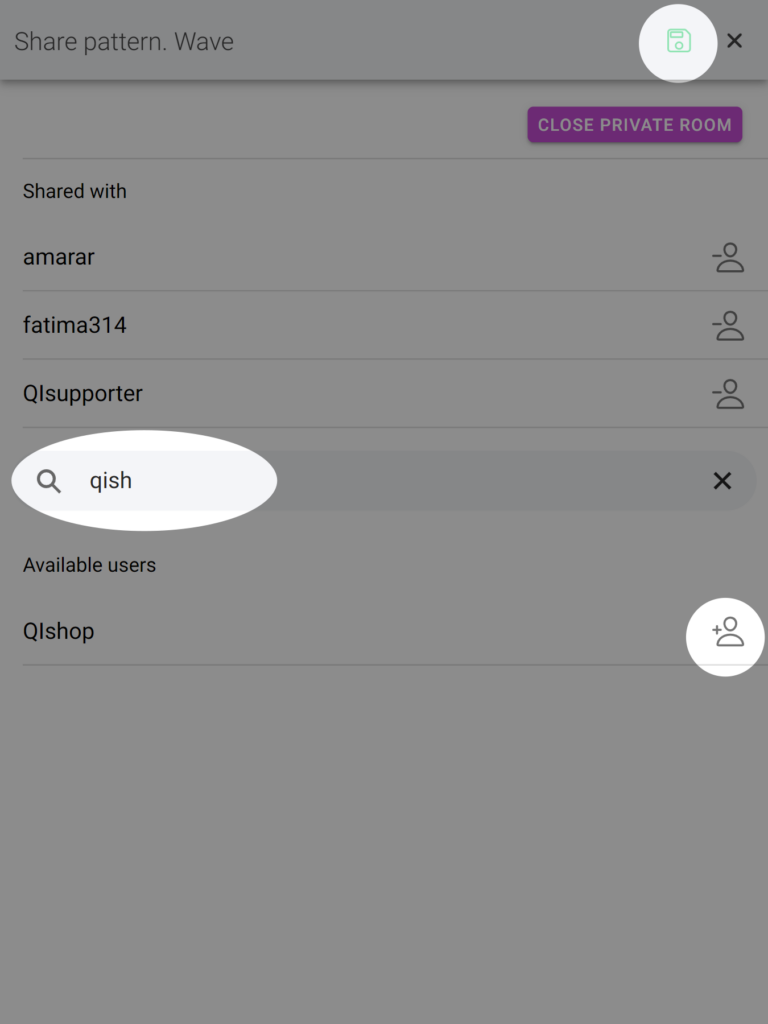
After clicking on “Manage private room” in the pattern management page, a new window will open where you can create the Private Room and add users to it. Follow these steps:
It’s important to note that the users who have been included in a Private Room will notice a small red circle with the number of new patterns they have been included in, displayed over the “Private Rooms” button on their profile page, near their profile information. Additionally, we recommend that as the designer, you personally inform the users that they have been included in the Private Room.
When a pattern has a private room it will be indicated with a blue badge displayed below the pattern name in the manage patterns page, “Private Room”.
Mockups created in a private room can be published in the exclusive Wall for that private room, Additionally, users will see the mock-ups they create in the private room on their Profile page, either in the draft or finished tab, depending on how they saved the mock-up. Mock-ups created in a private room will be indicated by a blue badge that says “Private Room” and will have an “eye” icon to publish them within the private room. If the pattern is active, public, or community, there will be another “eye” icon to share the mock-up on the Wall. For more information, refer to the “Patterns in QuiltInk” tutorial.
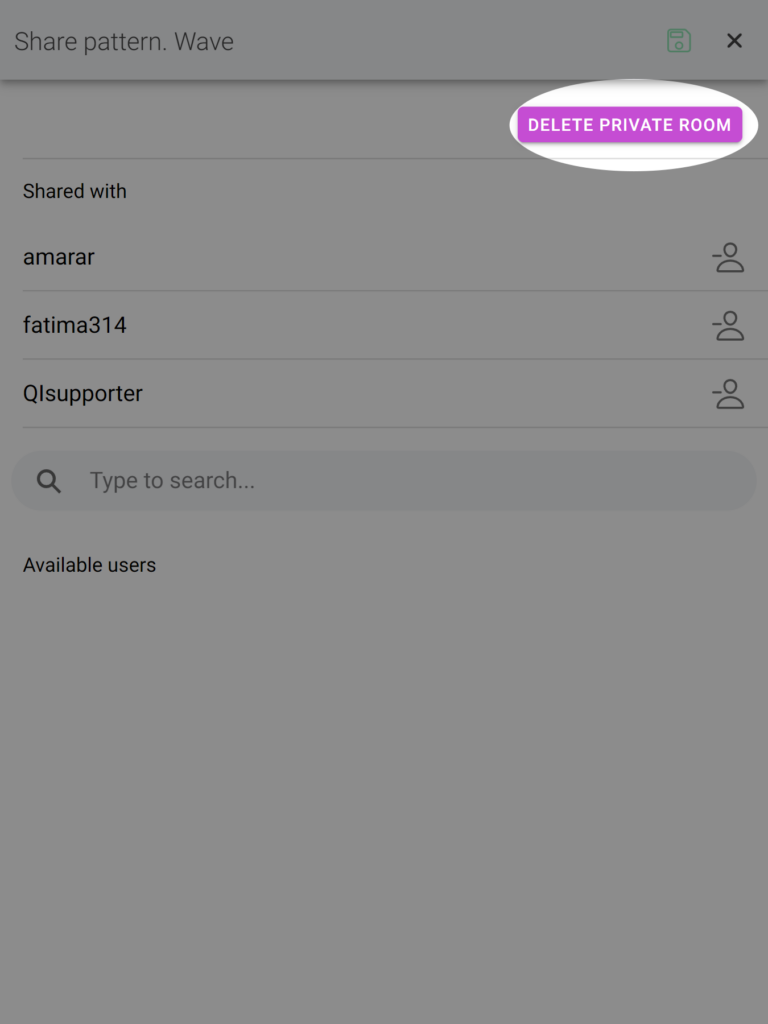
Once you have finished using the Private Room, you can close it by clicking the “DELETE THE PRIVATE ROOM” button. When a Private Room is closed, the mock-ups created within that private room will still be saved in the user’s profile. Users will have the option to publish their mock-ups to the Wall when the designer activates the pattern associated with the Private Room.
It’s important to note that once a Private Room is closed, there is no possibility to reopen it. If you decide to close a Private Room and later open a new one with the same set of users included, it will be treated as a separate and distinct Private Room. The previous Private Room will not be accessible or reopened with the same users.
Therefore, if you need to continue using the same Private Room in the future, it’s recommended to keep it open rather than closing it. This way, the mock-ups within the Private Room can be easily accessed and continued without starting afresh.
Please ensure that you communicate the closure of the Private Room to the users involved and provide them with any necessary instructions or guidance regarding the publishing of their mock-ups.
Note: Having a Private Room for a pattern does not restrict the ability to activate it as Public or Community. It’s important to be aware that activating a pattern will make it accessible to a wider audience. If you do not intend to make the pattern public, be cautious not to activate it as such.
When a pattern has been on QuiltInk for more than one year, you have the option to disable it. Disabling a pattern means it will no longer count towards the total number of patterns allowed in your subscription plan, giving you the flexibility to submit new patterns without needing to upgrade your plan.
The one-year period is calculated from the date you submitted the pattern to QuiltInk, and this date is displayed below the pattern name on the manage patterns page.
When a pattern is disabled, you will not be able to access its editing pages, activate it, or create a private room. The pattern will still remain in QuiltInk, but you cannot use it until it is enabled again.
HOW TO DISABLE A PATTERN
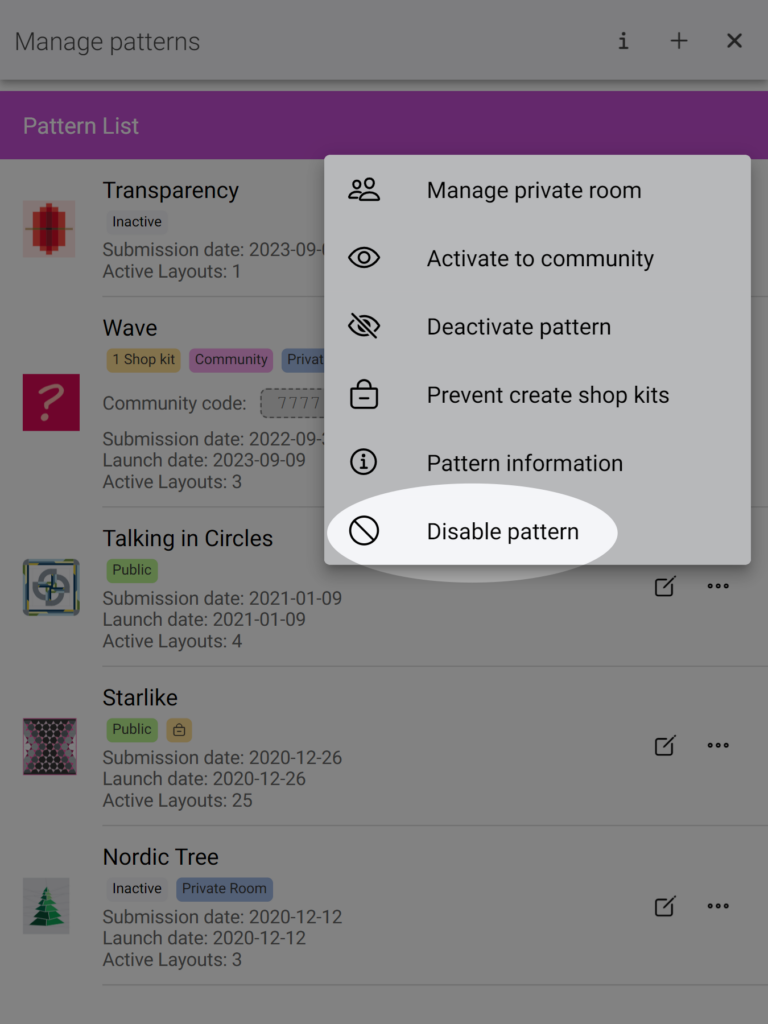
To disable a pattern, follow these steps:
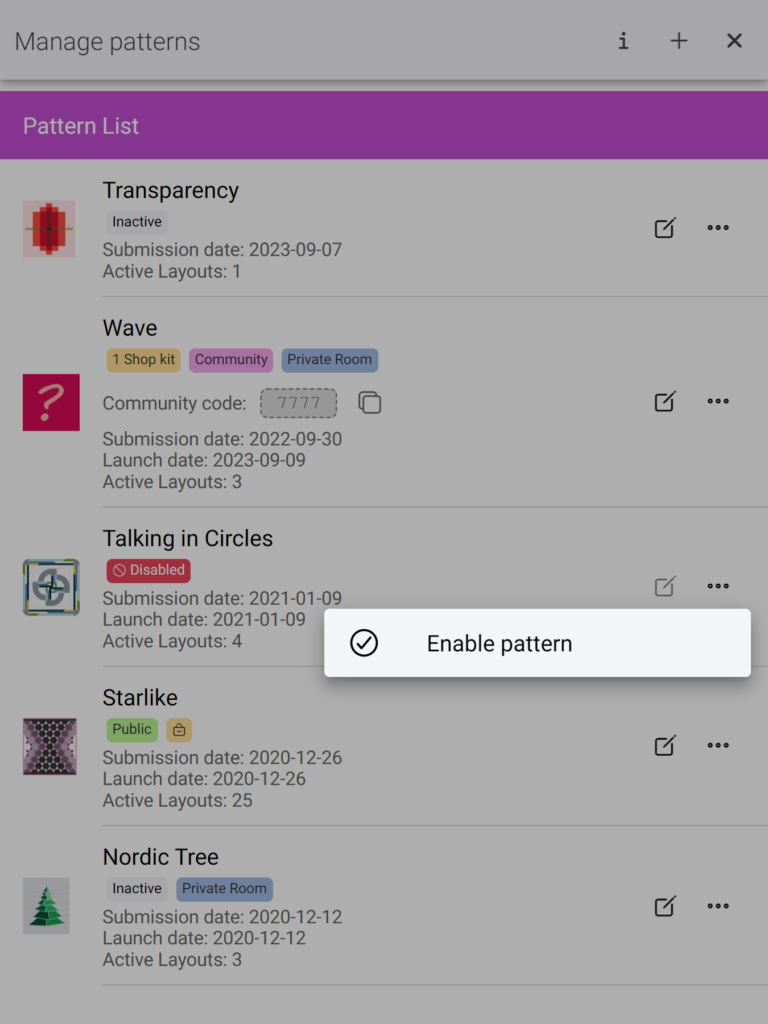
When a pattern is disabled, a red badge will be displayed below the pattern name, indicating “Disabled” to indicate its current status.
Mockups made in the past from a disabled pattern will no longer appear at public, community or private room walls, but they will appear in the profile page of the users who made them with a badge indicating this pattern is disabled. They will be able to export them with the list of colors but not duplicate or edit the colors.
You can enable the pattern again by either freeing up space by disabling other patterns or by upgrading your plan to a higher plan.
This option provides more flexibility to your plan, allowing you to replace patterns in QuiltInk or activate them seasonally, depending on your needs.
If you have any questions or concerns related to the patterns in QuitlInk or any aspect of using QuiltInk, we are here to help. You can reach out to us via email at info@quiltink.com or through the chat on our Instagram platform (@quilt_ink).