Color a pattern

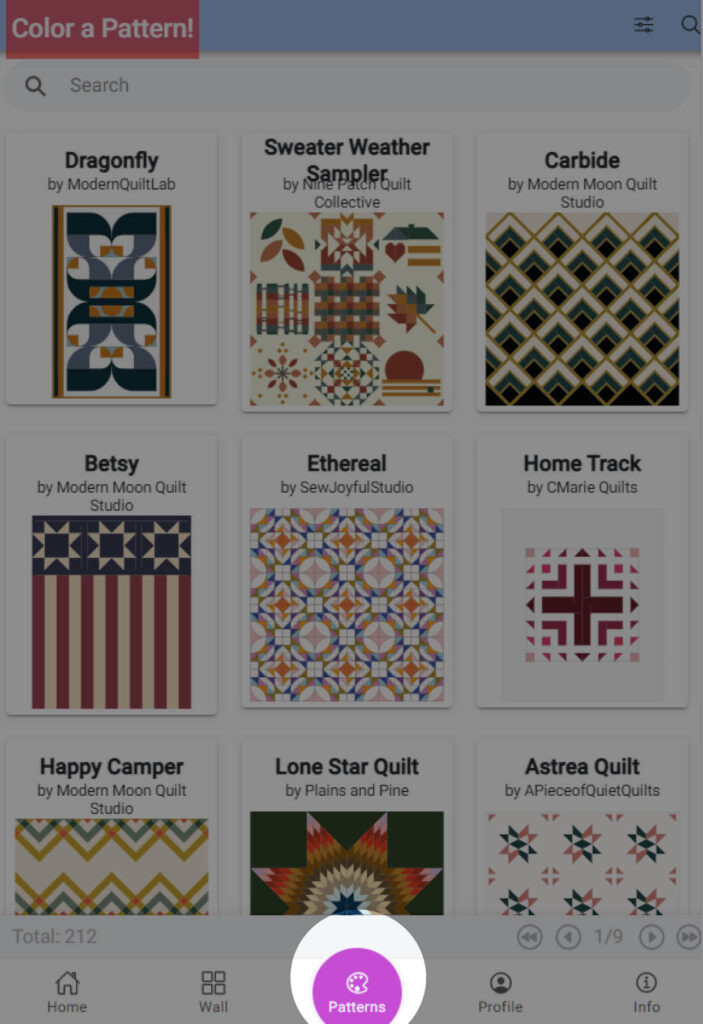
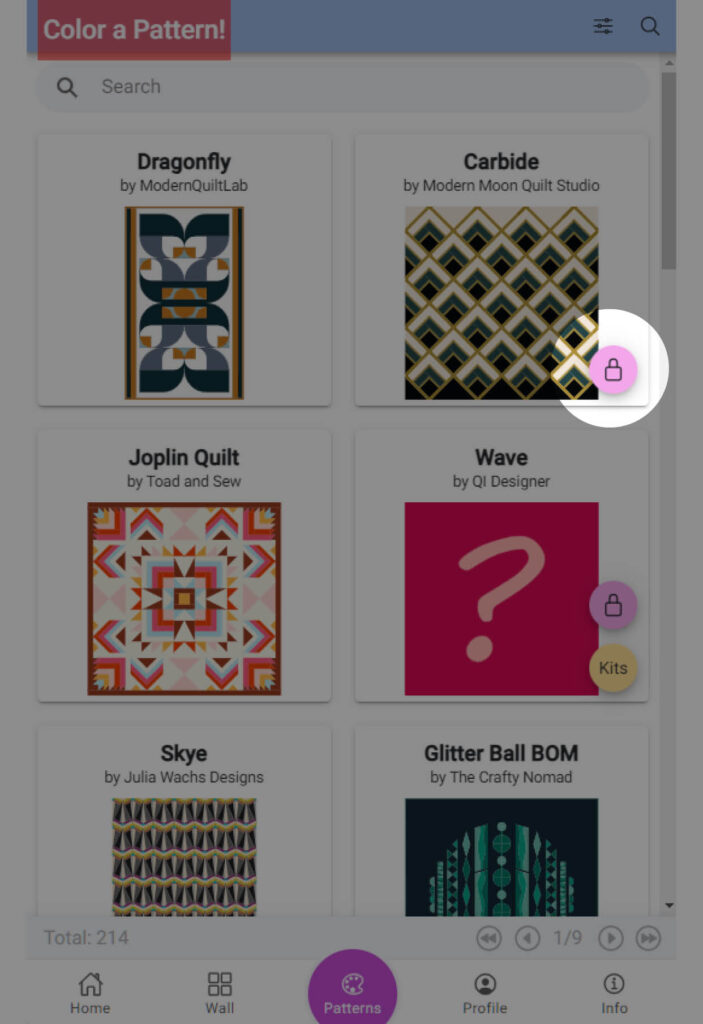
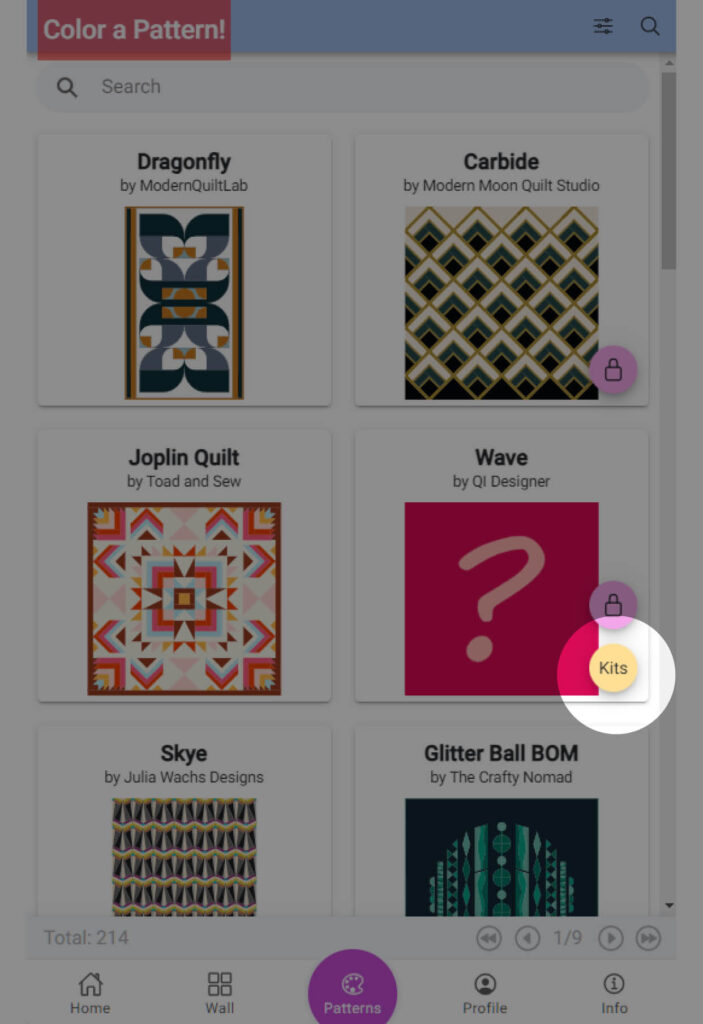
The first step to color a pattern in QuiltInk is to choose the pattern you want to color.


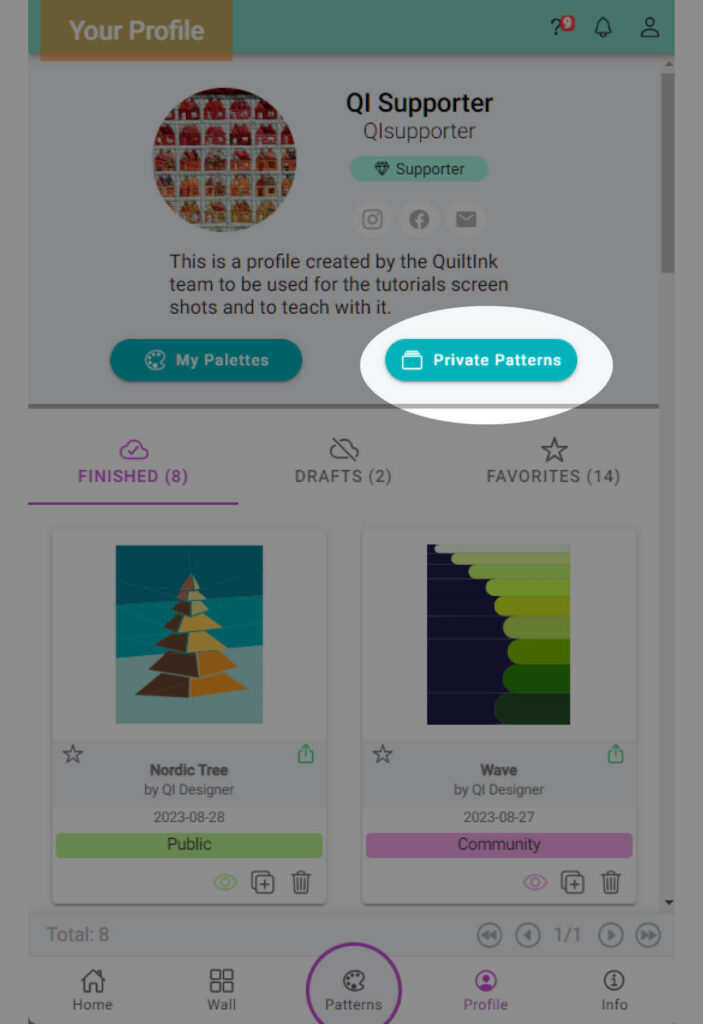
Pattern coloring pages are accessible from various locations in QuiltInk, depending on the type of pattern you wish to color:

  1. Public patterns: Coloring pages for public patterns can be accessed from:
    • Patterns tab: You can access coloring pages for public patterns from the main Patterns page in QuiltInk. This page is represented by a palette icon located at the bottom bar of the platform.
    • Designer profile page: Within the Patterns tab of a designer’s profile page, you can view and access coloring pages for all patterns associated with that designer and access to color them.
    • Mockup Wall Pop-up: Clicking on the palette icon within the pop-up that appears when you click on any mockup in the Wall will grant you access to color the pattern using the color layouts set up by the designer.
  2. Community patterns: Coloring pages for community patterns, which require a code to unlock, can be accessed from:
    • Patterns tab: You can access coloring pages for community patterns from the main Patterns page in QuiltInk. Community patterns are identified by a pink circle with a padlock icon on the main Patterns page.
    • Designer profile page: Within the Patterns tab of a designer’s profile page, you can view and access coloring pages for all patterns associated with that designer and access to color them.
  3. Private patterns: Private patterns within Fabric Shops and for Supporter users can only be accessed from the ‘Private Patterns’ button located on the respective user profile pages.
  4. Private Rooms: Patterns associated with a private room in which you are a member can also be accessed using the ‘Private Patterns’ button on your profile page. If the pattern is public or community, you can use the same method described above.
  5. Kits: Patterns with kits can be colored in two modes: the General mode, which features all fabrics and colors available in QuiltInk, and the Kit mode, which allows coloring exclusively with fabrics from a specific Fabric Shop. To access the Kit mode:
    •  Pattern tab:  If a pattern has Kits created by Fabric Shops, a yellow circle will appear on the pattern’s main page. Clicking on this circle will display a list of Fabric Shops that have created Kits for this pattern. Simply click on the desired Fabric Shop to access their profile page and see the fabrics they have available and to access the coloring pages of the pattern.
    • Fabric Shops profile page: In the Kits tab of a Fabric Shop’s profile page, you can view and access coloring pages for all the kits set up by that specific Fabric Shop. These kits utilize only the fabrics available from that particular shop.
Patterns Tab
Designer profile page
Mock up Wall Pop up
Community Patterns
Private Patterns
Pattern Kits

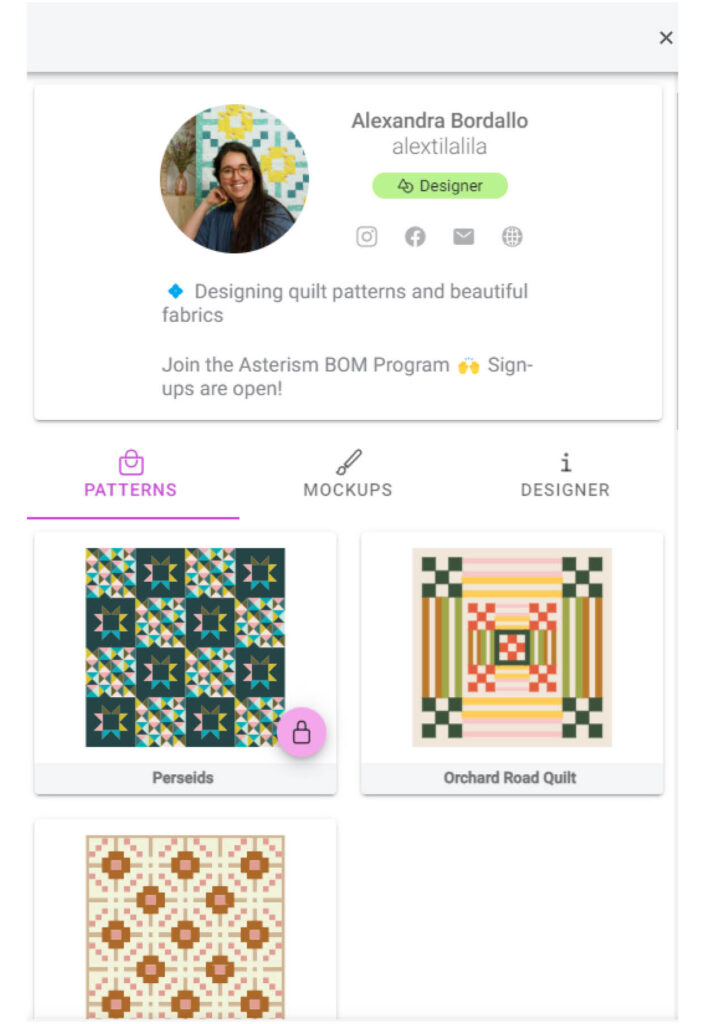
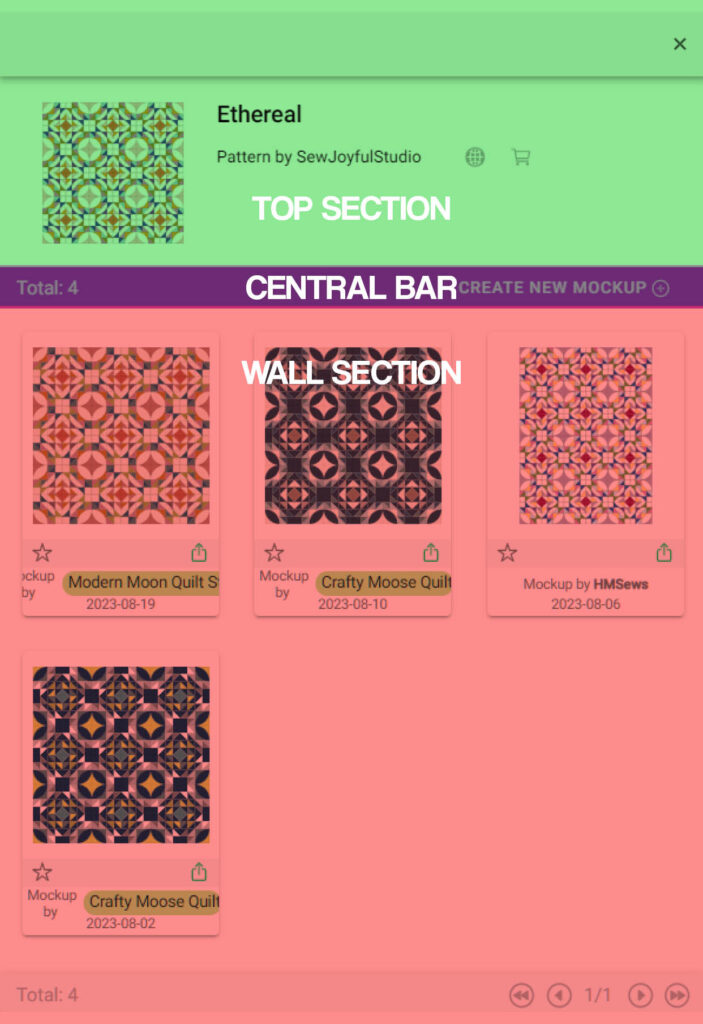
Once you have selected a pattern, click on it and a new window will appear, displaying the exclusive page for that pattern. This pattern page has 3 main sections:

  1. Top Section: This section contains the cover image of the pattern, along with title and other information about the pattern users are about to color.
  2. Central Bar: In the central bar, you will see, at the left, the number of mock-ups that have been published by the quilters who have access to this pattern, and at the right, a “Create a new mockup +” button, which allows users to start coloring this pattern and create their own mock-up.
  3. Wall Section: Below the central bar, users will find a section where all the mock-ups of this pattern shared by you and other users are displayed.
 

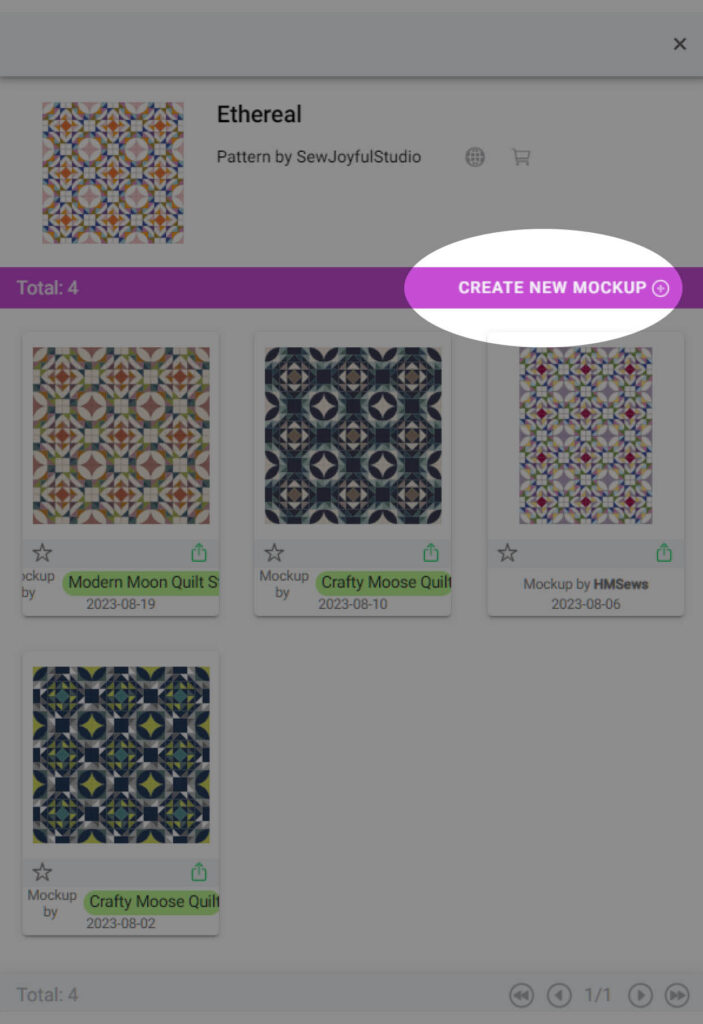
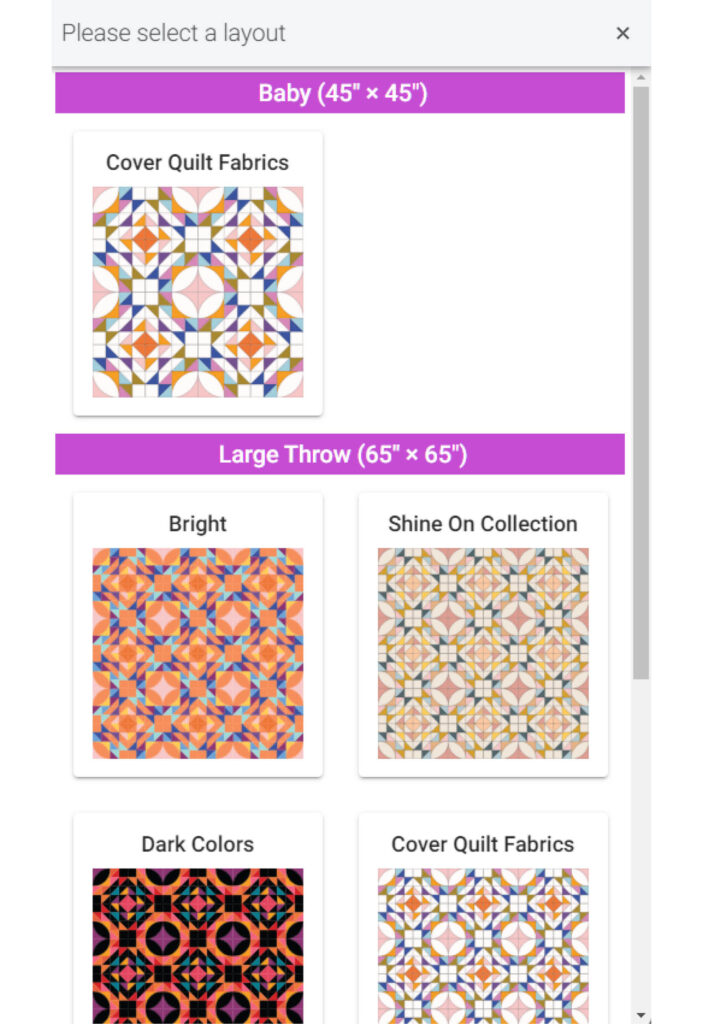
To start coloring the pattern click over the “Create a new mockup +” button and a new page with the color layouts the designer has prepared as the basis for coloring this pattern will open.


These color layouts may be sorted by sizes and can include variations such as different pieces layouts of the pattern, pattern color versions, or inspiring color layouts to help you get started with coloring this pattern.

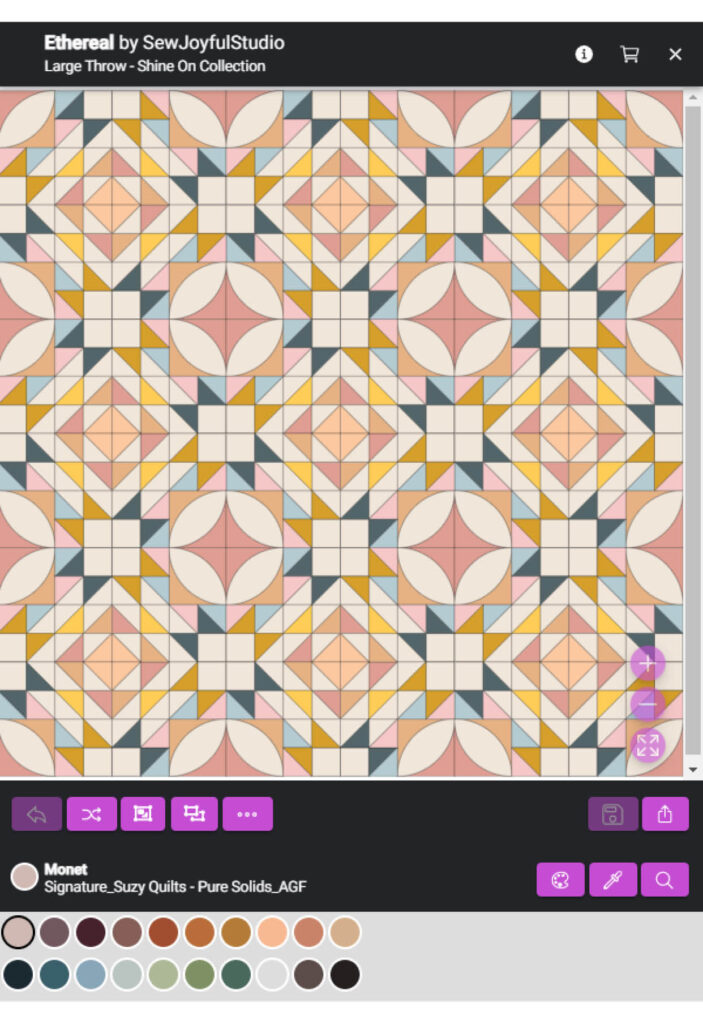
Clicking on your preferred color layout will open a new window with the coloring page for the selected pattern. This is where you can customize the pattern with your preferred color/fabrics combinations. Make sure to explore all the features on this page, as they will enhance your QuiltInk coloring experience.

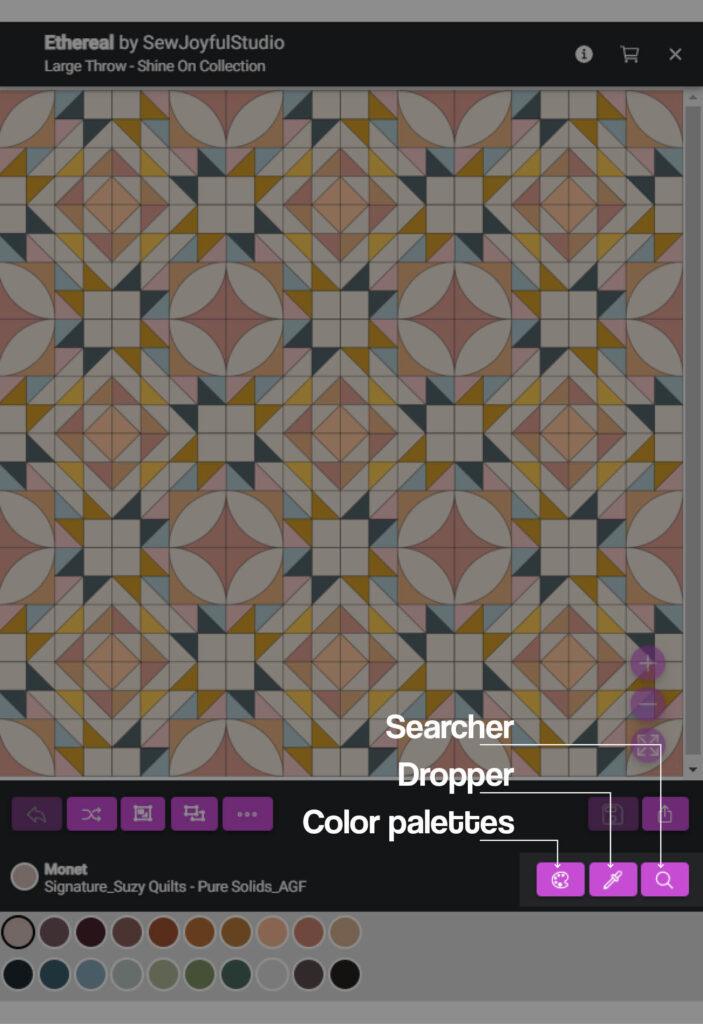
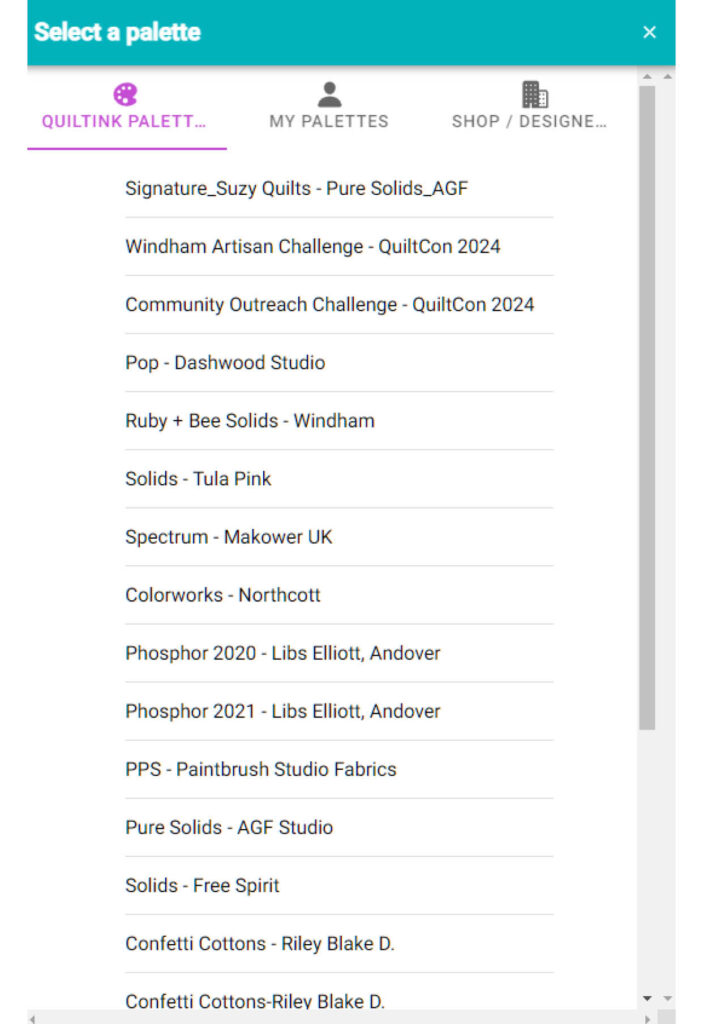
To start coloring your pattern, first select the palette you wish to use. The palette icon can be found in the bottom right menu, as highlighted below.

QuiltInk offers different types of palettes for coloring:

  • Solid colors: These palettes consist of actual solid swatches from various fabric collections by different fabric companies. The QuiltInk team regularly updates these palettes with new fabrics over time. Adding these palettes to QuiltInk is free for fabric companies, and new palettes can be introduced based on user or fabric company requests.
  • Fabric Shop: This option enables you to color using printed fabrics that have been uploaded to QuiltInk by various fabric shops. The palettes are organized by the names of these fabric shops, and each shop determines how to display and sort their fabrics. These palettes are accessible to all QuiltInk users without any charge.
  • Custom Palettes:  Users have the capability to create their own palettes, which can include swatches of printed fabrics, solid colors from QuiltInk palettes, and colors chosen by the user using a color wheel. For detailed instructions on creating custom palettes, please refer to the “Custom Palettes & Printed Fabrics” tutorial.


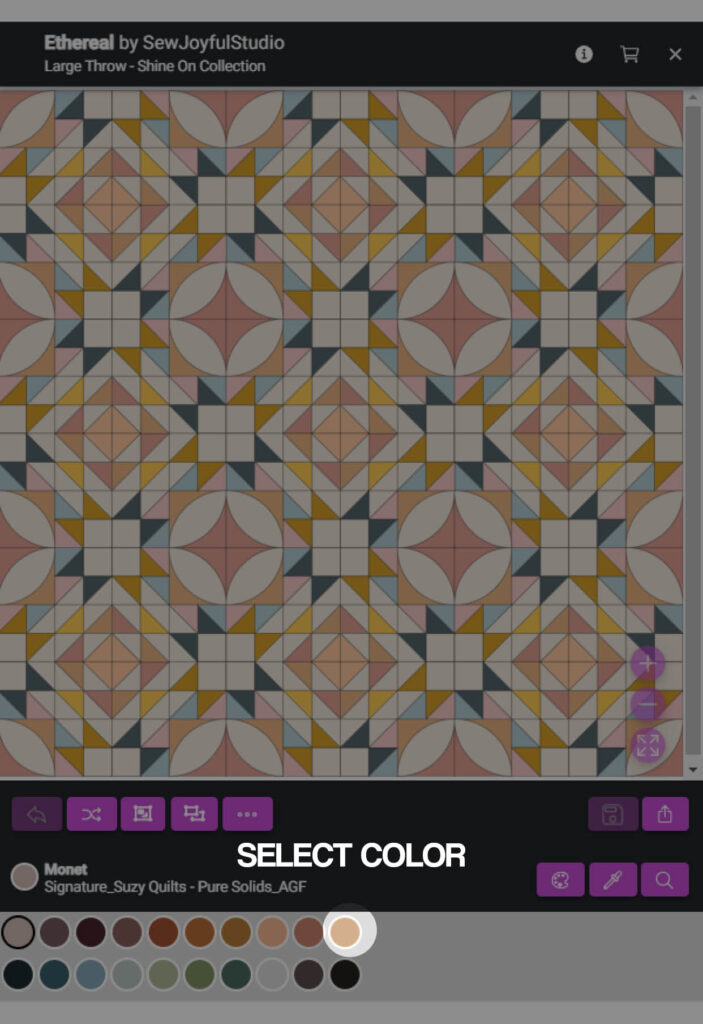
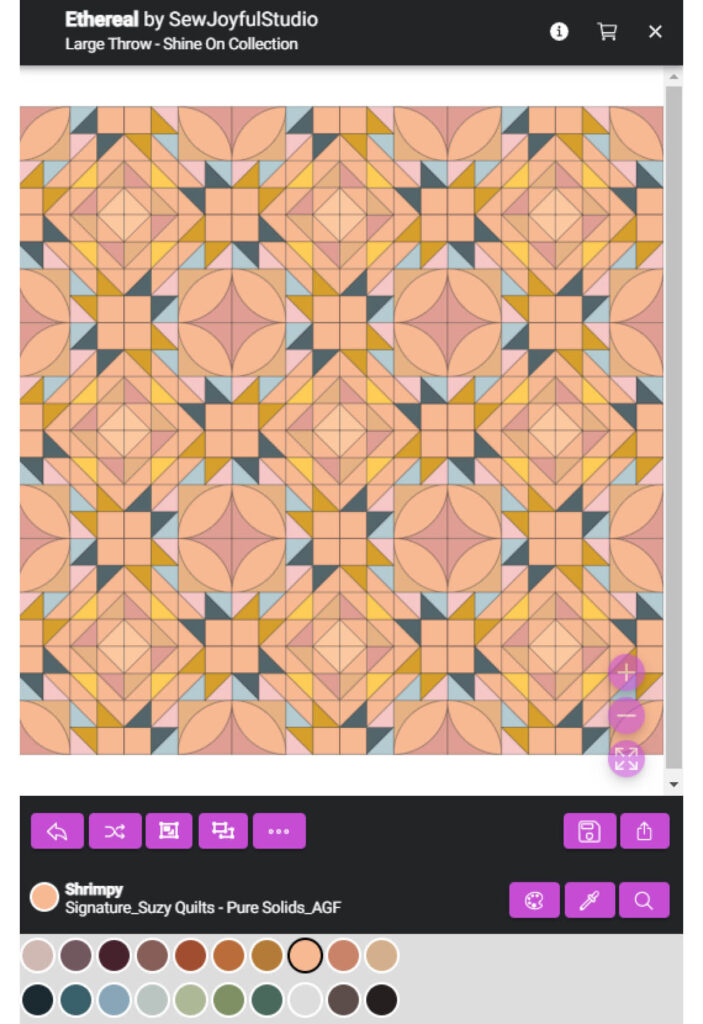
Once you have selected the palette you want to use, you can start coloring your pattern. The coloring process consists of the following steps:

  1.  Click over the color/fabric you want to color. Colors/Fabrics are displayed in circles below. Notice the name of the color, and the name of the brand, chosen will be displayed at the bottom left, and the color selected will be rounded with a black stroke.
  2. Choose the piece or pieces (if they are merged) you want to color with this selected color/fabric and click over them.
  3. Repeat all the process until you have your desired color version.
 

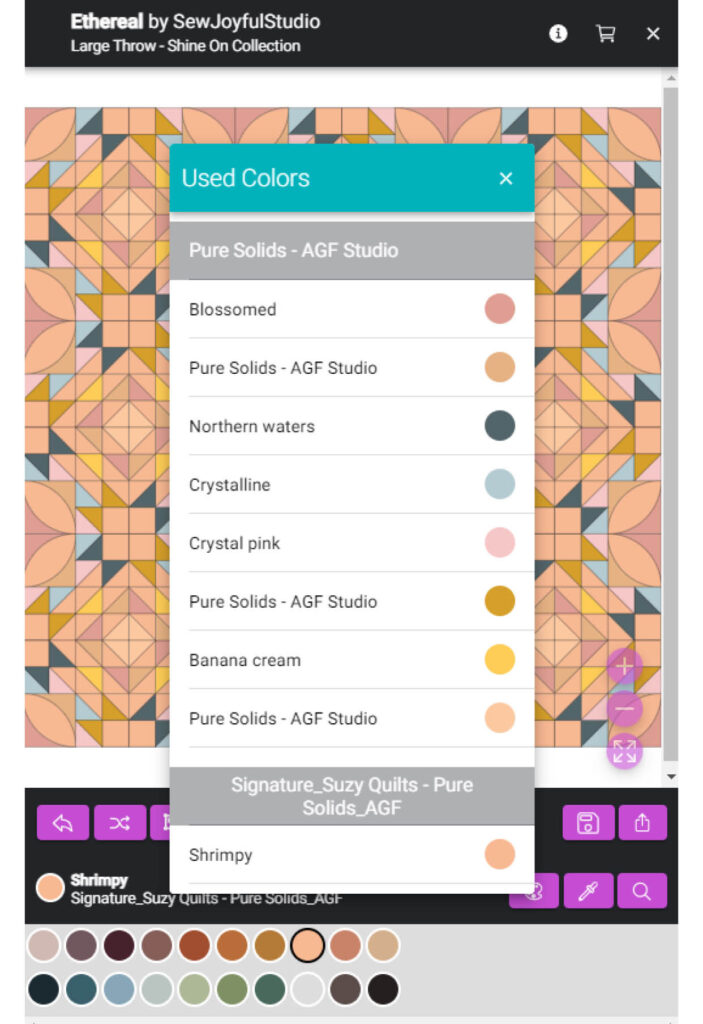
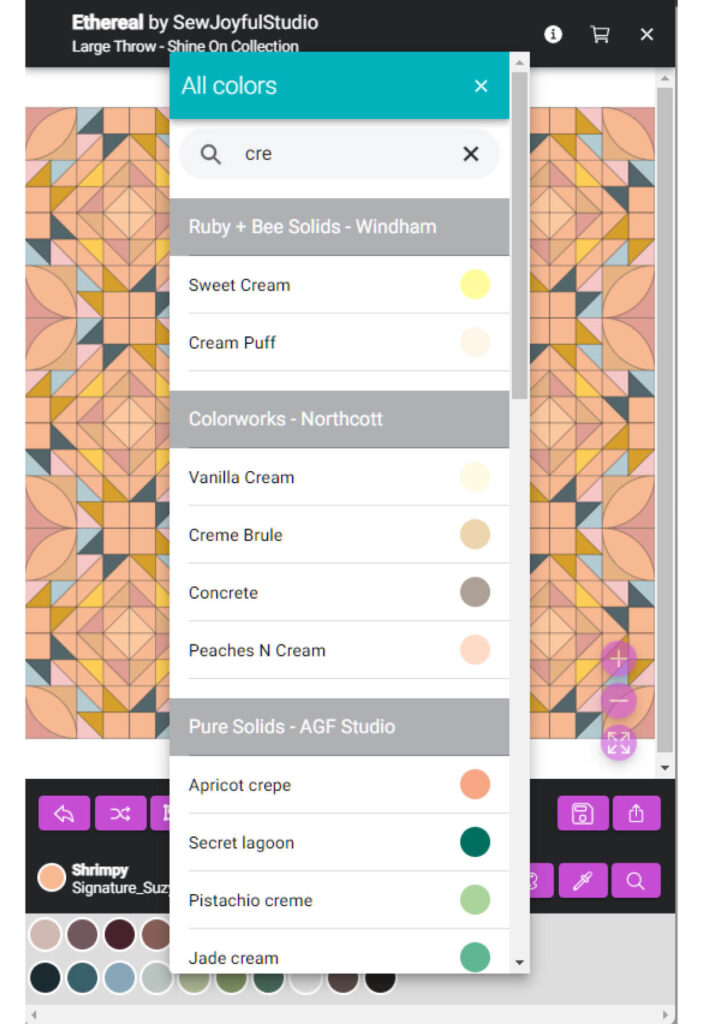
To color a pattern in QuiltInk, you have the flexibility to mix colors and fabrics from different palettes. This allows you to expand your creativity and explore a wider range of possibilities for your design. Don’t be afraid to explore and mix colors and fabrics from different palettes in QuiltInk. Embrace the freedom to combine elements and let your creativity shine through in your coloring process.


Please check below the other features QuiltInk is offering to help you fully enjoy your coloring experience.

While you are coloring, there are two features in QuiltInk that can greatly assist you:

  • Dropper: By clicking on the “Dropper” icon, a list of colors that are present in the design or the colors you have already used will be displayed. This option is particularly useful if you need to use the same color/fabric multiple times. Instead of scrolling through all the colors again, you can simply click on the desired color in the list, and it will be selected in the main window for you to use again.
  • Searcher: Clicking on the “Magnifying glass” icon allows you to access the color search feature in QuiltInk. This feature enables you to search for any color you want to use within QuiltInk’s palettes, including Solids, Fabric Shops, and your own Custom Palettes. It makes it easier for you to find specific colors without manually scrolling through all the available options.
Choosing a palette
Selecting colours from the given design
Selecting a colour by its reference

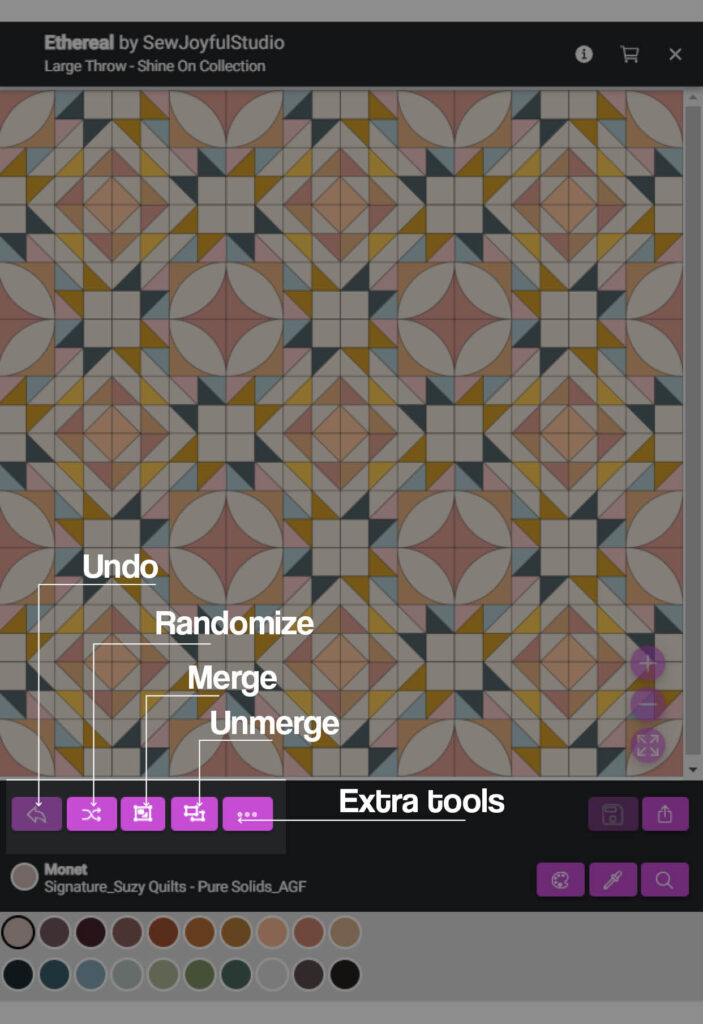
On the left side menu, highlighted below, you will find the following options:


  • Undo: This icon allows you to undo a previous action. If you made a mistake or want to revert to a previous state, you can click the Undo icon. Clicking it multiple times will undo multiple actions.
  • Randomize: By clicking this icon, the entire design will be colored with random colors from the selected palette. This feature is useful for several purposes, such as experimenting with different color combinations, color with fabrics you have at home, or with a shadow scaled group of colors. Combining this feature with custom palettes expands your creative possibilities.
  • Merge: This option merges pieces with the same color together. When pieces are merged, changing the color of one piece will simultaneously change the color of all the pieces in that group. Designers often present patterns with merged pieces as indicated in the pattern instructions. This feature simplifies the coloring process and allows for quick color adjustments.
  • Unmerge: Clicking this icon will unmerge all the pieces, allowing you to color each piece individually. Unmerging is useful if you want to customize the original color distribution of the design.

    Please note that the merge/unmerge actions are only available if the designer hasn’t blocked the color merging feature in this pattern.

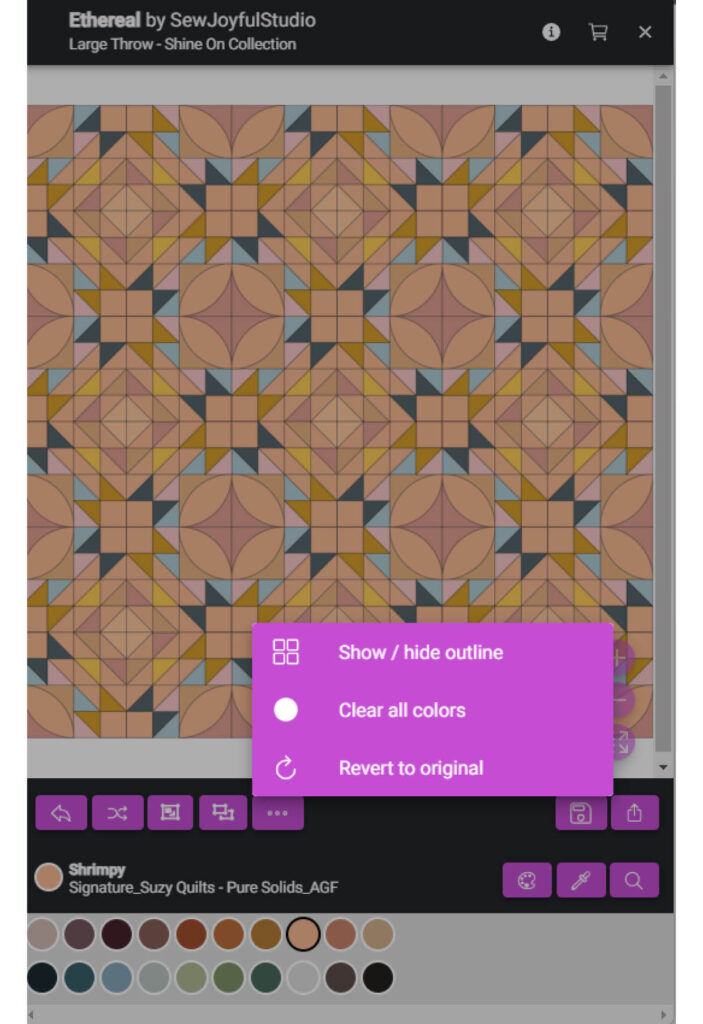
QuiltInk also provides three additional tools that can be accessed by clicking on the “…” icon, which will open a pop-up window displaying these extra features:

  • Show or hide the outlines:  This option allows you to toggle the visibility of the outlines of each piece in the design. By hiding the outlines, you can create a cleaner look for your design, focusing solely on the filled colors without the distraction of visible outlines.
  • Clear all colors: Selecting this option will reset all the colors in the design, effectively clearing the color references and providing you with a blank canvas. This feature is particularly useful if you want to start coloring the pattern from scratch or if you want to experiment with different color combinations without any existing colors influencing your choices. Clearing all colors gives you a fresh start and the freedom to explore new possibilities.
  • Revert to original: Choosing this option will revert the coloring of the pattern back to its original state as set up by the designer. If you have made extensive changes or want to return to the original color layout for reference, this feature allows you to easily restore the pattern to its initial coloring.

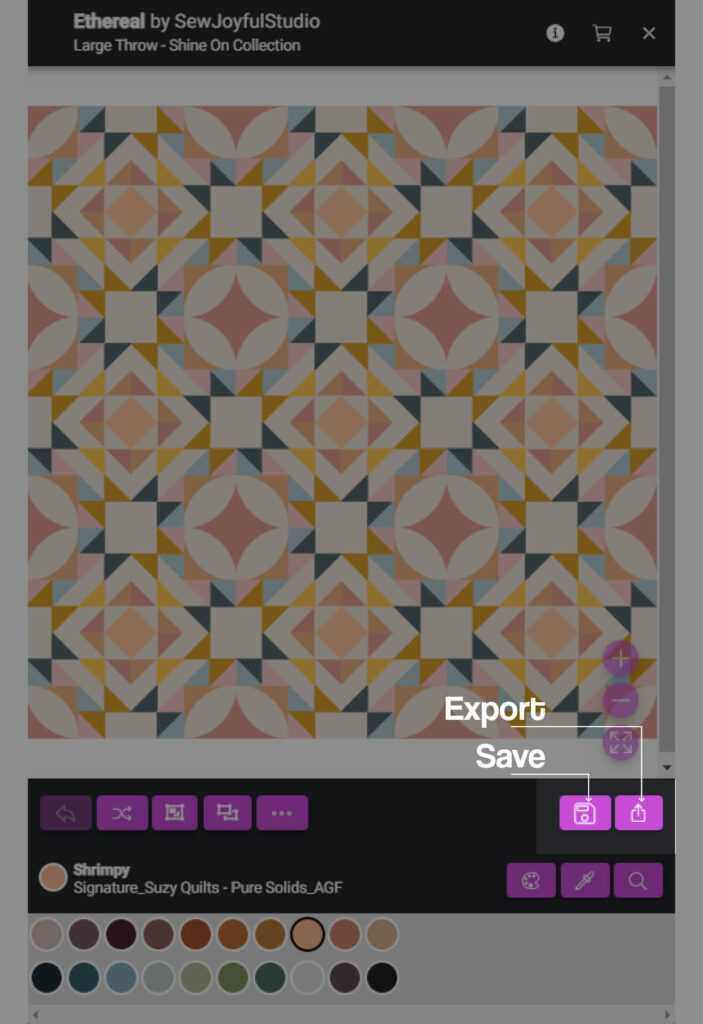
Once you have finished coloring your pattern in QuiltInk, you have the option to save your design or export it in different formats. Here are the available options

  • Save: QuiltInk provides a “Save” feature that allows you to save your design within the platform. This enables you to revisit and edit your design at a later time. Saving your design ensures that your progress is preserved and can be accessed whenever you want to continue working on it.

    The saving option allows you to save the mockup as a draft to keep coloring it later or save the mockup as a finished one and publish it in Wall.

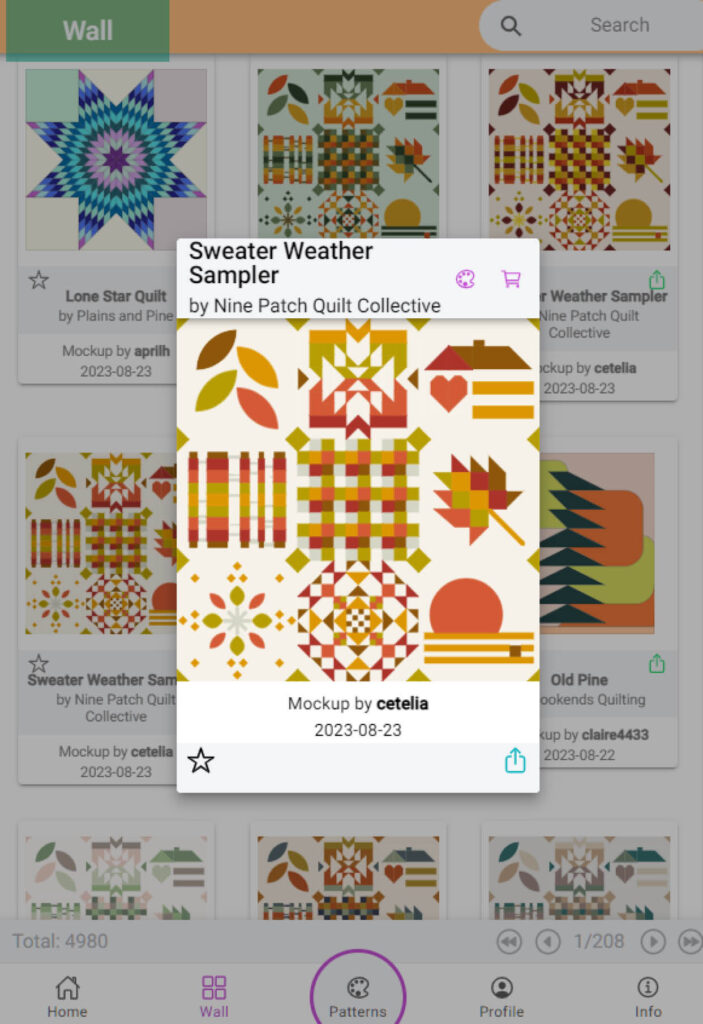
    Explore the “Manage your mock-ups” tutorial to learn more about your saved mockups, how you can make them as drafts or finished, publish in the QuiltInk Wall, duplicate them and save other user’s mock-ups as our Favorites.

 
  • Export: If you want to share or use your design outside of QuiltInk, you can choose the “Export” option. This allows you to save your design as an image file (PNG) or as a PDF file. You can also export the image with the list of colors used. The exporting option can be very useful to use it while you are sewing the pattern or sharing on social media. At the “Export your mock-ups” tutorial you will be able to learn the possibilities you have when exporting your mock-ups created in QuiltInk.


If you have any further questions or need additional assistance, feel free to ask. You can contact us at info@gmail.com or chat with us on Instagram, @quilt_ink .


Enjoy creating and sharing your unique mock-ups with QuiltInk!