One of the key features available to Fabric Shops in QuiltInk is the ability to create kits for patterns uploaded by Designers. This option enables you to select specific patterns and pair them with your fabrics, offering QuiltInk users the opportunity to exclusively color those patterns using your fabrics and subsequently visit your shop to purchase the fabrics.
Designers, being the owners of the patterns, have the ability to restrict the possibility of creating kits with their patterns. When you create a kit, you will only be able to choose from the patterns that have the kits option allowed.
For the Kits, you have the option to choose between public patterns and community patterns:
- Public patterns are accessible to all QuiltInk users. Any user can freely interact with and color these patterns. You can create a kit from any pattern that the designer has allowed for such purposes.
- On the other hand, community patterns are visible to all users, but coloring them requires entering a code provided by the Designer. This ensures that only users who have the code can access and color the community patterns. Therefore, to create a kit for a community pattern, you will be asked to input the code provided by the Designer. Once set up, both QuiltInk users and your customers on your website will need to use the code provided by the Designer to access and color that specific kit pattern.
In the future, we plan to allow Designers to specify fabric requirements for each color/fabric combination, making it even easier for your customers to get the fabrics from your shop.
Set up the Kits
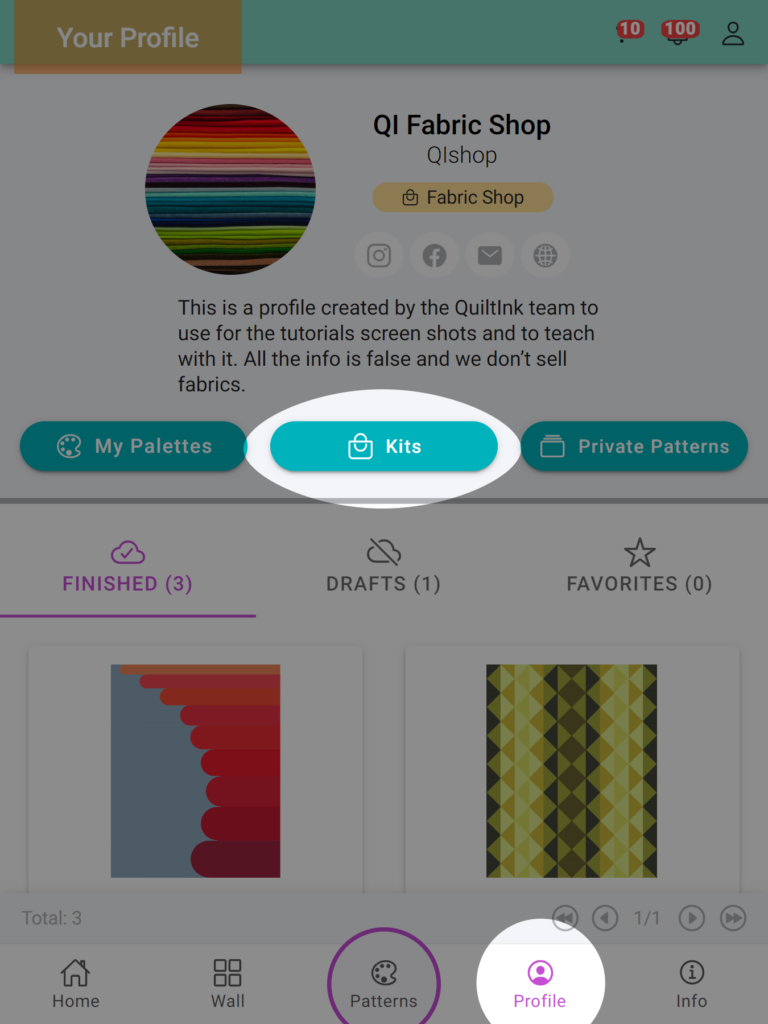
With a Fabric Shops profile and a plan that includes kits (all excep the “just Fabrics” one), on your profile page, you will find a “Kits” button that allows you to create and manage your kits.
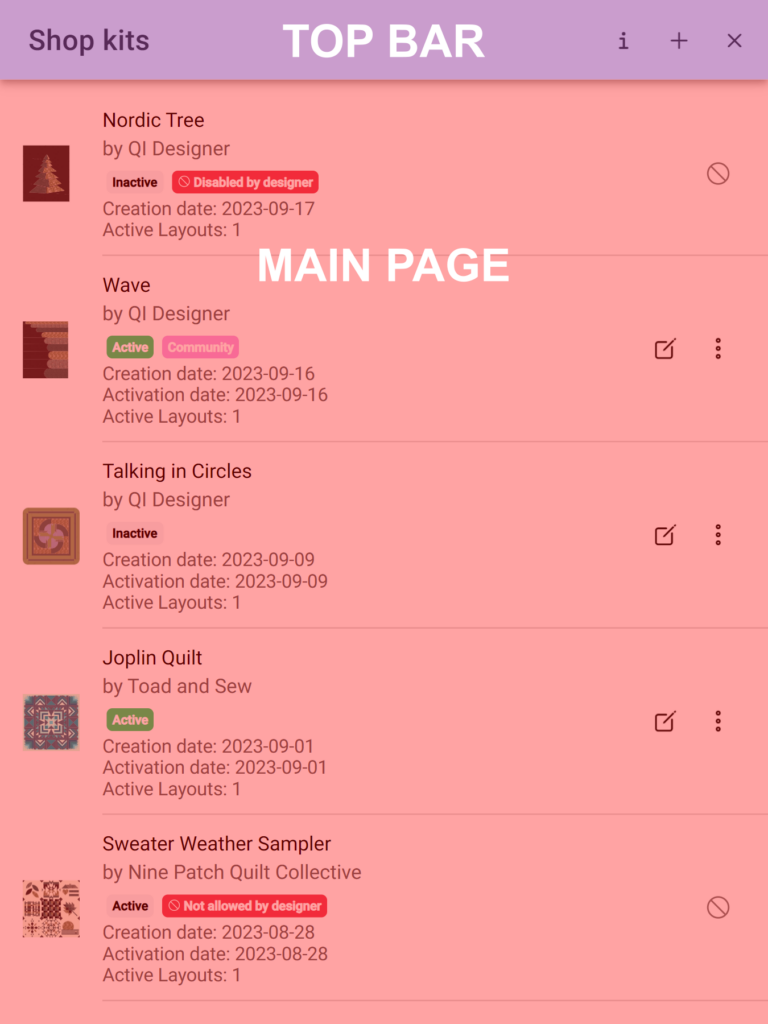
The Kits management page consists of two sections:
- Top Bar: This section displays two icons:
- “+” icon: Clicking on this icon allows you to create a new kit.
- “x” icon: Clicking on this icon closes the Kits management page.
- Main page: In this section, all the kits you have created will be listed, along with relevant information and various options to manage them.
CREATE A NEW KIT
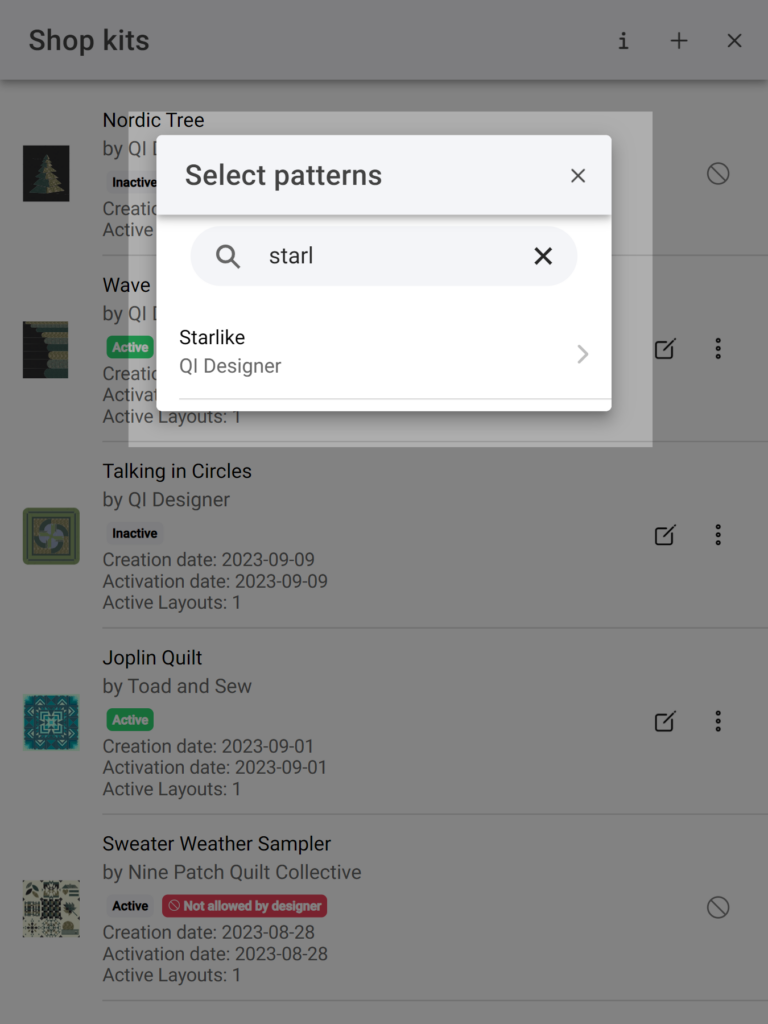
To create a new kit, click on the “+” icon located at the top bar. This action will open a pop-up window where you can search for the pattern you want to use.
In the search field, you can enter either the pattern name or the designer’s name to refine your search. As you begin typing, a list of available options will be displayed. Simply click on the desired pattern, and it will be automatically added to the main page at the top of the pattern list used for kits.
Remember that you will only be able to choose among the patterns that the designers have not restricted the option to use for kits.
SET UP YOUR KITS
Once you have created the kit, you can access the editing page by clicking on the “edit” icon. This will open a new window where you can customize the kit.
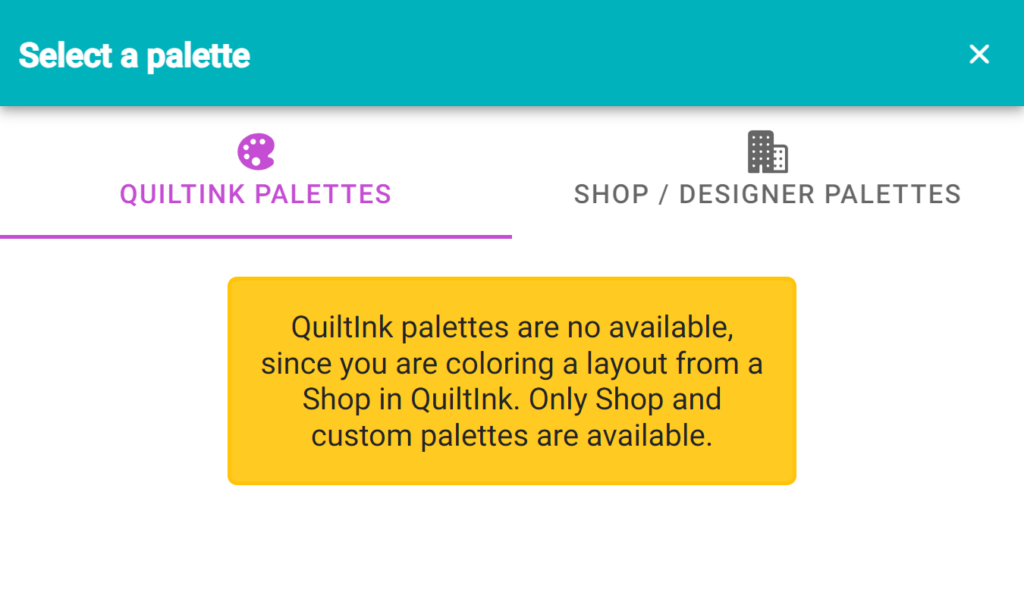
Please note that as a Fabric Shop, the palettes available for coloring in the kit will be restricted to your public palettes and the user’s custom palettes. You can only use your public palettes when setting up a kit.
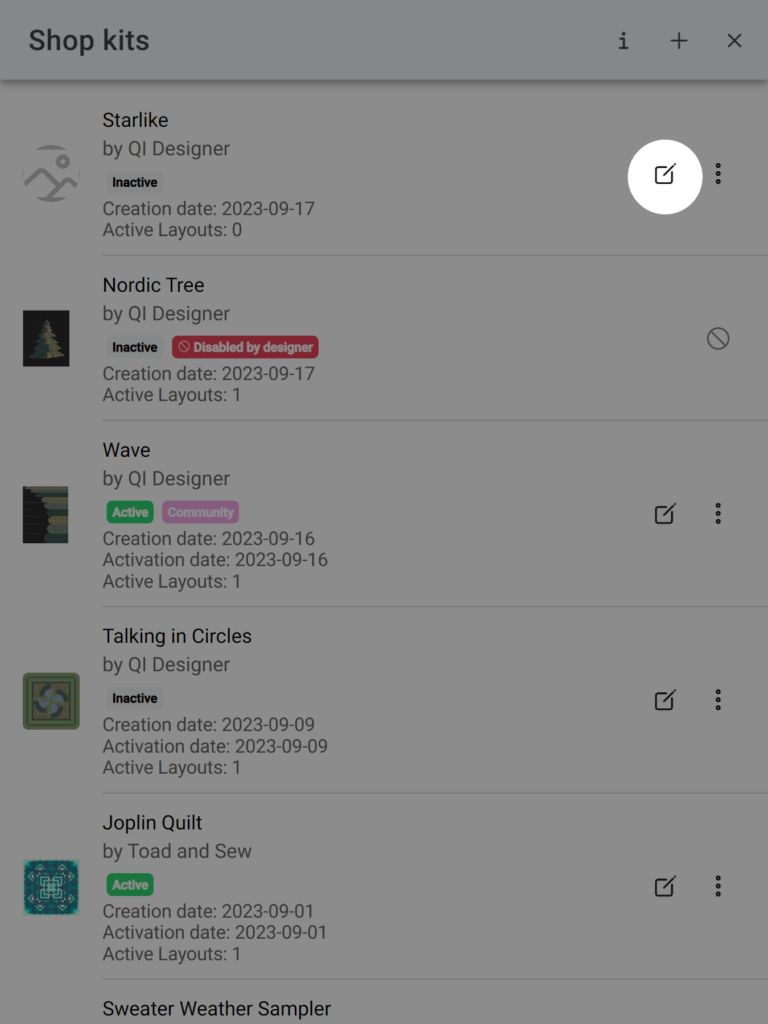
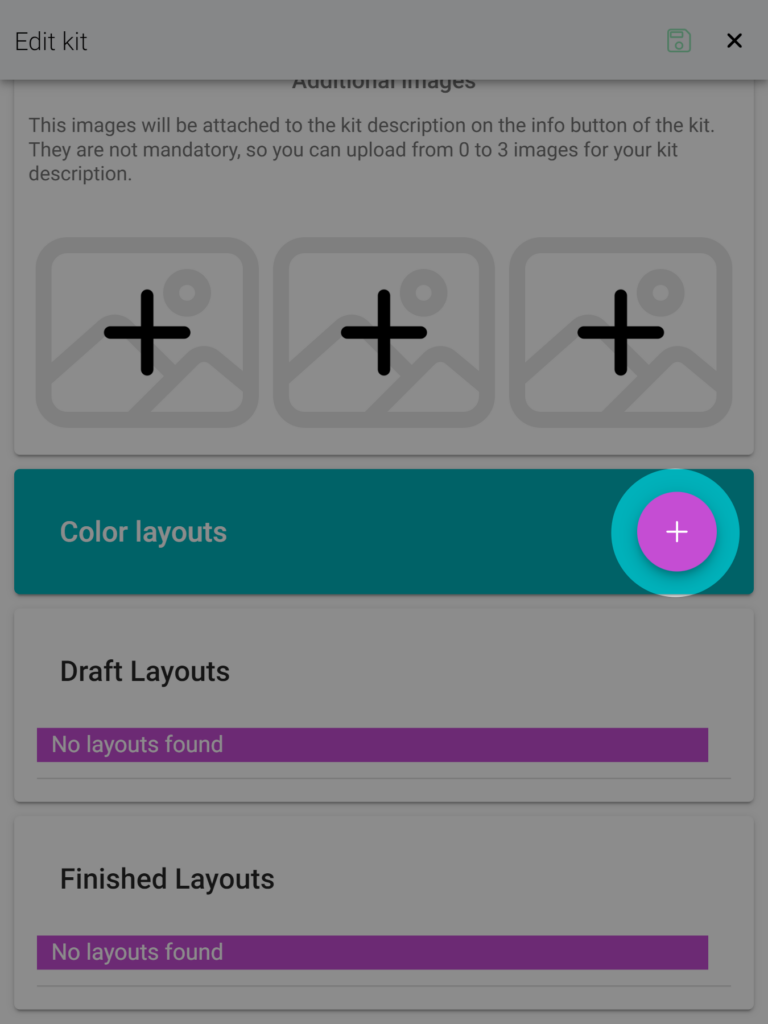
On the editing page, you need to create color layouts for the kit, which will serve as the basis for QuiltInk users to color the pattern in the kit mode. Here’s how you can do it:
1. Create a draft: To create a new draft, click on the “+” icon in the draft section. Here you will be able to choose which color layout from the designer you want to use to set up the color layouts for the kit.
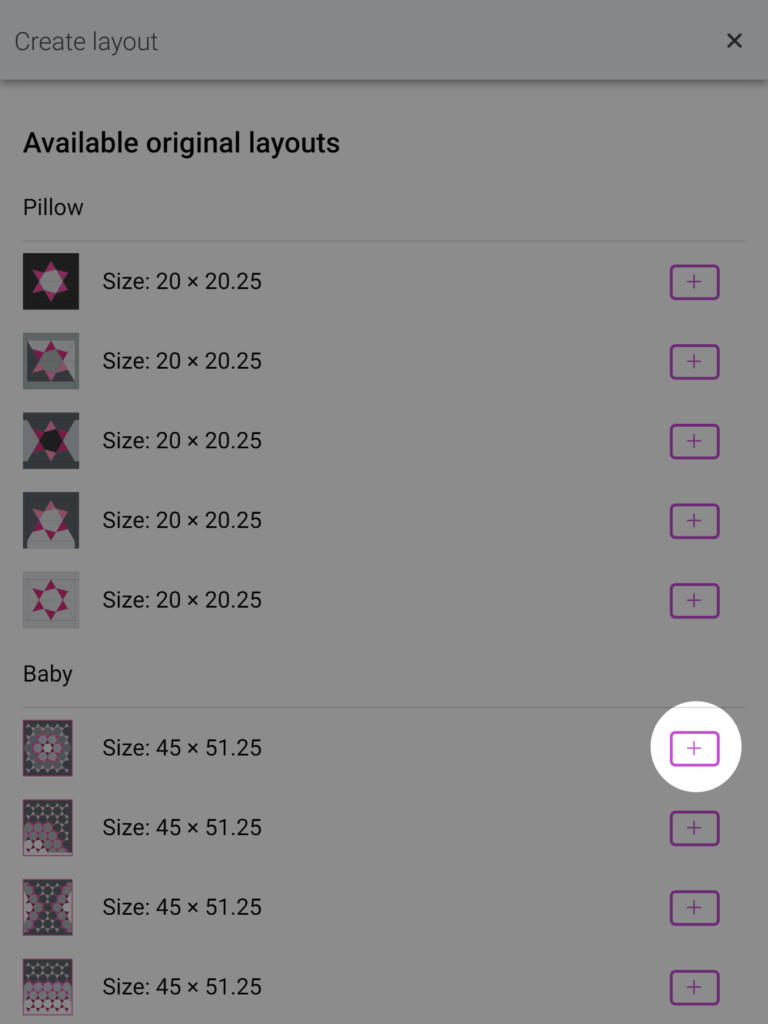
2. Color the draft: Click on the “palette” icon to access the coloring page for the draft. Your basis layout is a color layout set up by the designer.
You can merge pieces by color/fabric and remove stroke from the pieces. If you want to prevent users from unmerging the pieces, you can lock it at the “…” icon. Refer to the “Color a pattern” tutorial to know more about it
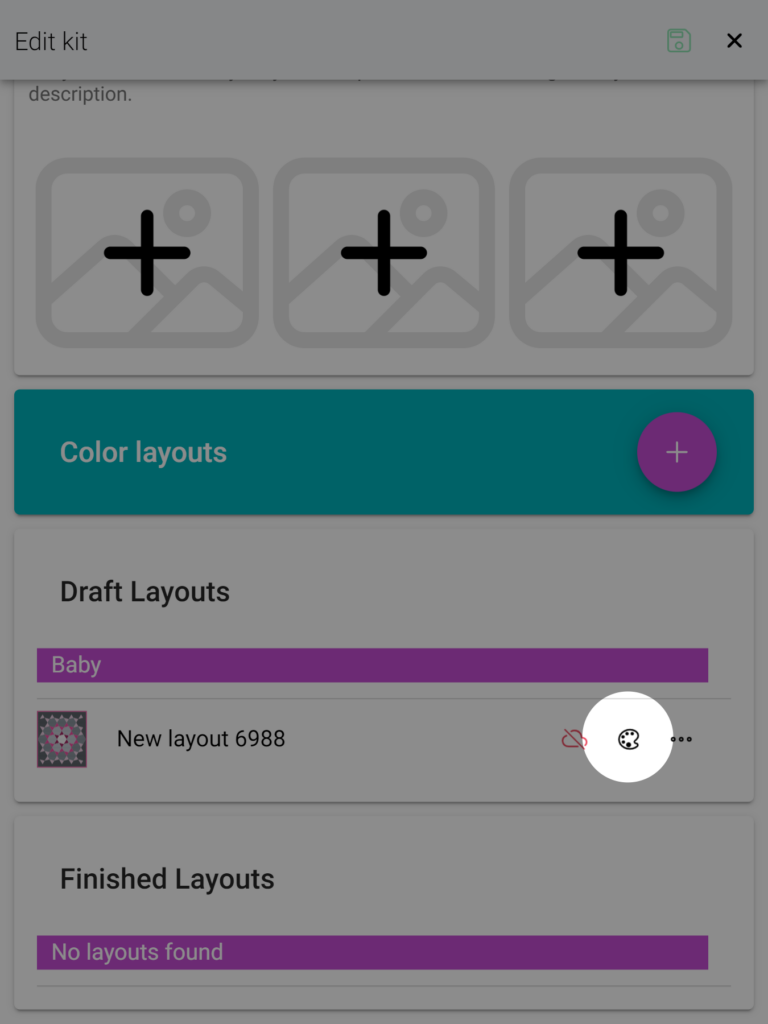
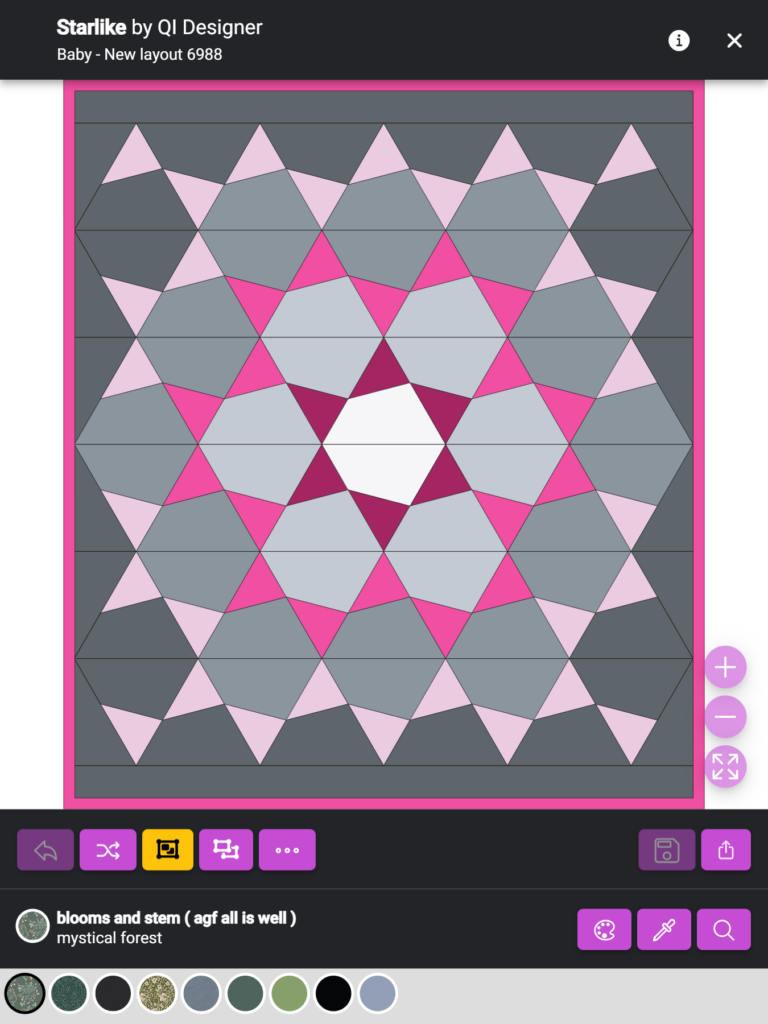
Remember, to color the basis color layouts for your kits, you can only use fabrics form your public custom palettes.
3. Save the draft: Once you have finished coloring, save the draft.
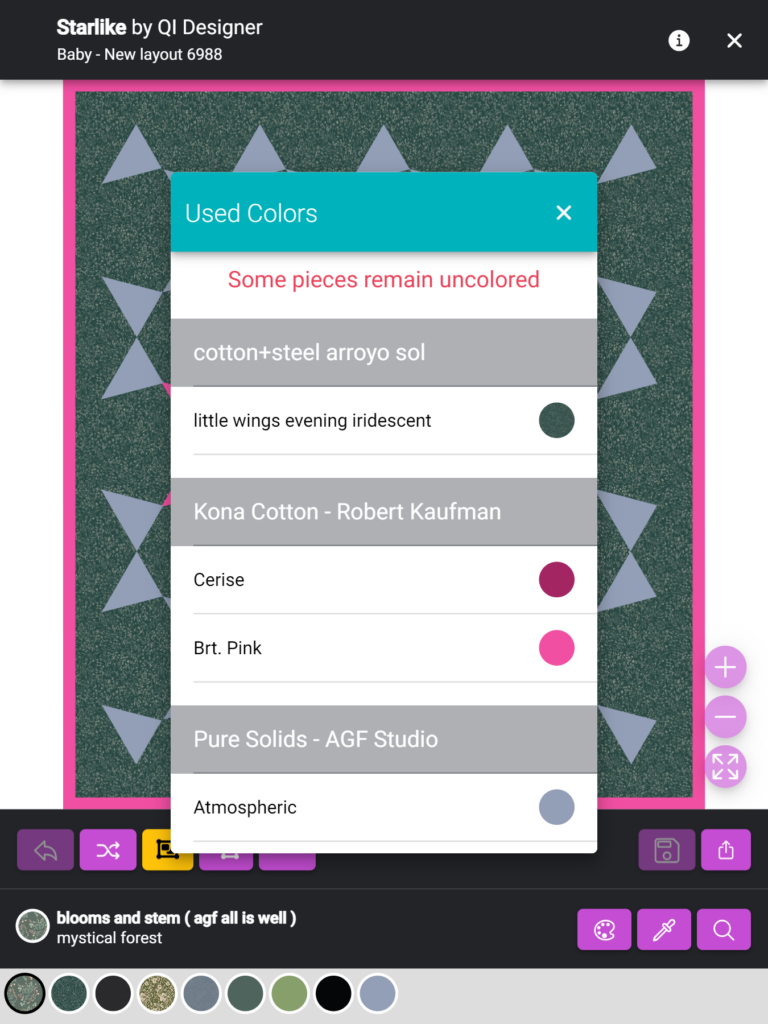
You need to color all the pieces of the diagram with the fabrics in your palettes and replace all the fabrics the designer used with fabrics from your custom palettes. If some fabric is not replaced you won’t be able to save the draft as finished to activate it. You can check if it’s ok at the pindrop icon, and if a red message appear it will mean you are not finished coloring lal the pieces with your fabrics.
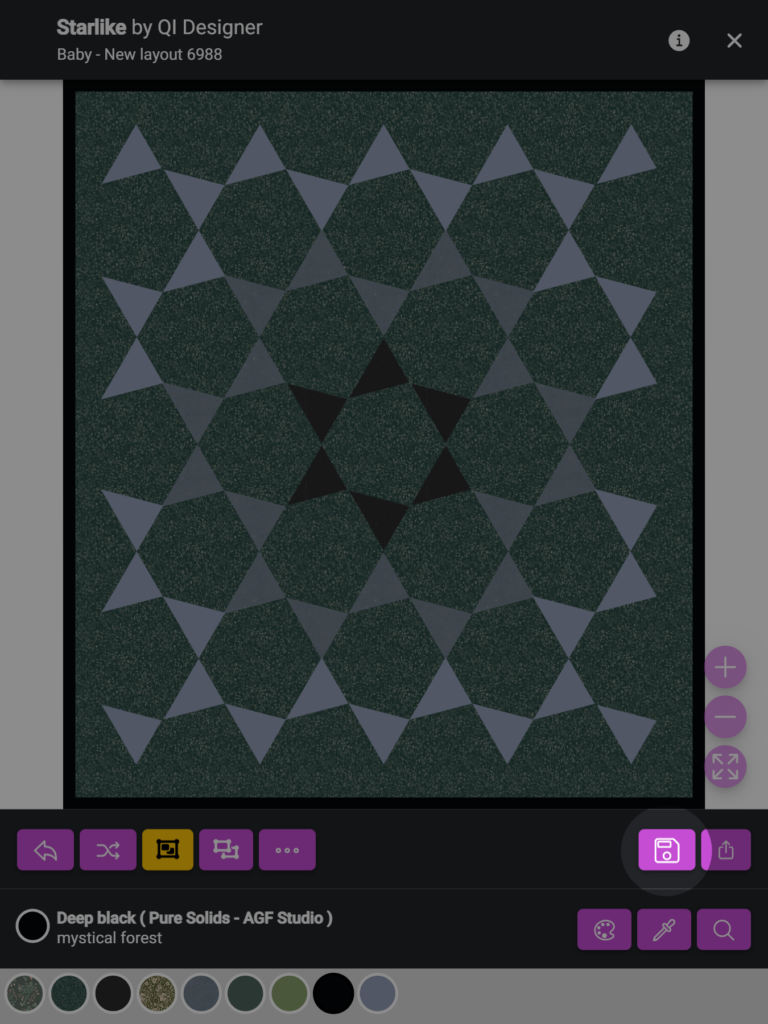
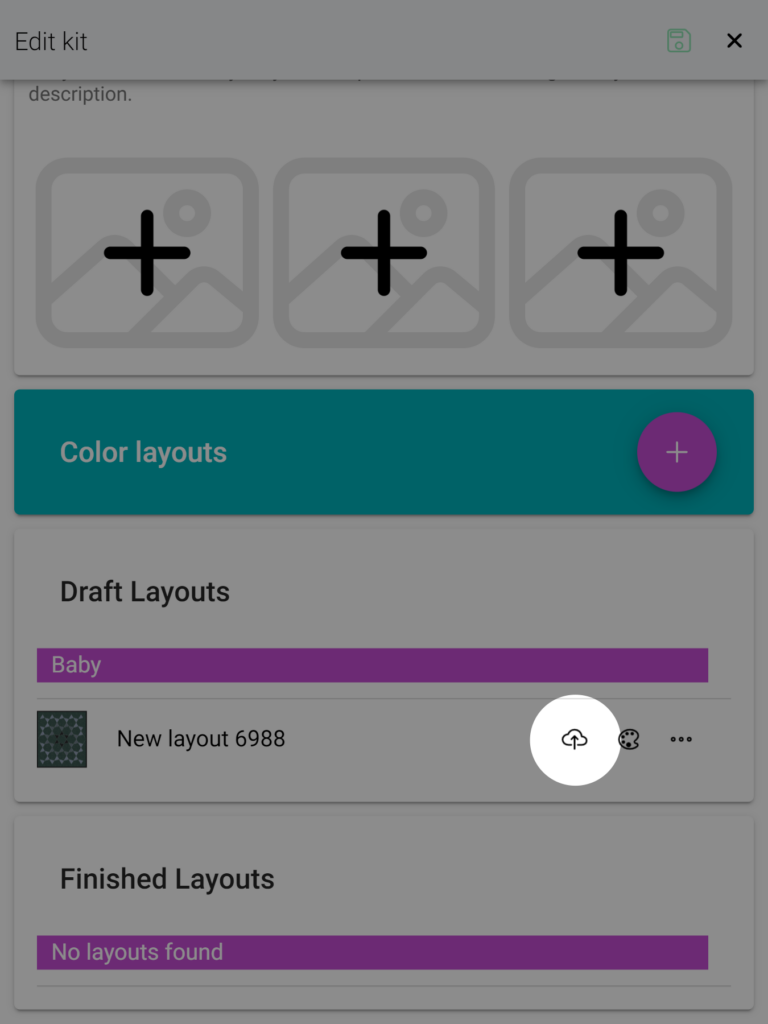
4. Turn the draft into a Finished color layout: For that, click the cloud icon.
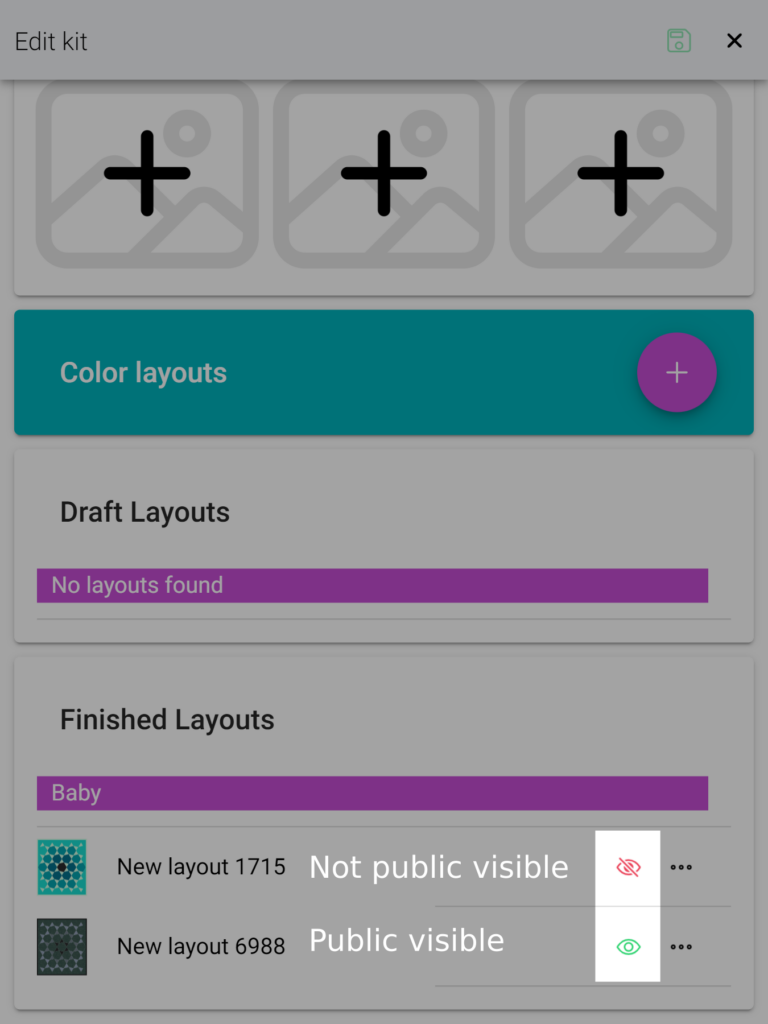
5. Activate the Finished color layout to make it public: Click on the “eye” icon at the right of the pattern name to change the visibility of the layout. When it turns green, it means the color layout will be visible on the pattern page. If it is red crossed, it will be hidden and not available for coloring.
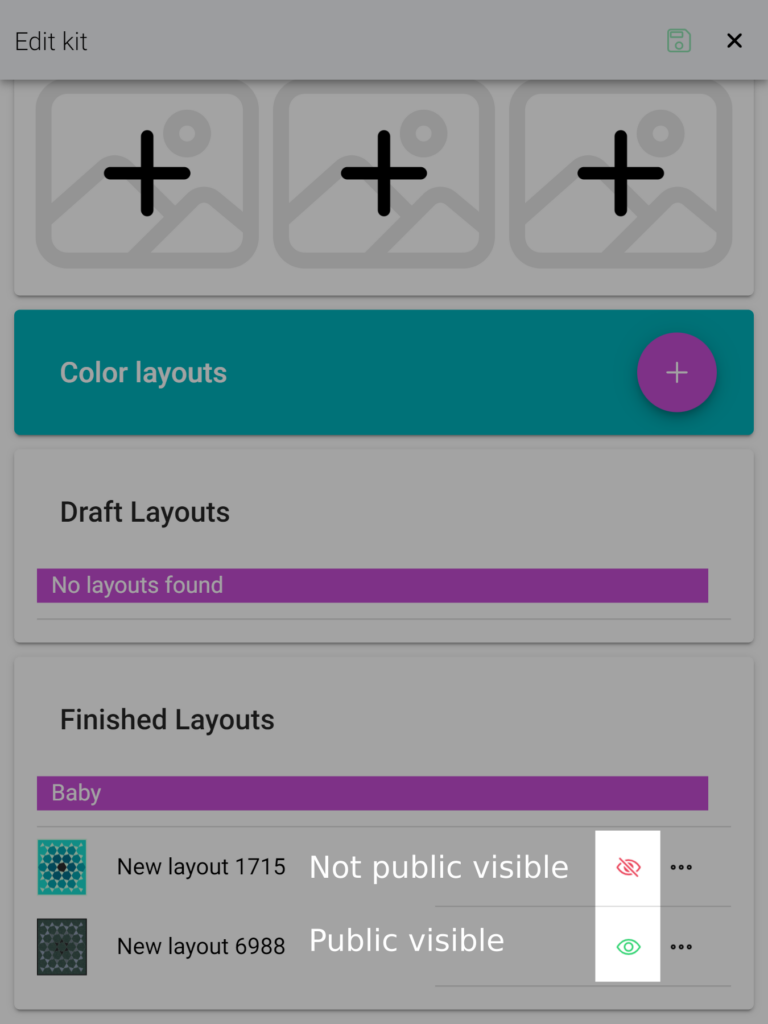
6. Create all the finished color layouts you want to include in the kit as a basis for users to color the kit pattern.
7. Set up the cover image: The cover image is one of the color layouts. Click on the “…” icon at the right of the color layout name and click to “Set as pattern cover”.
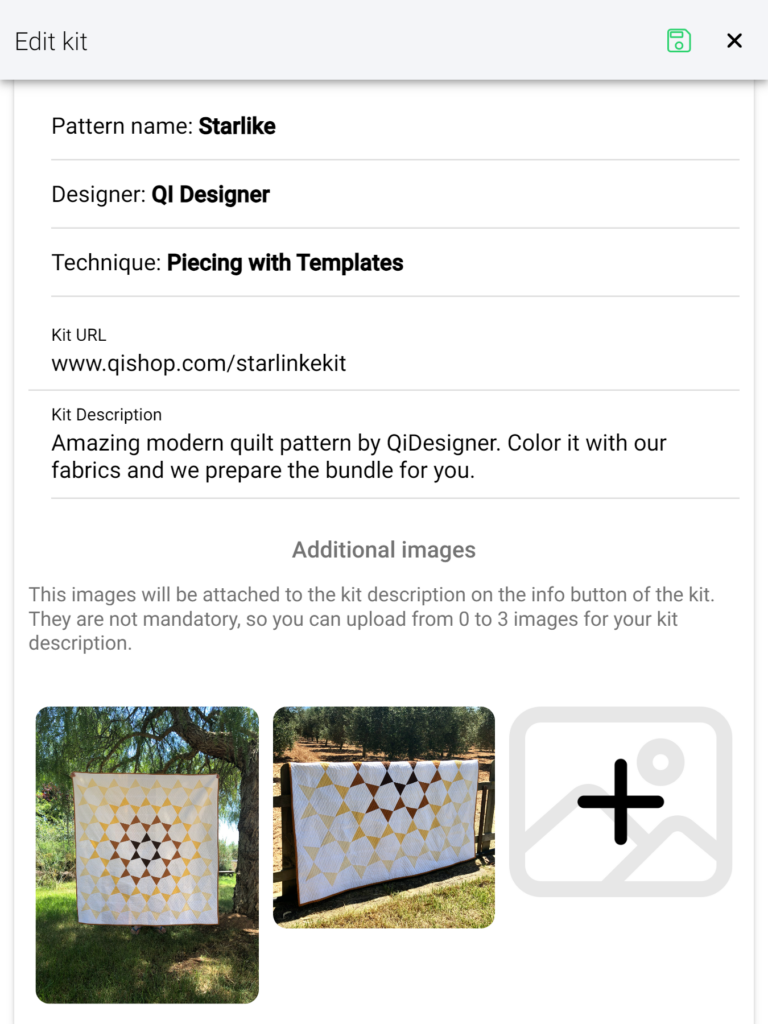
As a Fabric Shop, you have the option to add a URL that will redirect QuiltInk users from the coloring page or mock-ups to your website, where they can purchase the fabrics. You can find this option in the top section of the editing page below the pattern description. If you don’t fill in the URL, the card icon will redirect users to the designer’s page instead. You can also add a description to the kit, and it will be displayed at all the “i” icons related to the kit.
ACTIVATE YOUR KITS
When you create a new kit, it is initially in a non-active mode, which means it is not visible to QuiltInk users. This gives you the flexibility to take your time setting it up.
Once you have finished setting up your kit, you can activate it to make it visible on your Profile page under the “Kits” tab and indicated with a yellow circle over the pattern in the Pattern QuitlInk main page.
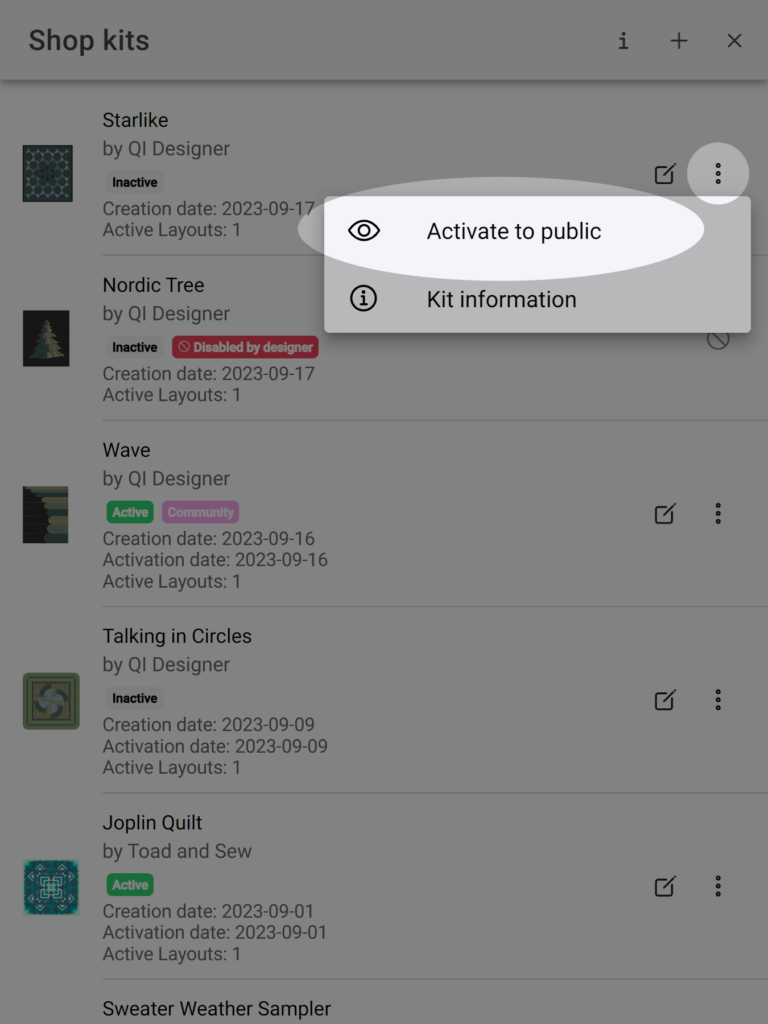
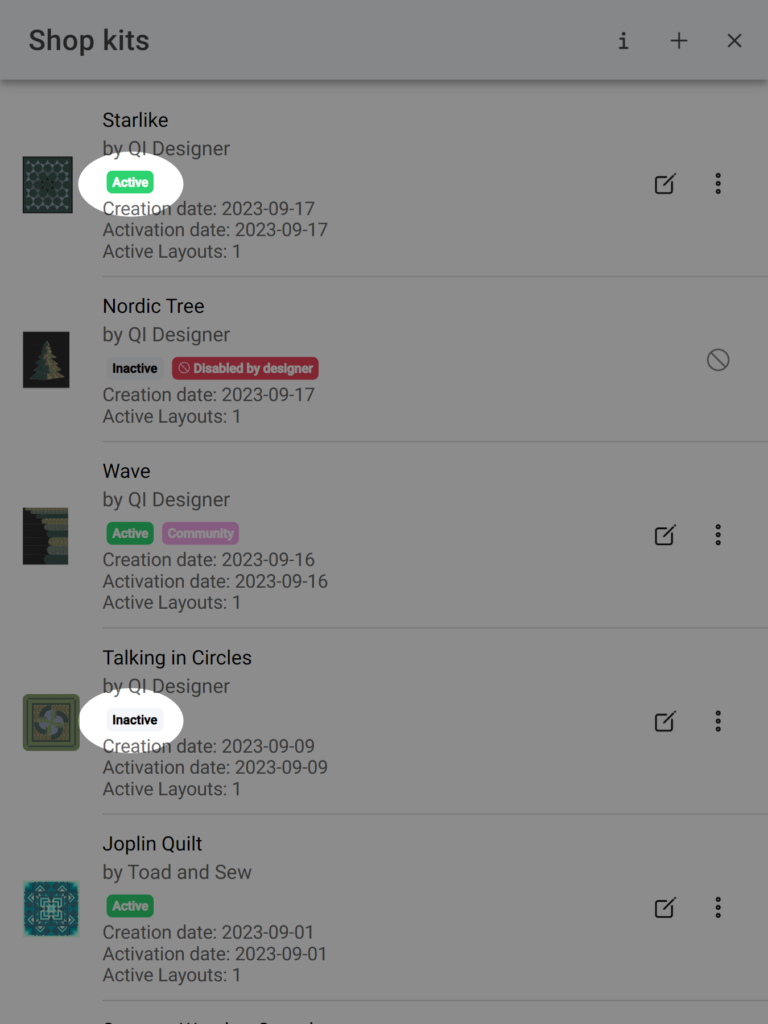
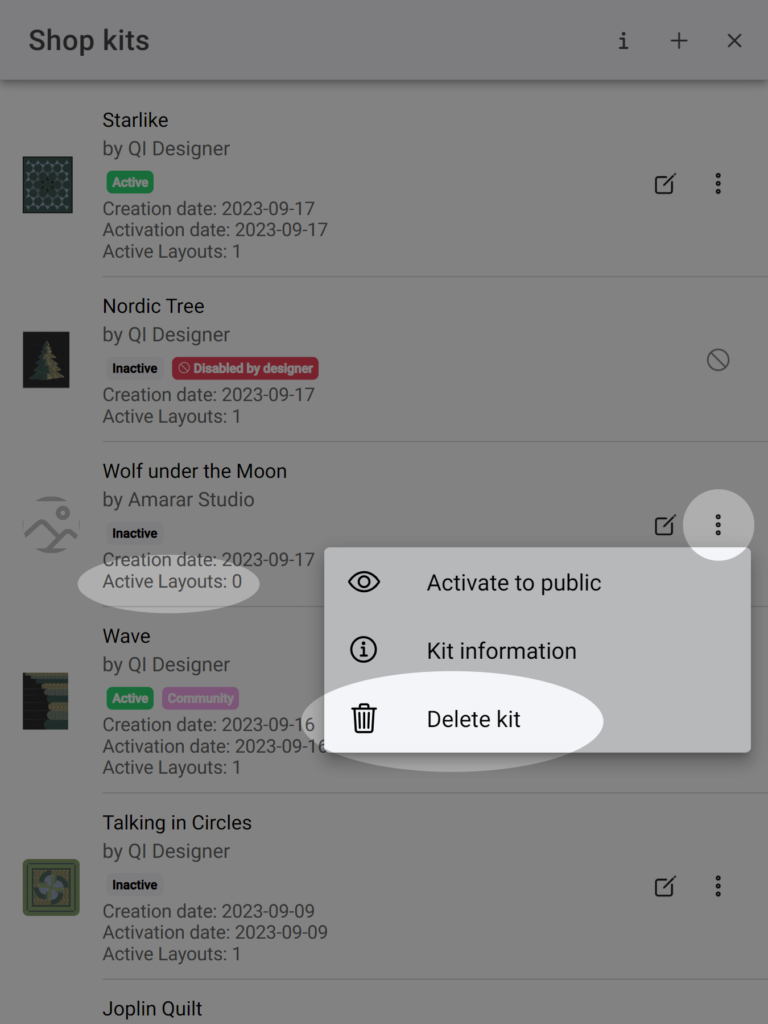
To activate the kit, click on the “…” icon associated with the kit in the general kit management page, and then select “Activate to public”. The badge below the kit name will indicate the current state of the kit:
- When the badge is grey and states “Inactive”, it means the kit is not visible and accessible for coloring.
- When the badge is green and states “Active, it means the kit is visible and accessible for coloring.
DEACTIVATE OR DELETE YOUR KITS
If you no longer wish to offer one of the kits you have created, you have three options:
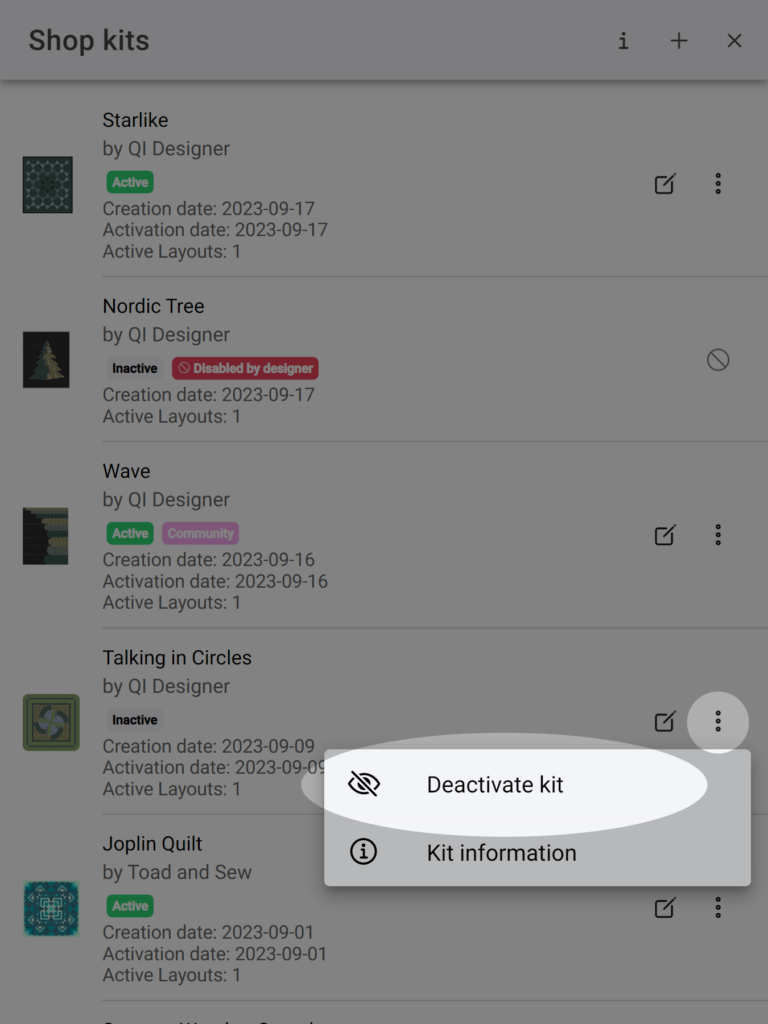
- Deactivate it: By deactivating the kit, it will be removed from public visibility but will remain in the manage kits page in a non-active mode. This allows you to edit or change the kit and reactivate it in the future if needed. Please note that when you deactivate a kit, the mock-ups created from it will still be visible in users’ profile pages, but they won’t be able to edit or share them. They can only view the colors and fabrics and export them.
To deactivate a kit, click on the “…” icon associated with the kit in the kits manage pattern and select “Deactivate kit”.
- Delete it: You can only delete a kit if you haven’t created any drafts or color layouts in the editing page. The delete option is intended for cases where you selected the wrong pattern when creating the kit. If you are unable to delete a kit, QuiltInk does not offer this possibility. If you choose to delete a kit, it will be permanently removed from QuiltInk, and it cannot be reactivated. Please note that this action is irreversible.
To delete a kit, click on the “trash” icon associated with the kit and confirm your decision to proceed with the deletion.
DEACTIVATION OR DISABLING BY THE DESIGNER
Kits in QuiltInk are closely tied to the privacy status of the patterns you use to create them. You have the option to set up kits with both public and community patterns. However, since pattern designers have ownership over their patterns, these statuses may change after you’ve created a kit.
It’s possible the designer restricts the options to create kits to one pattern after you already created the kit.
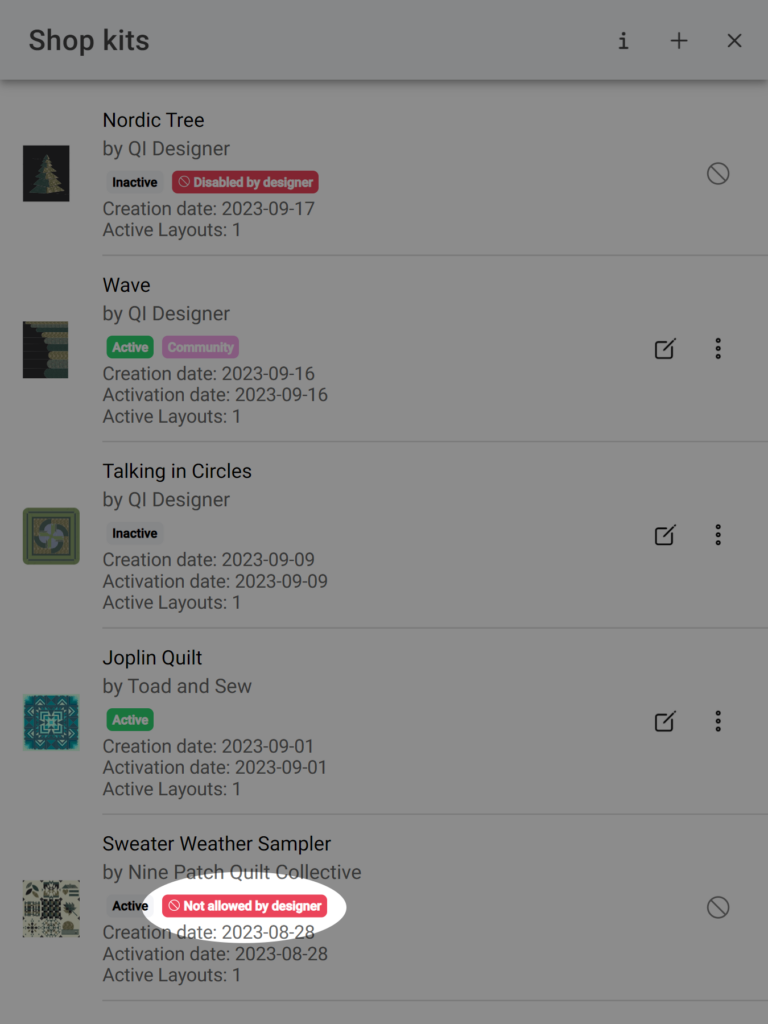
- “Not allowed by Designer”: If you see this badge on one of your kits, it indicates that the designer has restricted the possibility to create kits with this patterns.
It’s also possible that a pattern you used to create a kit becomes unavailable for coloring in QuiltInk. This could happen if the designer deactivates, disables, or cancels their QuiltInk subscription account, causing their patterns to no longer be accessible. In such cases, the kit won’t vanish from your manage kits page, but it won’t be usable by QuiltInk users either. Here are the two scenarios:
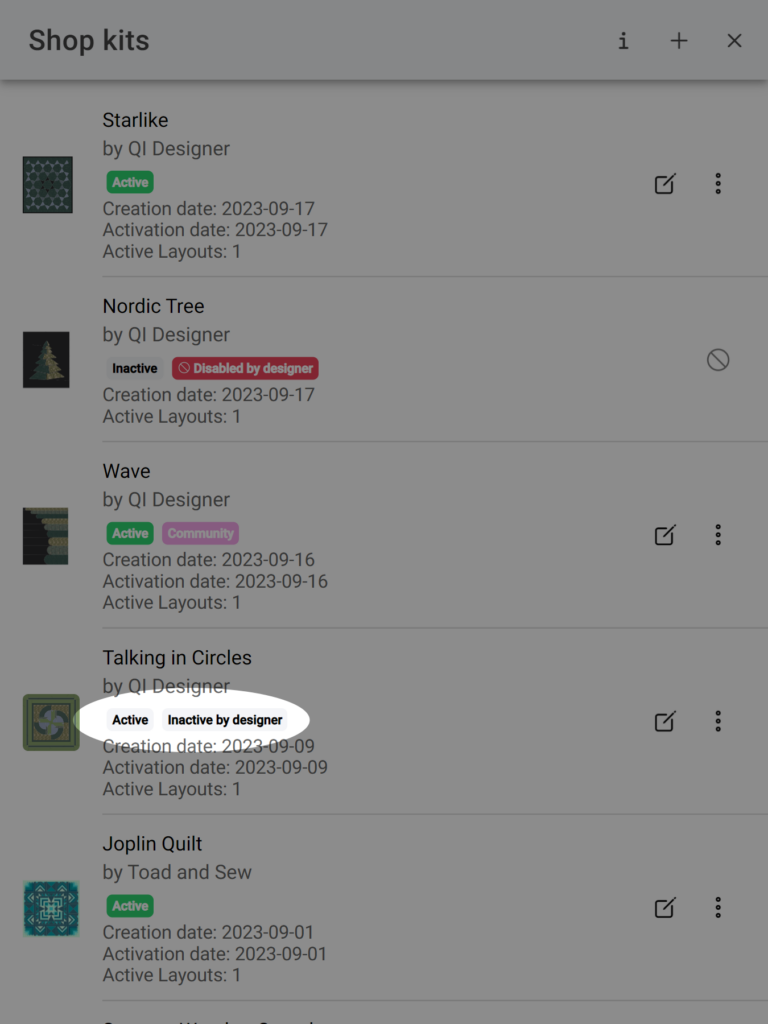
- “Active”(in grey) + “Inactive by Designer”: If you see this badge on one of your kits, it indicates that the designer has deactivated the pattern for some reason. However, the designer retains the ability to edit and reactivate it. In this situation, you can access the editing page of the kit, but the kit won’t be visible to QuiltInk users. If you had the kit active and the designer reactivates the pattern, the kit will become available for coloring again.
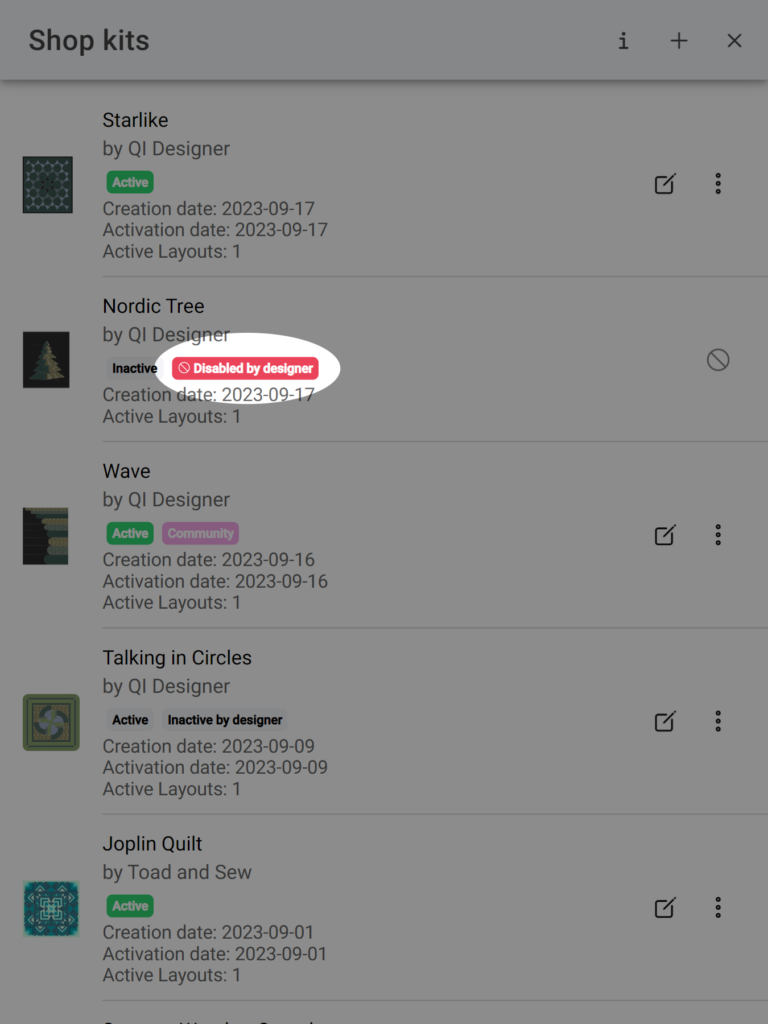
- “Disabled by designer”: If you come across this badge on one of your kits, it signifies that the pattern has been disabled by the designer. This could be because the designer intends to replace the pattern with a new one or has canceled their subscription, causing the pattern can not be edited by the designer anymore. In this case, the designer won’t be able to edit or manage the pattern, and consequently, you won’t be able to do so with the kit until the pattern is enabled again.
Unlike the deactivation scenario where the pattern could potentially be reactivated, the likelihood of a disabled pattern being re-enabled is lower.
EMBED YOUR KITS
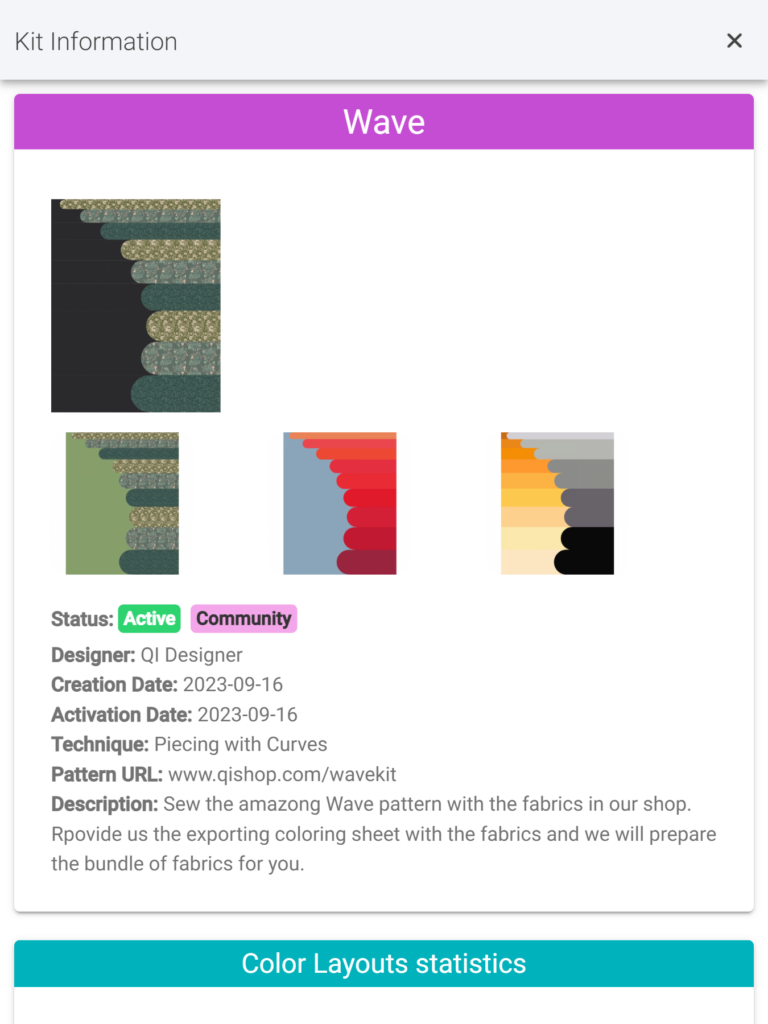
By clicking on the “info” icon associated with your kit in the manage kits page, you will be directed to a page that provides various information about the pattern. This includes:
- Kit/Pattern details: Name, designer, status (active or inactivated), creation and activation dates, URL, description, and images.
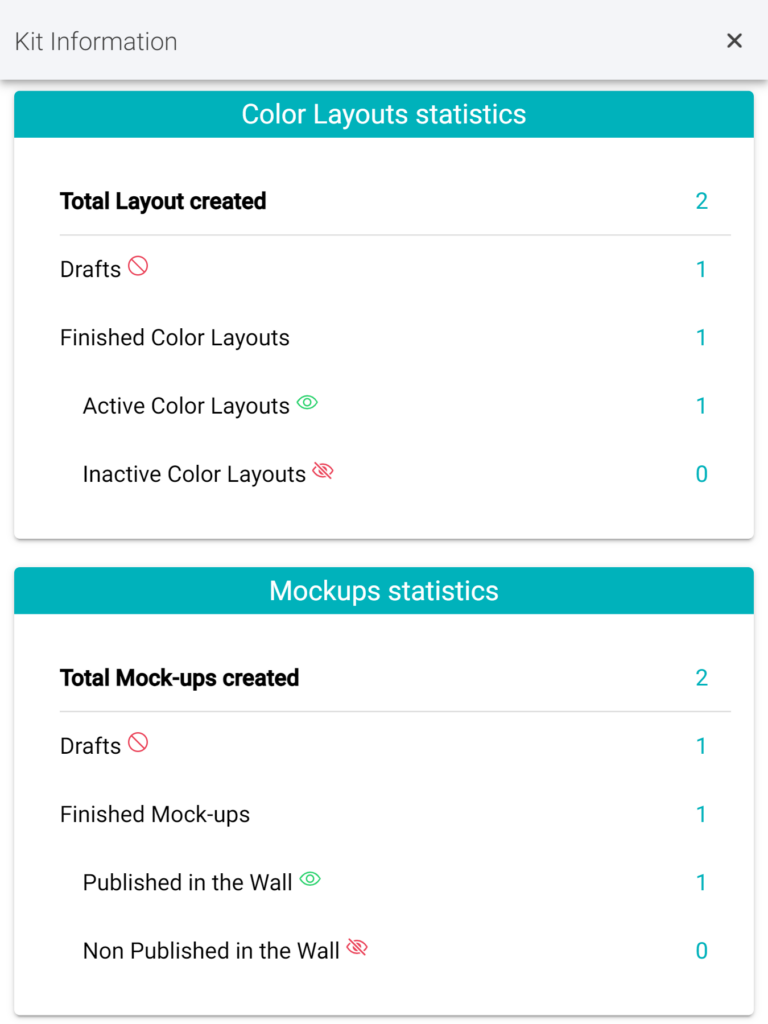
- Color layouts and mockups statistics. Here you can see how much this kit has been colored-in, which can help you with managing your kits and promotions about it.
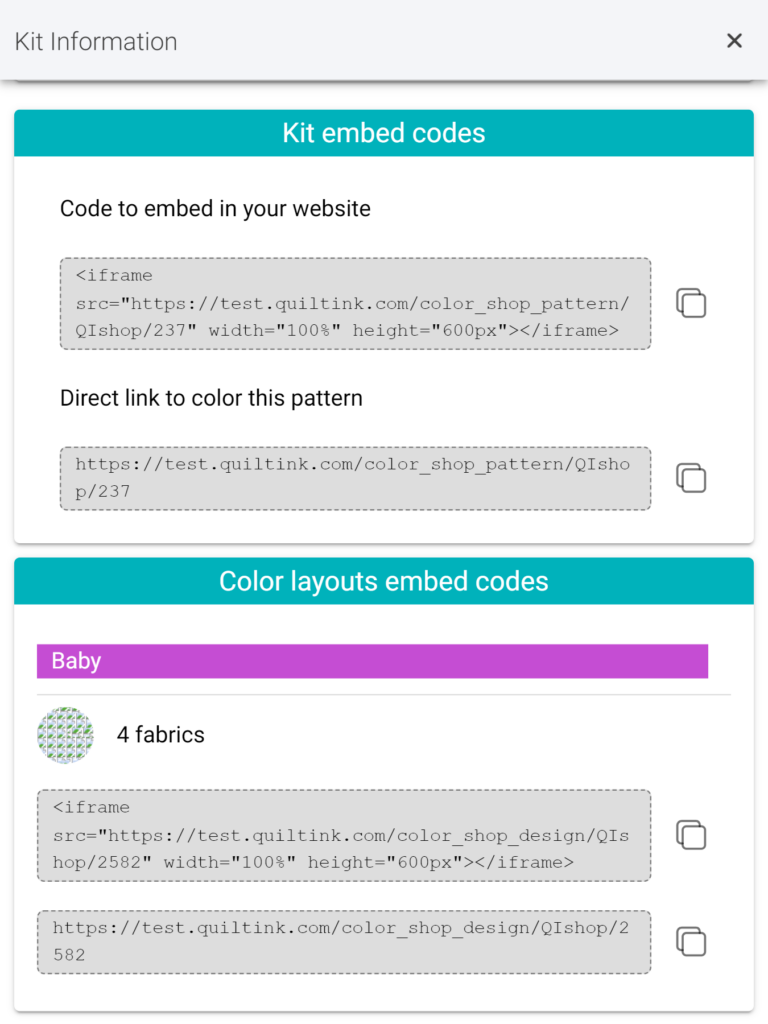
- Additionally, on this page, you will find the codes/links that allow you to embed the kit into your website. By copying the provided embed code and pasting it into your website, you can offer visitors the ability to color the kit directly on your website without needing to access QuiltInk. Alternatively, you can use the provided link to redirect your customers to color the kit on the QuiltInk platform. For more information on how to embed QuiltInk into your website, refer to the “Embed QuitlInk into your website” tutorial.
If you have any questions or concerns related to the Kits in QuiltInk or any aspect of using QuiltInk, we are here to help. You can reach out to us via email at info@quiltink.com or through the chat on our Instagram platform (@quilt_ink).
