


The Pixy Quilt is a colouring page series now available on QuiltInk to help you to plan a pixel quilt. It is like planning a pixel quilt in a sheet of paper but in a digital, fast, fun and eco-friendly way.
To celebrate its first birthday, QuiltInk added a new option to count the number of pieces of every colour you need to make your planned quilt. It will make your planning really easy. Cool right?!
Here are the instructions to prepare, cut and assemble your fabrics.
The Mini Pixy Quilts use 2 1/2″ unfinished squares which finish at 2″ squares. The Mini PixyQuilt Series contain:
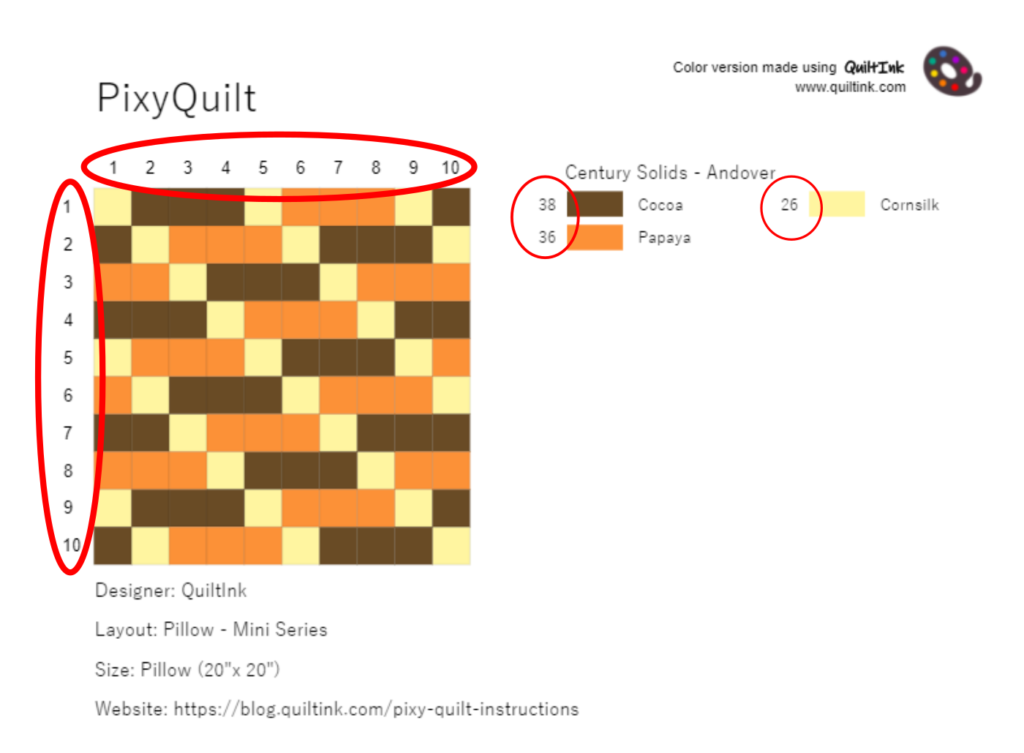
Finished Size: 20″ x 20″
# pixels: 10 x 10 = 100
Finished Size: 40″ x 48″
# pixels: 20 x 24 = 480
Finished Size: 84″ x 84″
# pixels: 42 x 42 = 1764
The Medium Pixy Quilts use 5″ unfinished squares which finish at 4 1/2″ squares. The Medium PixyQuilt Series contain:
Finished Size: 63″ x 72″
# pixels: 14 x 16 = 224
Finished Size: 90″ x 90″
# pixels: 20 x 20 = 400
The PixyQuilt Layouts are set up having in mind the precuts you can find in the market and the number of pieces they usually contain.
Here are the number of 2 1/2″ and 5″ squares you can obtain from precuts and yardage:
And here is the number of pre-cut packs you need for every one of the PixyQuilt layouts:
* It’s for the total squares needed for every layout. Have in mind if the colour in the pre-cut packs adjusts your colour planning.
All of the PixyQuilt layouts and the instructions provided here, however you can make your PixyQuilt using the basis pixel/square at your desired size. For that, you only need to do some simple maths to know the final size of your quilt depending on the square size.
For example, if you colour the Throw size of the Mini Series but you want to sew it using 3 1/5″ unfinished squares:
A new option on QuiltInk is to provide the number of pieces of every fabric/colour used to colour a PixyQuilt. You can check them when you go to export a PixyQuilt, from the colouring page or from the Wall. If you don’t know how to export check our tutorial about exporting colouring versions.
Another new option on QuiltInk is the display of the row and column numbers. It can be very useful to assemble the quilt.
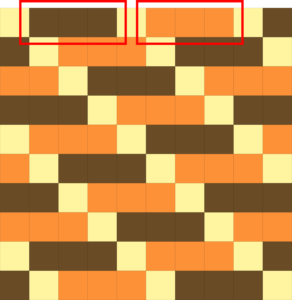
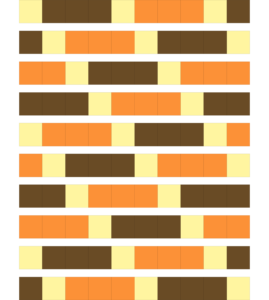
At first sight, to make a pixel quilt, all you need are squares at the size you choose, but depending on the design it can be simpied by joining some pieces.
For example, this PixyQuilt, by rows, has 3 pixels that can be cut together and make only one piece.
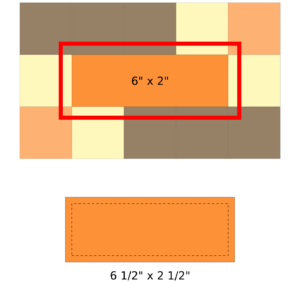
To know the size of the pieces (different from the squares) you need to cut, you have to think which would be the finished size of the piece and add 1/4″ to every size. Look at the examples and see the difference.
With squares we need 3 squares to make 6″ x 2″, so better to cut 6 1/2″ x 2 1/2″.
Note, QuiltInk only counts the number of squares you need by colour. If you want to join squares in bigger pieces, you will need to adjust the maths to your desired pieces.
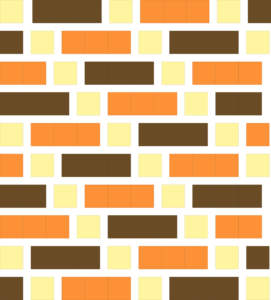
Join the squares (pieces) together by rows placing them right sides together and sewing with 1/4″ seam allowance.
Then, join the rows in the same way.
Make sure to match the seams when you are sewing the rows together. Use needles or clips to maintain the matching while you are sewing.
TIP! Since we are going to join long rows, alternate directions when sewing the rows together to avoid bowing.
Finally, make the sandwich, quilt it as you wish, and finish the quilt with your preferred method (machine binding, hand binding, facing,…).
We hope you enjoyed planning your pixel quilt with Quilting and remember to share it on social media using the hashtags #pixyquilt, #quilt_ink and tags us @quilt_ink.
If you want to participate in the #fromquiltinktoreality section in our instagram feed, send your Quiltink colour versions and a real photo of your quilt to info@quiltink.com and we will make the 50-50 image to all enjoy the magic of QuiltInk!
We can’t wait to see all your PixyQuilts!!