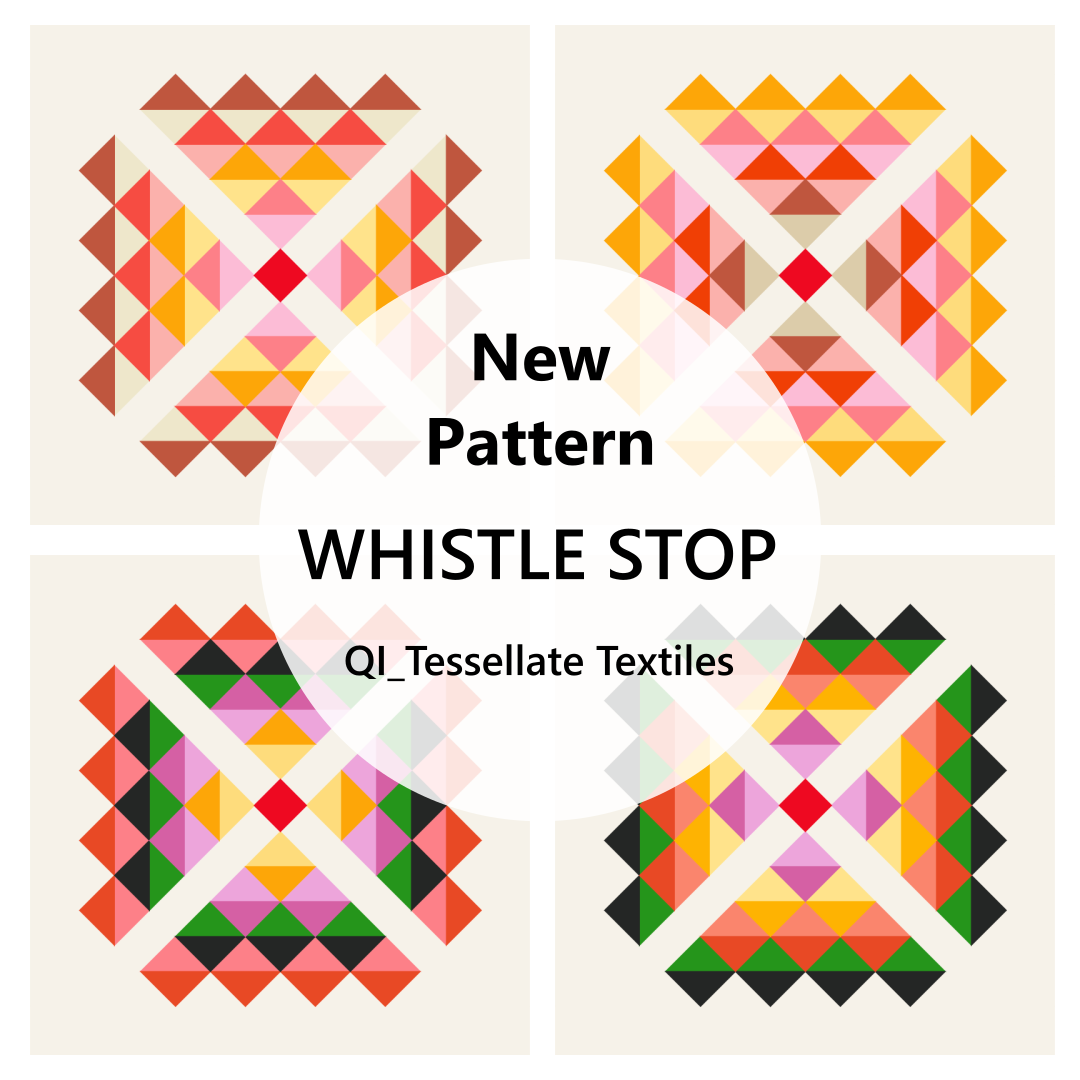
Title: Whistle Stop
Designer: Tessellate Textiles
Technique: Traditional piecing
Sizes: 2
Colour Layouts: 2
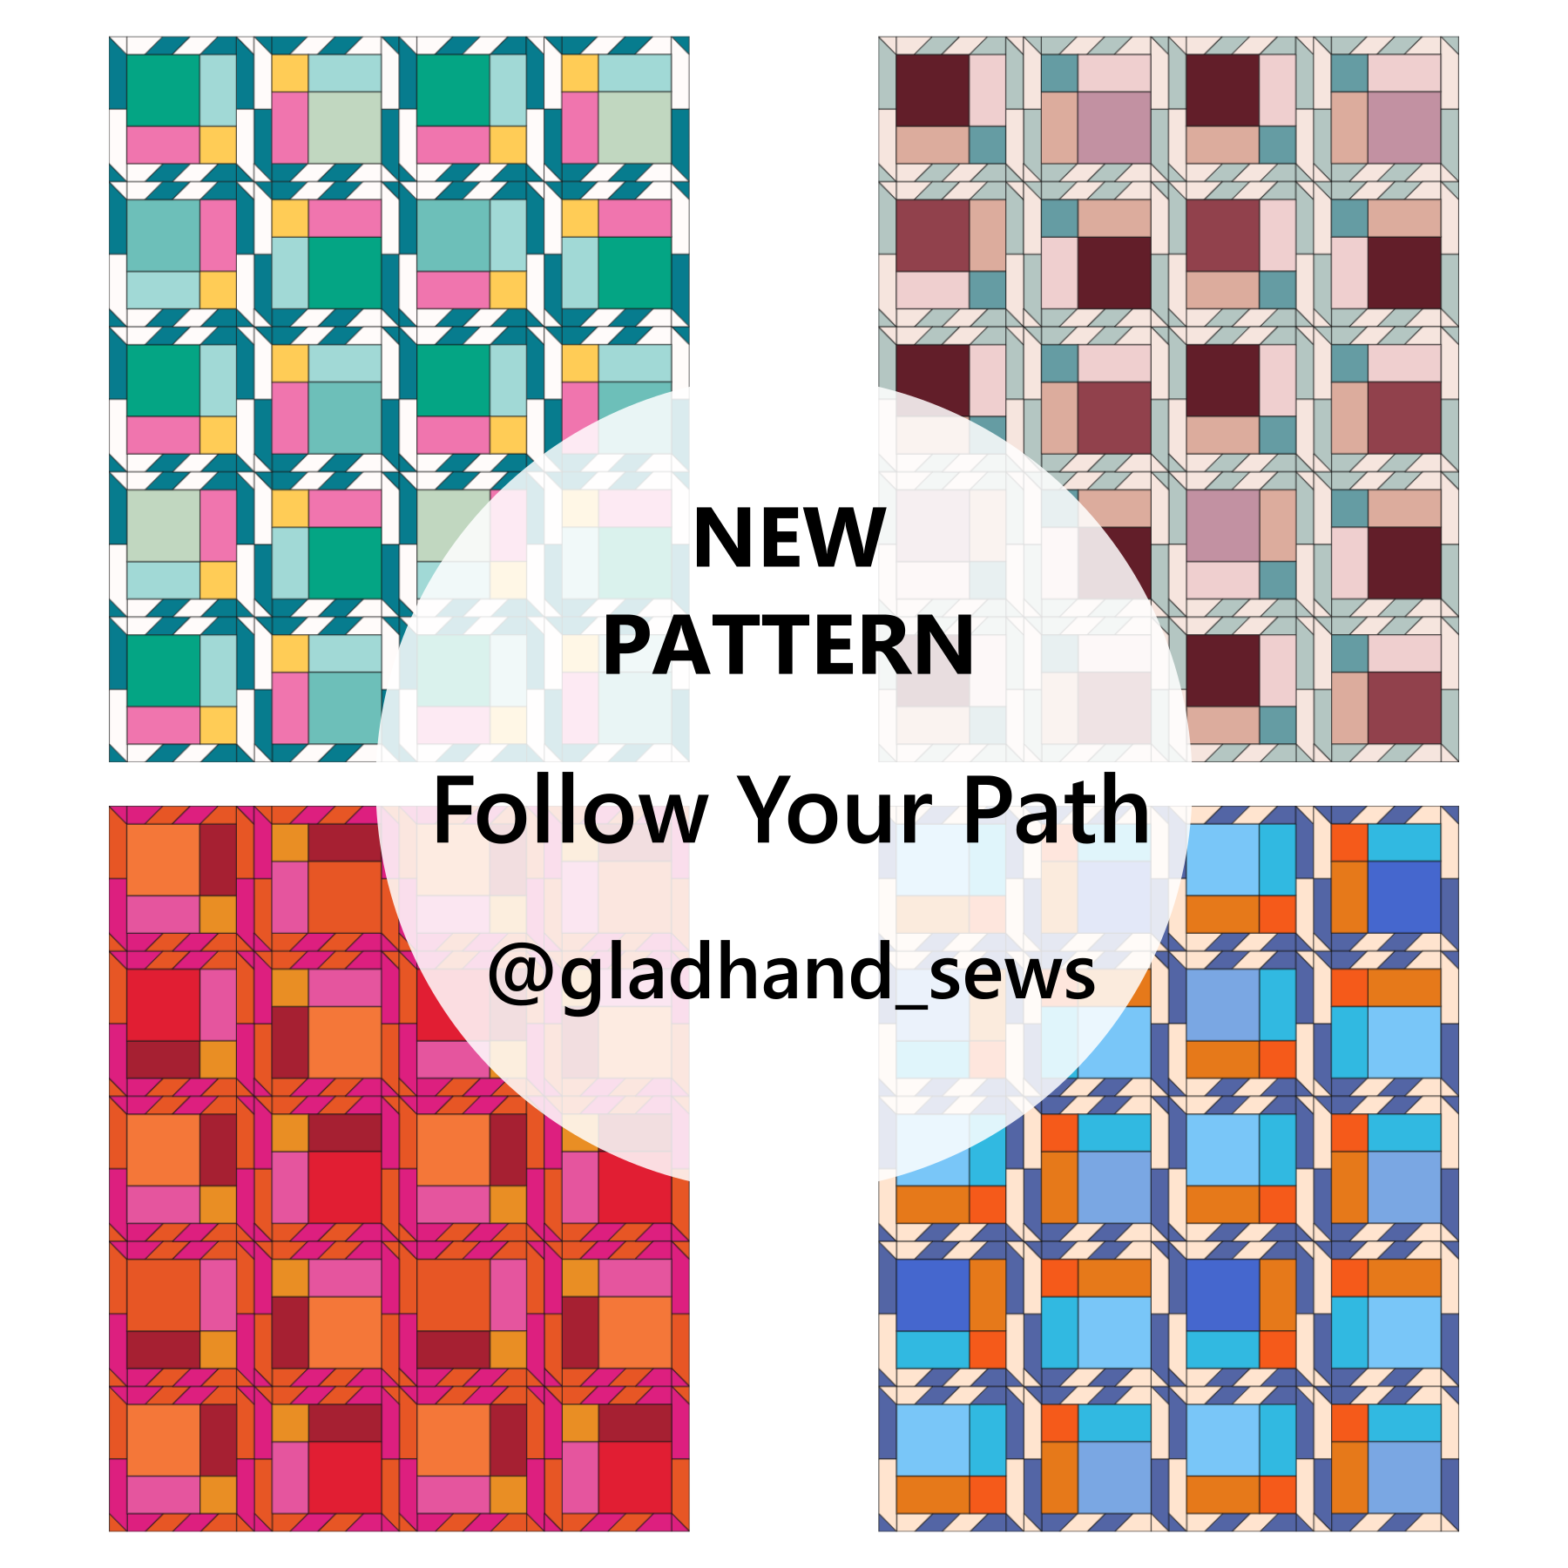
Christien from Tessellate Textiles is just about to release a new amazing pattern, the Whistle Stop, and she placed the pattern on QuiltInk for you to colour plan your version!
Whistle Stop is an advanced beginner, traditionally pieced pattern. The design is a fresh take on the Railroad Crossing block that uses repeating shapes to create a striking effect. The design comes in both a 9 block layout (throw size) and a 1 block layout (cushion, baby, and throw sizes).
Christine @tessellate_textiles has created a tutorial to guide you through how to use QuiltInk to create your own Whistle Stop Quilt – check out her IGTV to make the most of the app!”
And remember to register on QuiltInk to be able to save your colour versions and share them on the QuiltInk Wall! We can’t wait to see them all!
Happy colouring and quilting!
Music from Uppbeat (free for Creators!):
https://uppbeat.io/t/soundroll/an-open-book
License code: 9IVEHWLEKTUQI9U0