Custom Palettes & Printed Fabrics

Custom Palettes Usage

In QuiltInk, apart from the solid colors provided by QuitlInk, all the users have the option to color with the printed fabrics from Fabric Shops that are available for public coloring across all the coloring pages in the platform with no cost.
 
To create Custom Palettes allowing you to upload your own Printed Fabric is needed a QuiltInk account which will allow you to save your printed fabrics and use them several times. The free account allows you to create 1 custom palette and upload 10 printed fabrics. All the subscription plans give unlimited custom fabrics and unlimited printed fabrics usage.
 
So, if you want to upload your own printed fabrics to color in QuitlInk, sign up for free in our platform and be able to use your own fabrics to color and fully enjoy QuiltInk with the possibility of saving your mock-ups, sharing them in the QuitlInk Wall, and additional functionalities available on the platform.

If you would like to have unlimited access to the custom palettes feature and upload an unlimited number of printed fabrics, we recommend checking out our subscription plans. Our subscription plans offer enhanced features and benefits, including unrestricted usage of custom palettes and printed fabrics.

By subscribing to one of our plans, you will have the freedom to create and utilize as many custom palettes as you desire, allowing for endless possibilities in coloring with your own printed fabrics.

To explore the different subscription plans available and their specific features, please visit “Subscribe to a Plan” tutorial. There, you will find detailed information about each plan, and how to subscribe. You can also directly start your subscription in the following link.

Custom Palettes Essentials

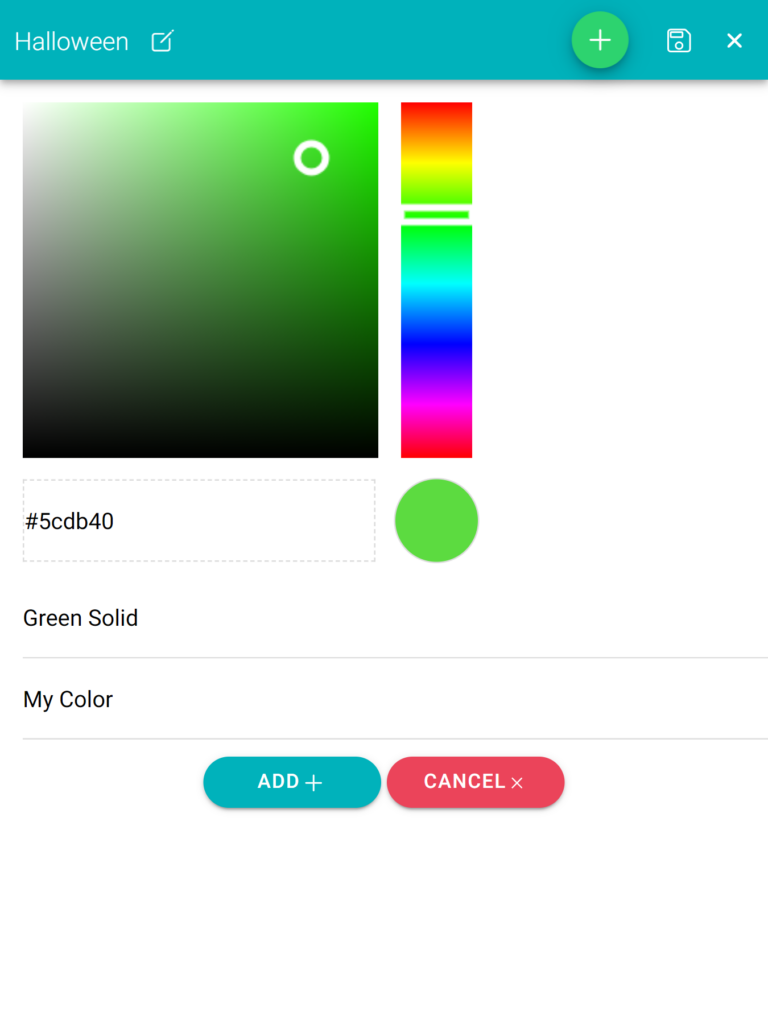
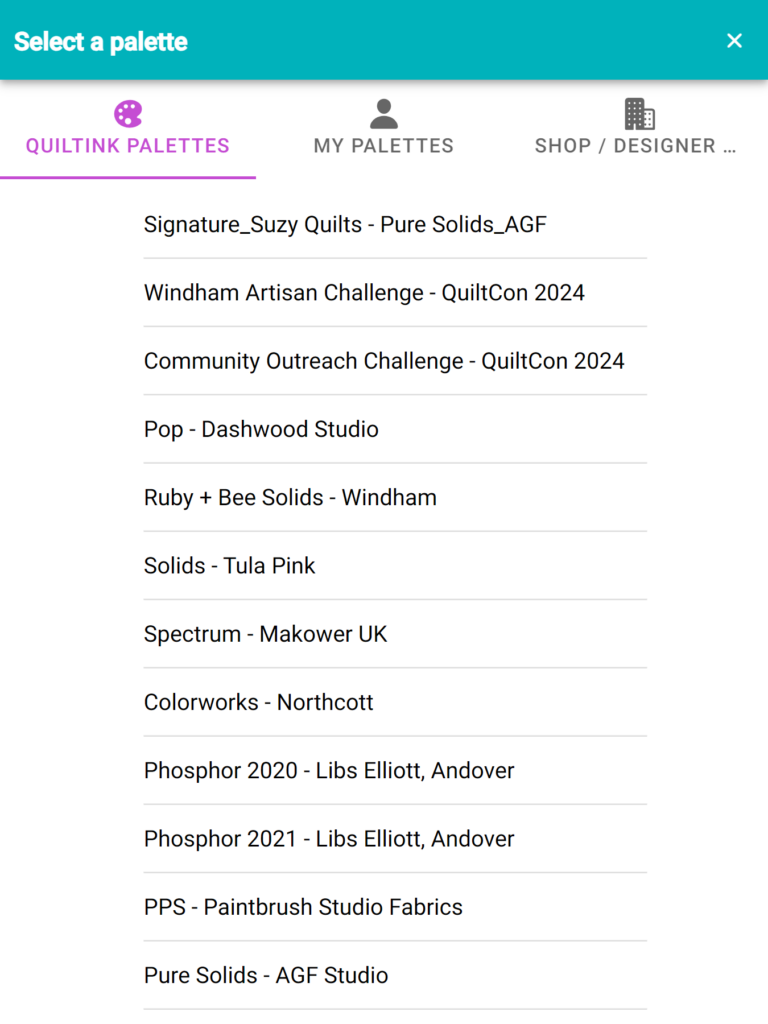
Custom palettes in QuiltInk can include a range of options. They not only allow you to include printed fabrics but also solids from the QuiltInk palettes and plain colors chosen from a color wheel. This means that within a single custom palette, you have the flexibility to mix and match the following elements:


  • Printed Fabrics.
  • Solids from QuiltInk Palettes.
  • Plain colors from a color wheel.
 
Please check the instructions below to see how to add each one of them to your Custom Palettes.

Before you begin creating palettes in QuiltInk, it’s advisable to take a moment and consider how you would like to organize your printed fabrics. Palettes serve as groups that determine how your printed fabrics will be displayed on the coloring pages. With the ability to create unlimited custom palettes, you have the flexibility to create smaller, focused groups that make it easier for users, including yourself, to find specific fabrics.


There are various ways to organize your palettes, depending on your preference and the purpose of your fabrics. You can consider organizing them by brand, color, style, season, or any other categorization that makes sense to you. Once you have chosen a method of organization, apply it consistently across all your palettes. This will enhance the coloring experience for you and other users who engage with your palettes.


We strongly suggest taking care of your palettes and keeping them organized. This practice will make it easier to manage your printed fabrics and enhance the coloring process with the app.

Manage Custom Palettes

Create Custom Palettes

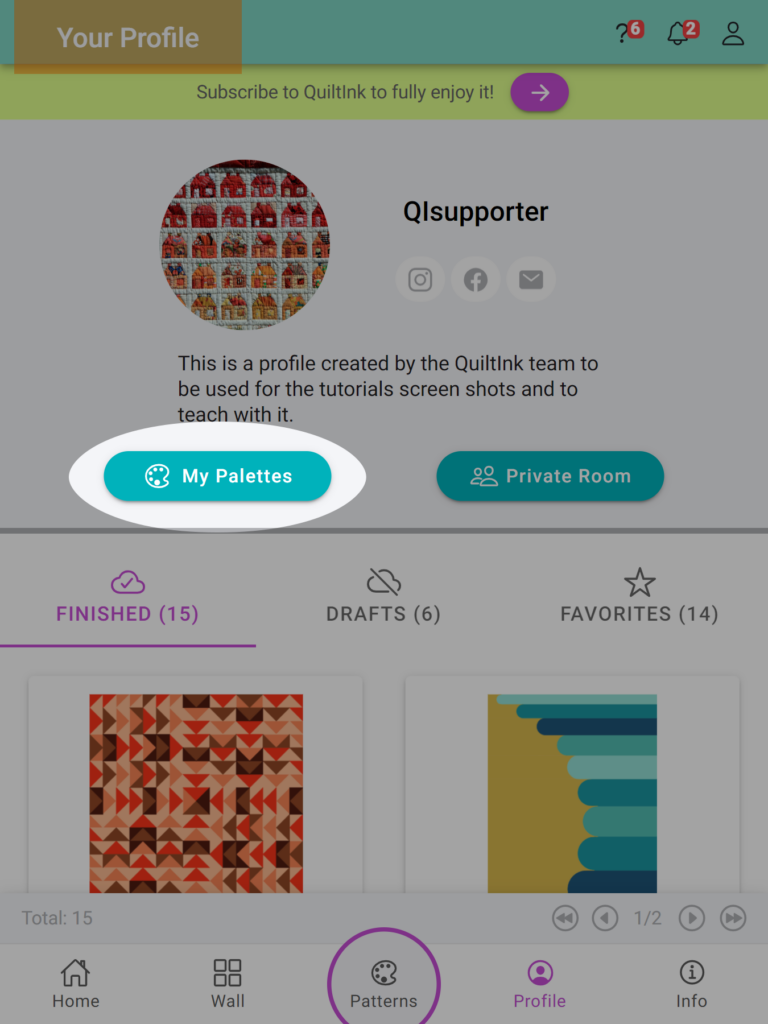
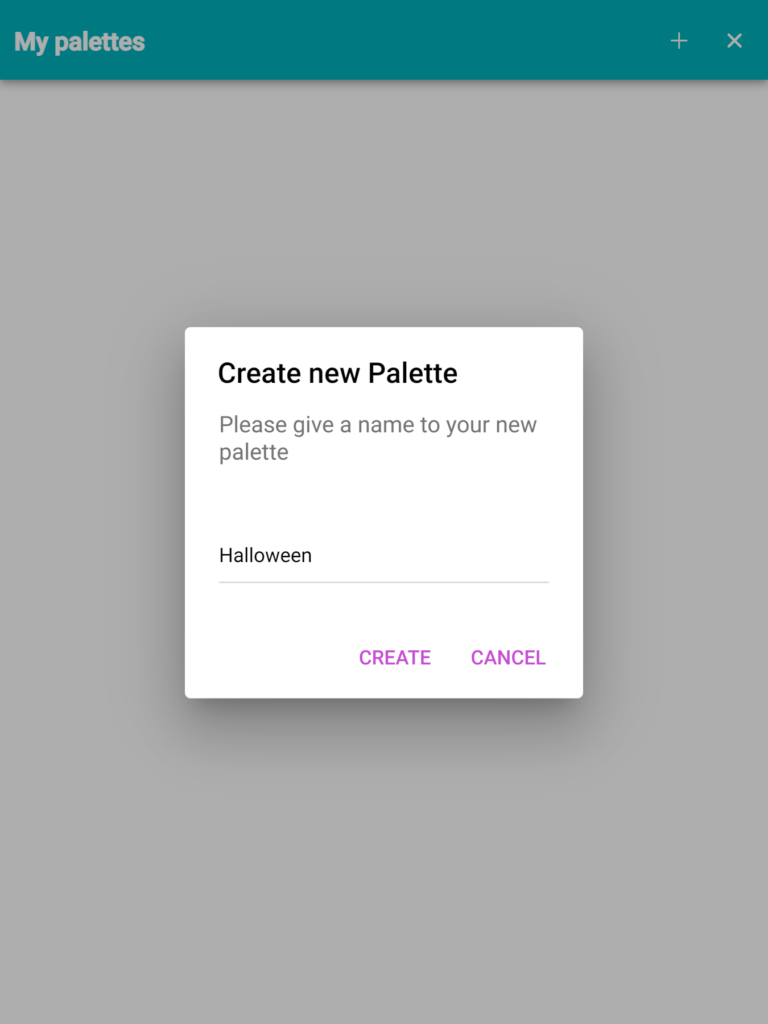
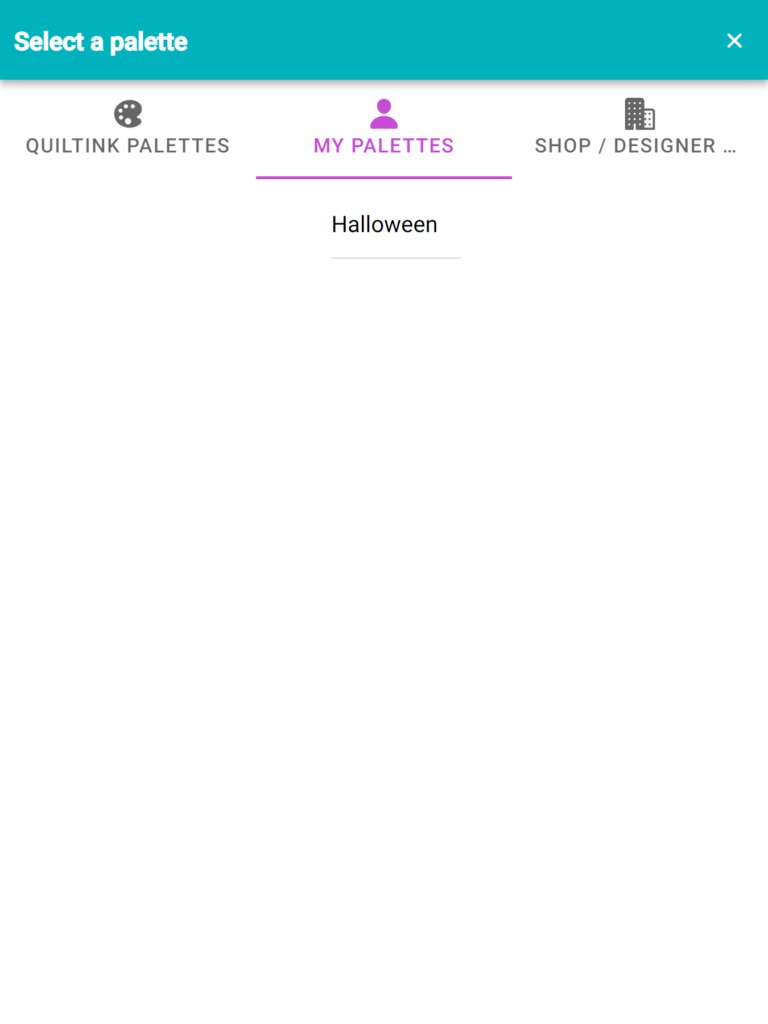
To create a new custom palette in QuiltInk, follow these steps:

  1. Go to your profile page and click on the “My Palettes” button. This will take you to the page where you can manage all your palettes.
  2. On the palettes page, locate the “+” icon at the top bar and click on it. This will open a pop-up window.
  3. In the pop-up window, enter a name for your new palette. It’s recommended to choose a name that is consistent with your other palettes, making it easier to organize and identify them.
  4. After entering the name, click on the “Create” button. This will add a new palette to your palettes list.

Basic/Super Palettes

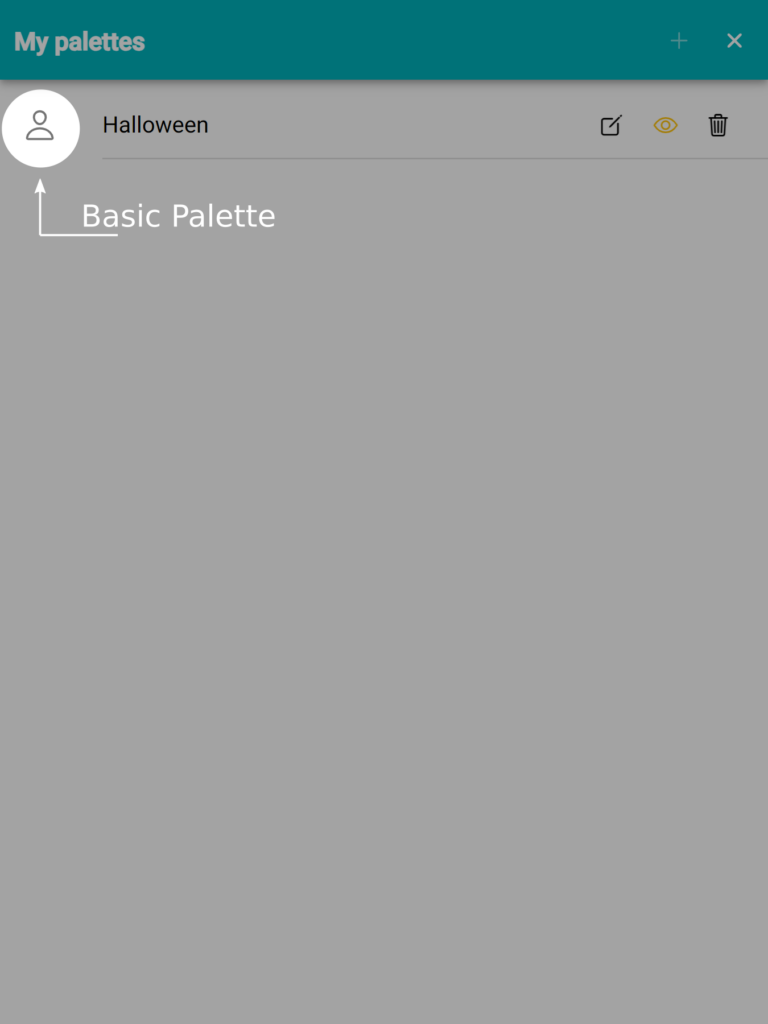
The Basic palettes are the only type of palette available to basic users in QuiltInk. A basic palette allows for a maximum of 10 items, which can include printed fabrics, solids, or colors.


On the other hand, Super palettes are the palettes you can create after subscribing to a QuiltInk supporter plan. With any QuitlInk subscription, you can create an unlimited number of Super palettes. These palettes have the capacity to accommodate unlimited printed fabrics.


If your first palette is created after subscribing as a supporter, all of your palettes will be considered Super palettes.


In the event that you cancel your subscription, your Super palettes will be disabled. You will still be able to view them, but you won’t be able to edit or use them for coloring. Only your basic palette will remain active.

Edit Custom Palettes

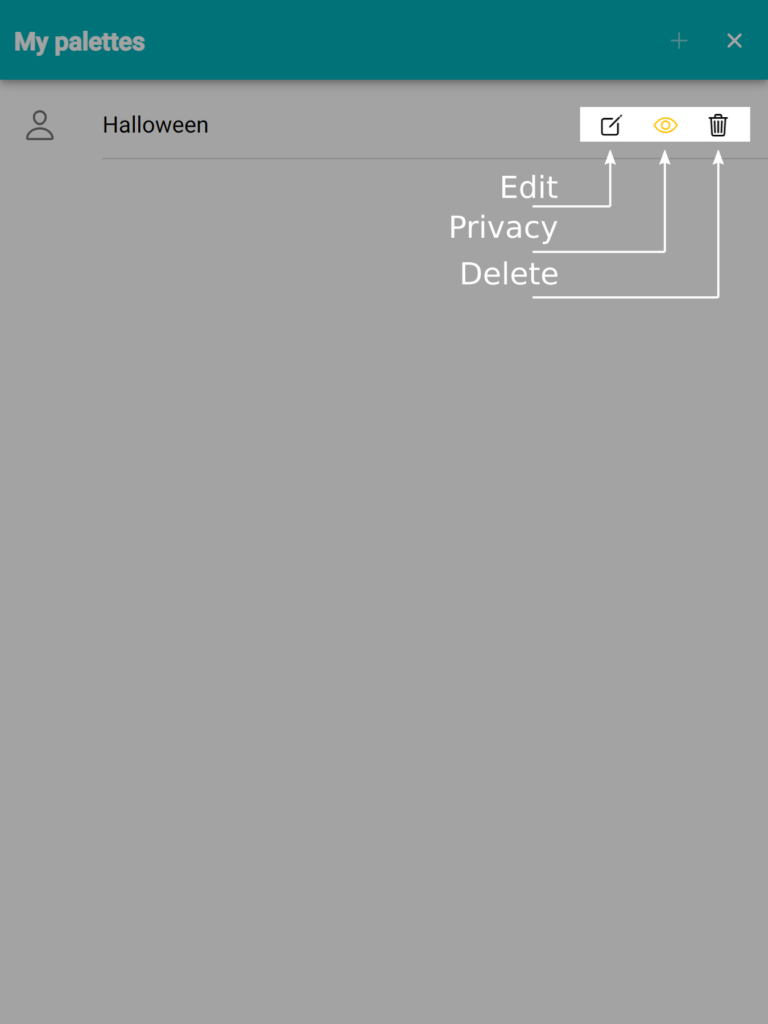
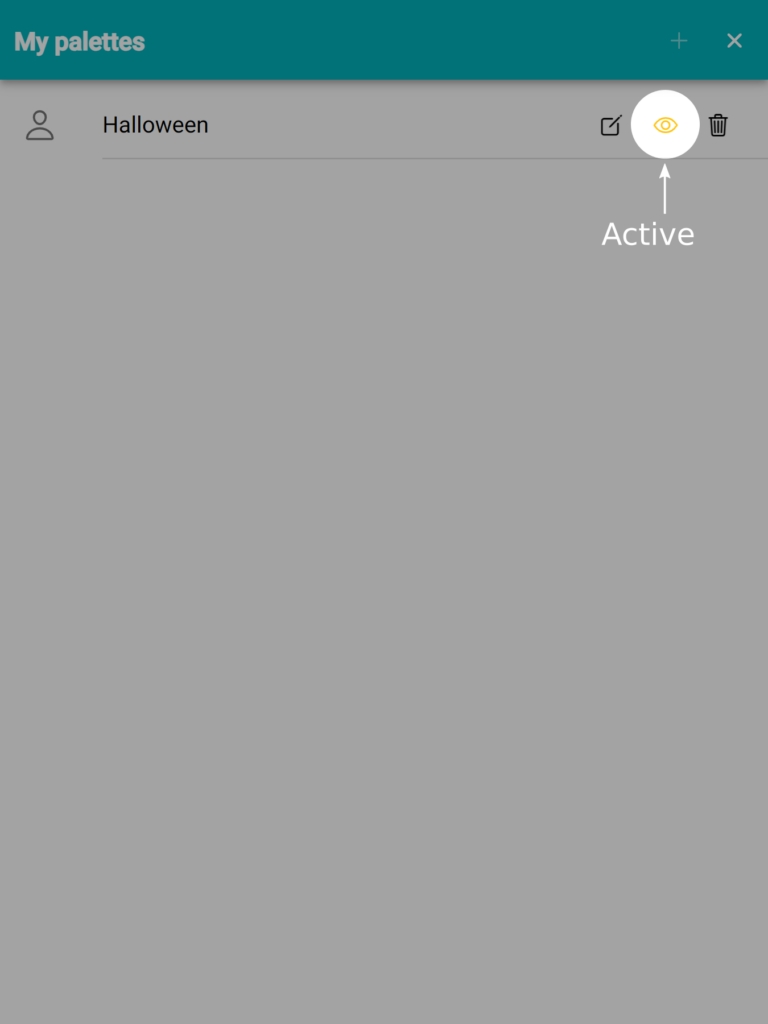
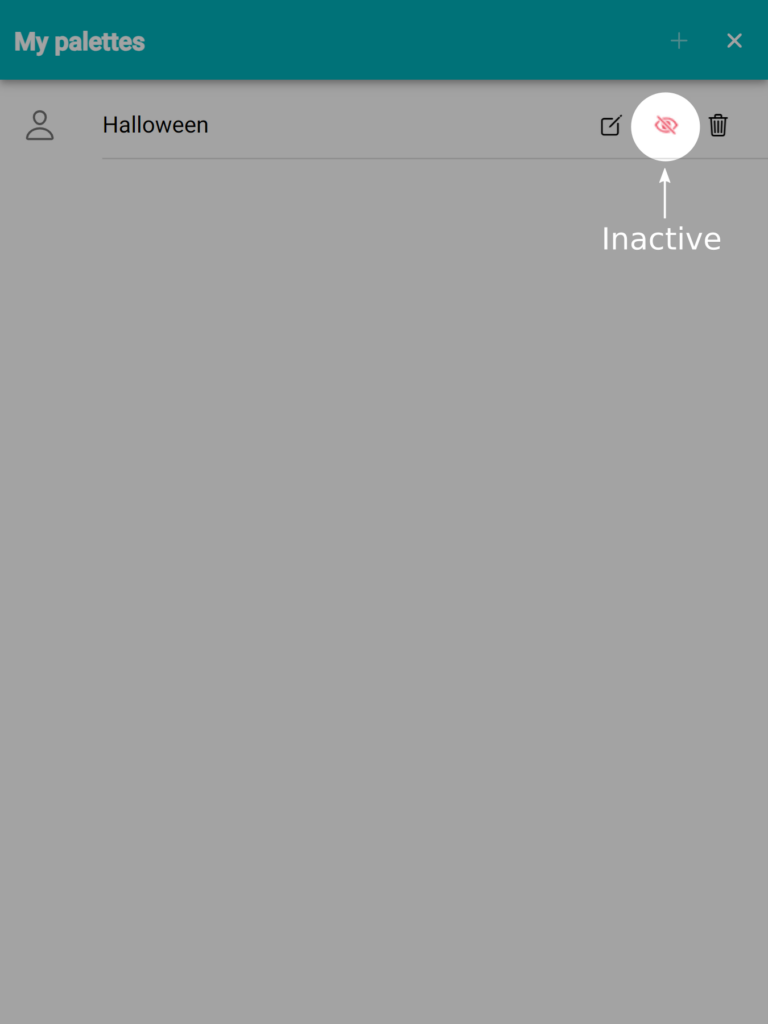
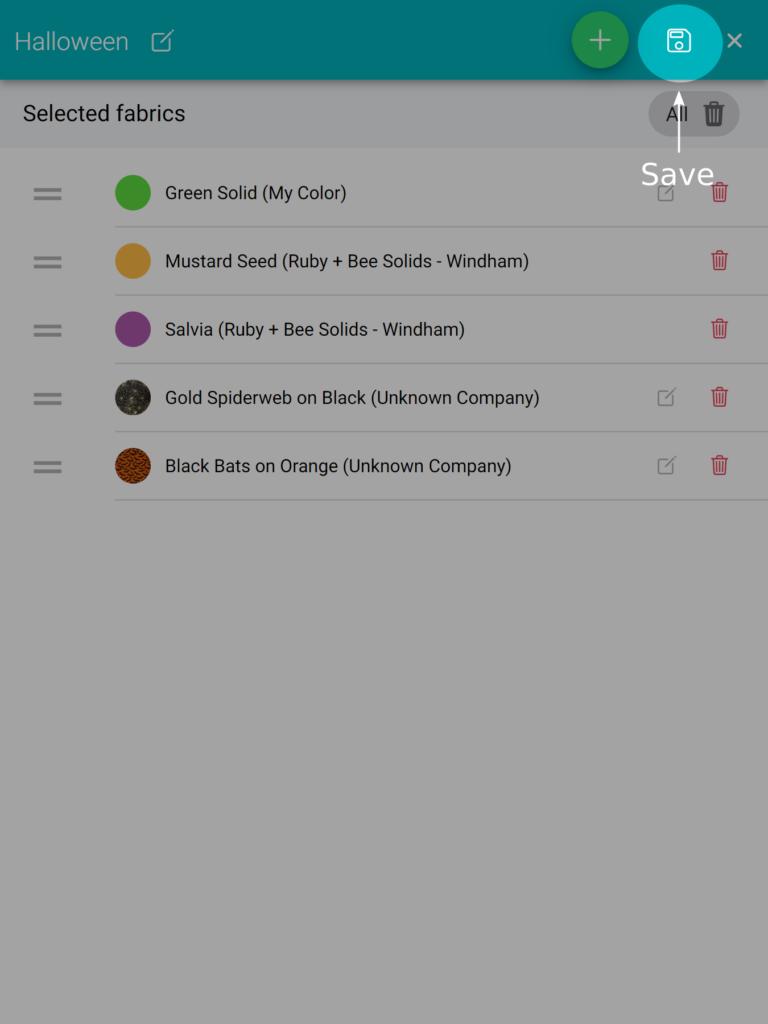
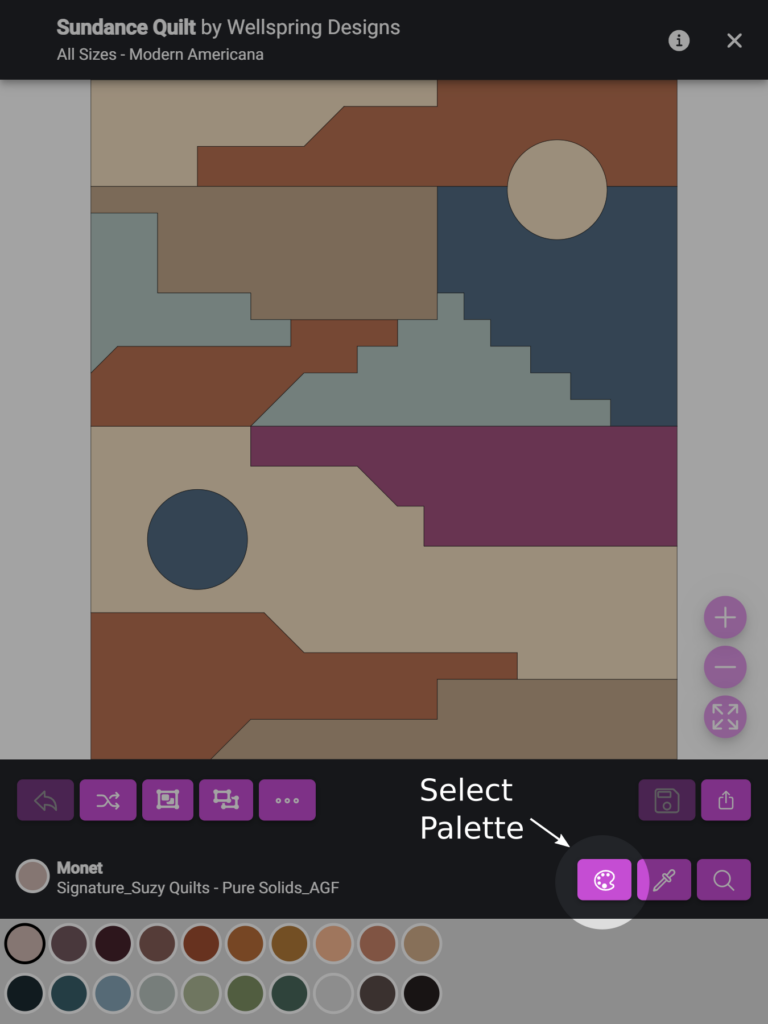
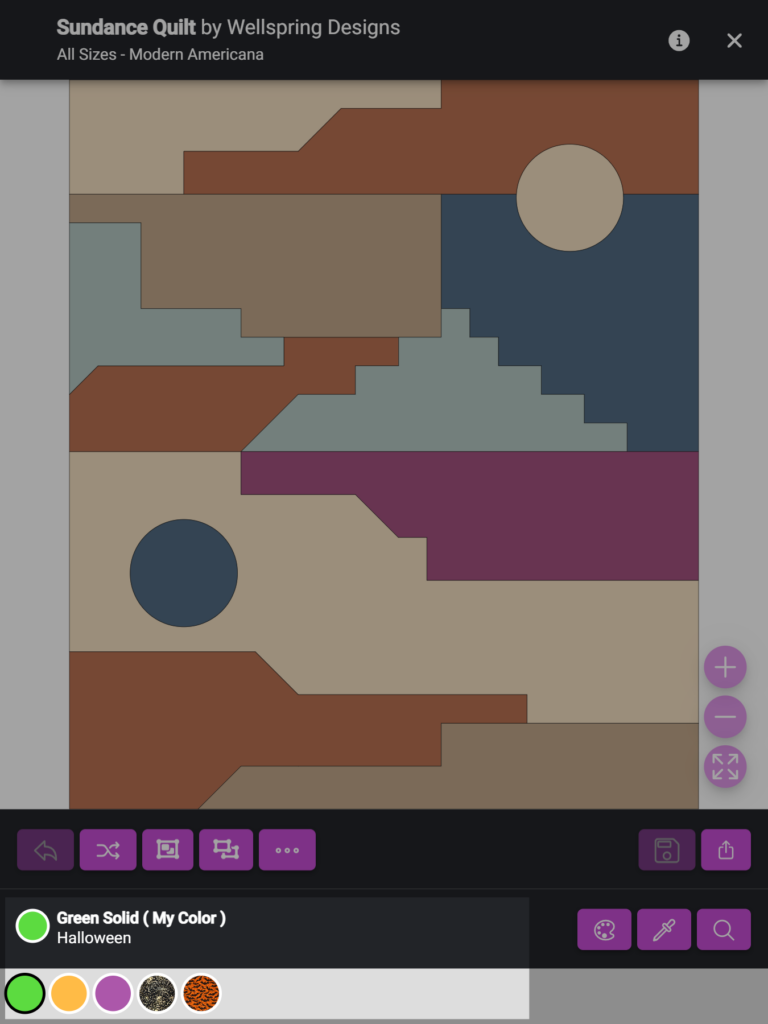
At the right side of each palette in your palettes list, you will see three icons with different functions:

  • Edit icon: Clicking on this icon will take you to the palette editing page. Here, you can add new printed fabrics/colors and make changes to the palette name. Refer to the instructions provided below to learn how to add new fabrics/colors.
  • Eye icon: The eye icon is used to set the privacy level of the palette. It determines who can access and use the palette for coloring. Click over the “eye” icon and the stage of privacy will change. There are two possible privacy levels:
    • Crossed red: This indicates that the palette is not activated and cannot be used for coloring.
    • Orange: The palette is activated for private usage. You can color with it, but other users cannot access or use it.
      Additionally, if you have a Designer or Fabric Shop profile, you will have the option to set the palette as public. This means that other users can access and use this palette for coloring.
  • Delete icon: This icon allows you to remove a custom palette from your list. Whether it’s a Basic palette or a Super palette, clicking on the delete icon will permanently delete the selected palette.

Upload Printed Fabrics / Solids

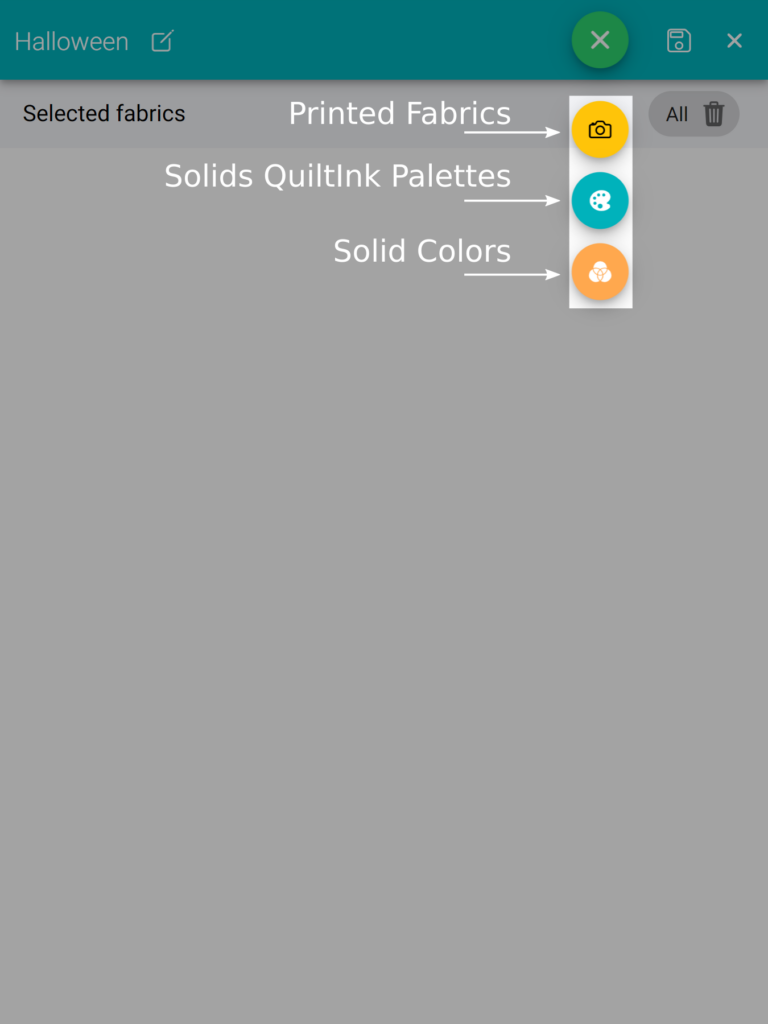
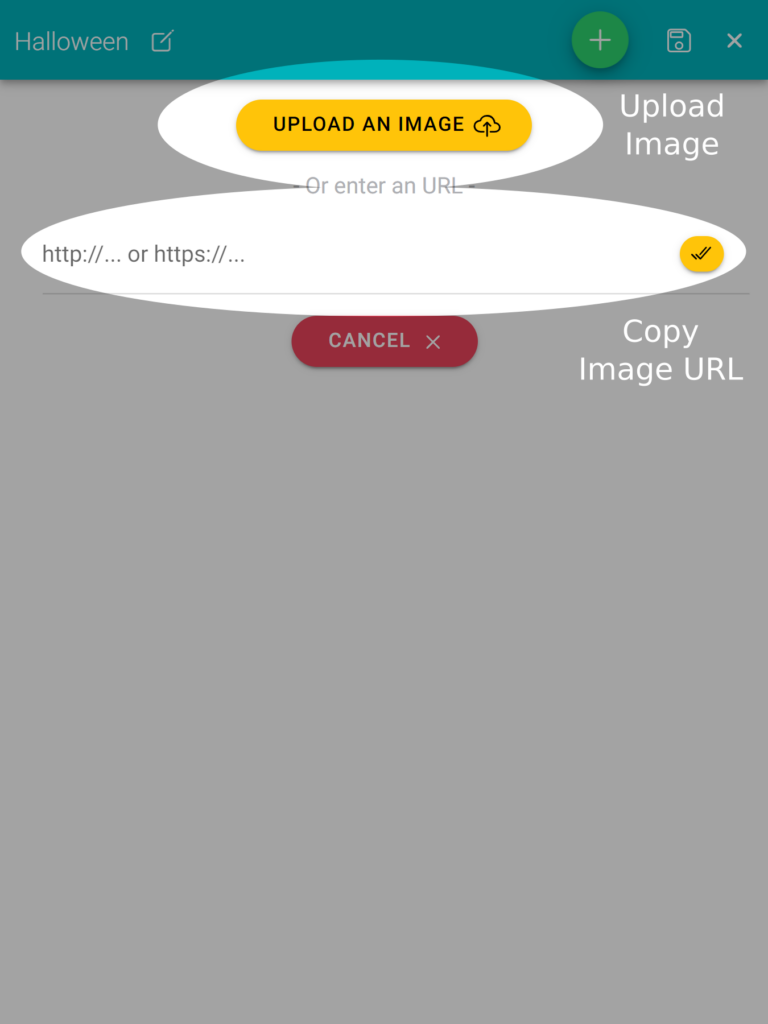
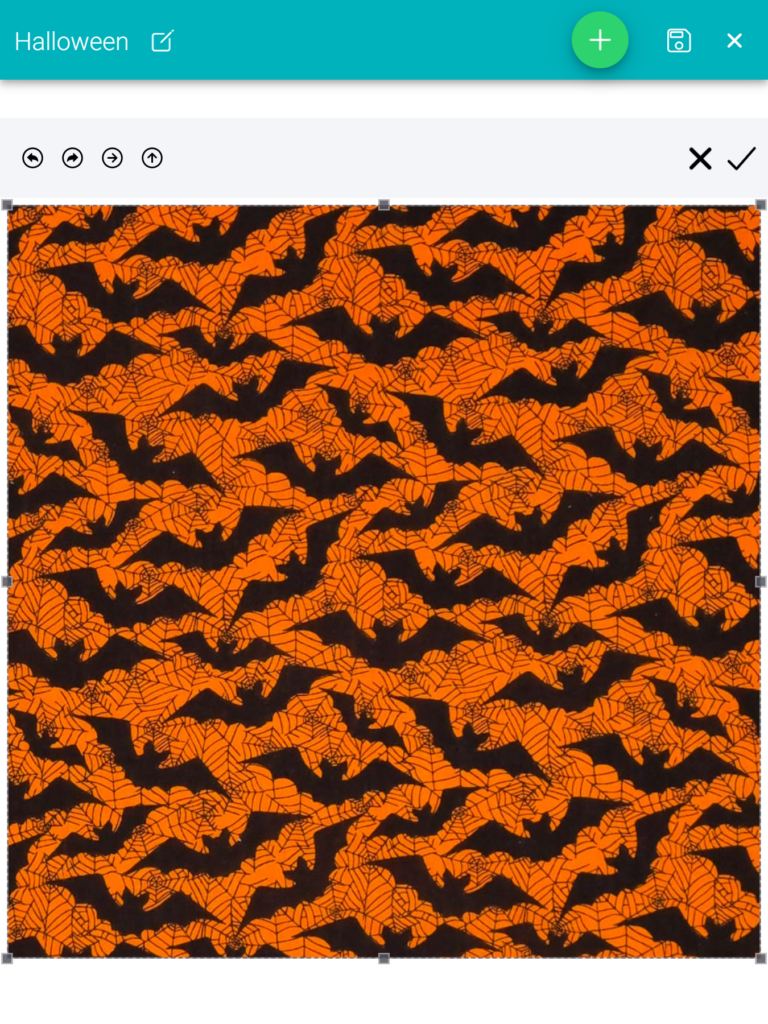
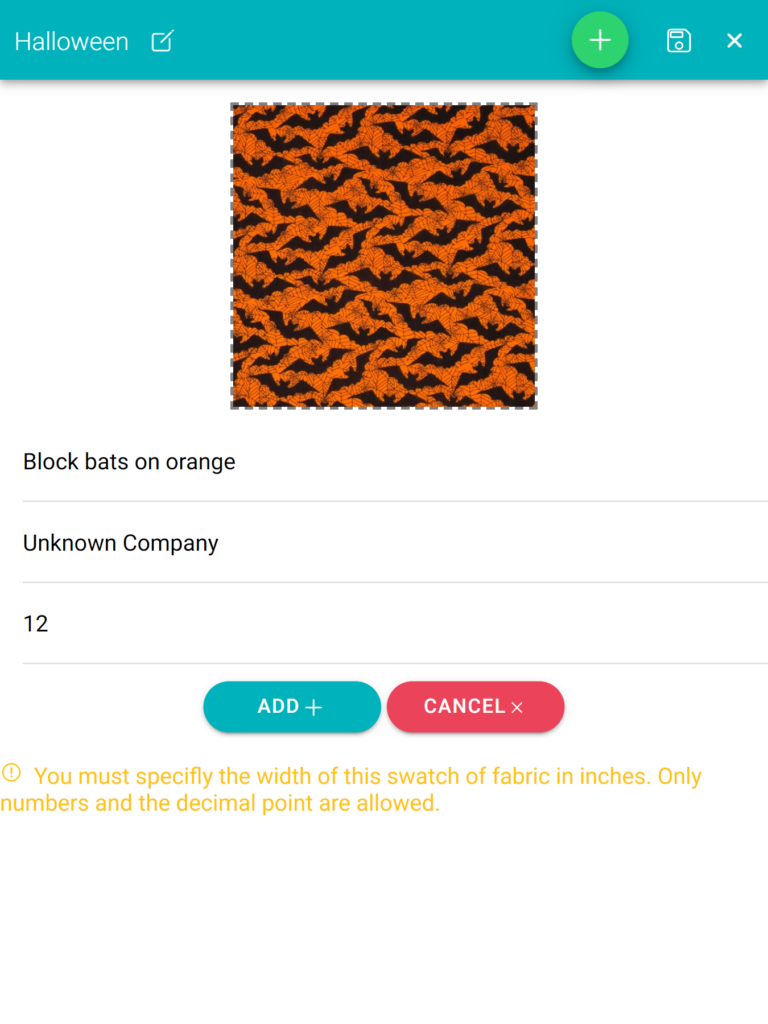
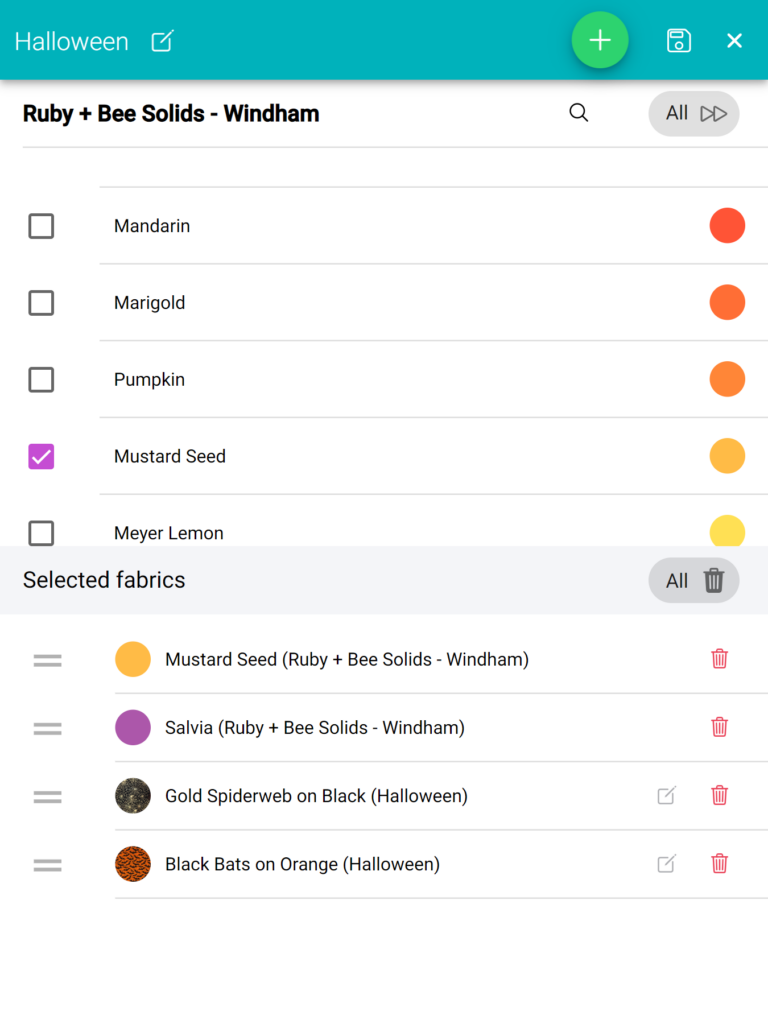
Once you have created a custom palette in QuiltInk, you can start filling it with the printed fabrics and solids of your choice. To add different elements to your palette, follow these steps:

On the My Palettes page, locate the “+” icon at the top bar and click on it. This will display three new buttons, each representing a different type of fabric or color you can add.

  • Photo camera icon: By clicking here you will be able to start uploading your printed fabrics swatches.
  • Palette icon: To add solids from QuiltInk Palettes to your palette.
  • 3 circles icon: To add plain colors from a color wheel.
PRINTED FABRICS
 
To upload your printed fabrics to QuiltInk, follow these steps:
 
  1. On the My Palettes page, click on the “+” icon and the photo camera icon. This will open a new page where you can upload your printed fabrics.
  2. There are two ways to upload printed fabrics:
    • Uploading from your files: Click on “Upload Image” and choose the image file from your computer or device.
    • Uploading from an URL: If the swatch you want to upload is available on a website, visit that website and locate the image of the swatch. Right-click on the image (or long-press on mobile devices) and select “Copy Image URL” or a similar option. Make sure you copy the direct URL to the image itself, not the URL of the entire website page.
  3. Once you have the swatch on the screen, you will be able to trim and adjust it to your desired look. Please note that all swatches uploaded to QuiltInk are square images. If you upload a non-square image, it will be automatically trimmed to a square shape.
Once you have uploaded the fabric swatch, you will need to fill in three required fields:
 
  1. Fabric Name: Choose a name for the fabric swatch to classify and display it. The name can be related to the color, prints on the fabric, or any classification rule you prefer. This name will appear on the coloring page when you select this fabric.
  2. Brand / Collection: This field allows you to classify your fabrics and provides a reference when exporting the list of fabrics used or checking your fabric used. The brand or collection name will appear on the coloring page below the fabric name. Please note that the name of the custom palette will not appear explicitly on the coloring page or in the exporting sheet.
  3. Width of the Fabric Swatch: Specify the width of the fabric swatch you are uploading. This refers to the width of the actual piece of fabric in the image, not the width of the entire fabric. Most fabric swatches available for download from the web are typically 8″ to 12″ wide.
 
Finally, click “ADD” to add this fabric to your palette.
SOLIDS FROM QUILTINK PALETTES
 
To add solid colors that match real solid fabrics from different fabric companies to your custom palette, follow these steps:
  1. On the My Palettes page, click on the “+” icon and the palette icon. This will open a pop-up window.
  2. In the pop-up window, choose the palette from QuiltInk palettes, referring to the collection and fabric company you want to pick the solids from.
  3. From the list at the left, select the colors you want to add to your palette, and they will be added automatically. You have the option to add them all together by clicking the “ALL” button at the top bar.
SOLIDS FROM COLOR WHEEL
 
If you don’t find the color your are looking for in the QuitlInk palettes, you can add solids colors from a color wheel, to do so follow these steps:
  1. On the My Palettes page, click on the “+” icon and the 3 circles icon. A new page will open.
  2. In the color wheel interface, you can choose the range of colors by clicking on the right bar. This will adjust the hue or color family of the displayed colors.
  3. To select a specific color, click on the central square of the color wheel. This will allow you to pick your desired color by clicking on the desired hue within the square.
  4. Fill in the “Name” and “Brand/Collection” fields for the selected color. These fields will appear at the coloring page when you select this color, helping you identify and reference it easily.
  5. Finally, click “ADD” to add the selected color to your custom palette.
When you want to mix printed fabrics and colors in your palette, simply click on the “+” icon again, and a new page will open for the new option.
 

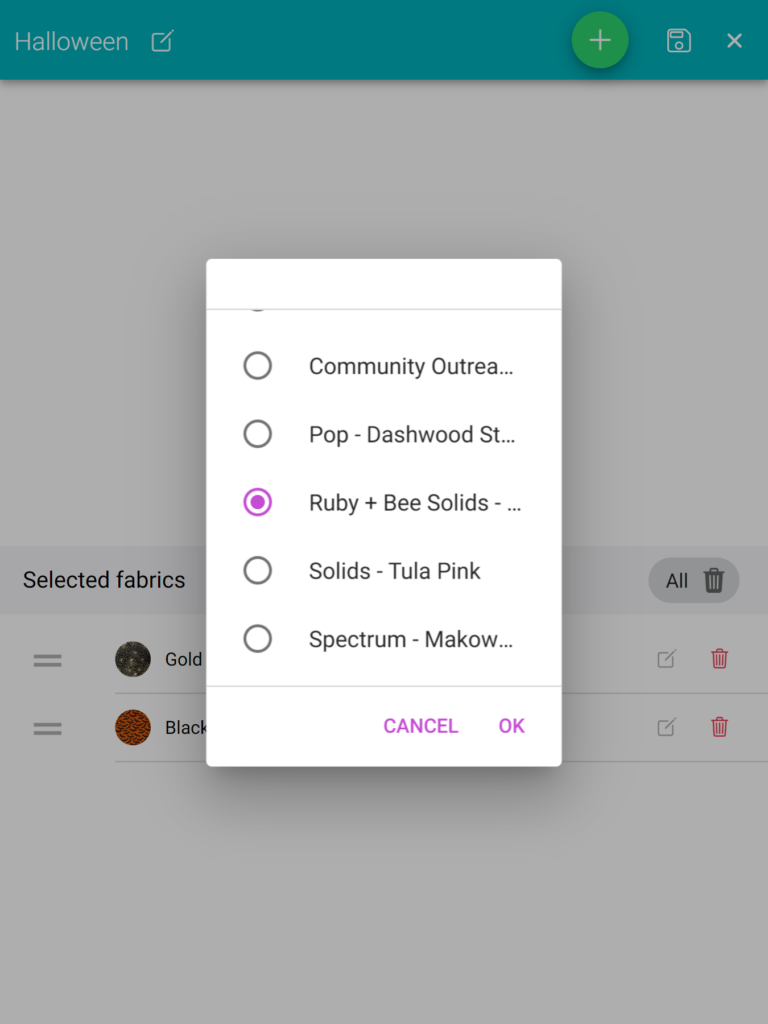
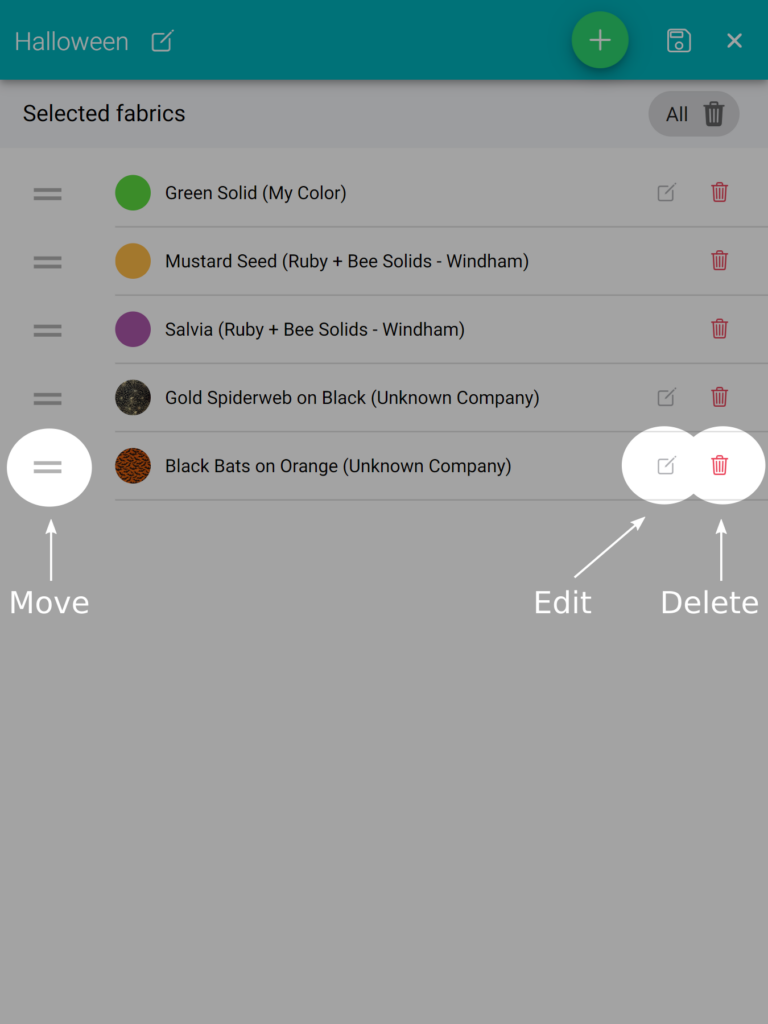
In the list of fabrics/colors in your palettes, you have several icons that will help you manage them:

  • 3 lines icon: This icon allows you to drag and rearrange the fabrics/colors in the list, allowing you to change their order as desired.
  • Edit icon: The pencil icon enables you to edit the name and brand of printed fabrics and solid colors from the color wheel. However, this option is not available for solid colors from QuiltInk palettes, as they already have predefined names and brands.
  • Delete: The trash icon allows you to remove any fabric/color from the list.
When finishing adding fabrics/colors to your palette, click the “floppy disk” icon to save your palette. And remember to set up the privacity level you want for it at the “eye” icon at the right in the palettes list. 

Color with your Custom Palettes

Once your custom palettes are ready, you can use them to color any pattern in QuiltInk.
 
When you open a coloring page, at the palette icon you will see:
 
  • At “QuiltInk Palettes”, there are the solid fabrics palettes uploaded by the QuiltInk team and sorted by collection and company.
  • At “My palettes”, you will see your custom palettes activated for coloring.
  • At “Shop/Designer Palettes” will be visible the custom palettes created by Designers and Fabric Shops and activated for public coloring.
You can select the specific palette you want to use, and its fabric/colors will be applied to your coloring page. It’s also possible to mix and combine different palettes to create unique color combinations for your patterns in QuiltInk.
KITS PATTERNS
 
When you color a Kit set up by a fabric shop, you will only have access to the public palettes of the fabric shop who set up the kit and your own private custom palettes.
QuiltInk Solid Palettes
Your Cutom Palettes
QI Shop Public Palettes

Thank you for using QuiltInk and exploring the custom palettes feature. We’re glad you’re enjoying it! If you have any questions, suggestions, or feedback to help us improve, please don’t hesitate to reach out to us at info@quiltink.com or chat with us on Instagram (@quilt_ink). We value your input and are here to assist you. 

Happy coloring!